04 Mar
complete system


The Ultimate Cyberpunk 2077 build is themed after the upcoming game, Cyberpunk 2077 by CD Projekt Red. When we first started on this build, the game was scheduled to be released this April, but it was later postponed until September this year.

This of course had little impact on our project, well, aside from the sad news that it would be even longer before we would be able to enjoy the game on this system.
Check out our video to see a walkthrough of the whole build process (do note that in is in Danish). You can also just keep reading.
When we started planning this project, we had already decided that this was going to be a PC system that focused on the smallest of details. Both in terms of the physical appearance of the exterior, as well as in regard to the hardware components inside and how we would make everything melt together in a cool and stylish way.
In terms of the hardware, this system is based on an AMD Ryzen platform with the following list of components:
AMD Ryzen 7 3700X - Read our review here
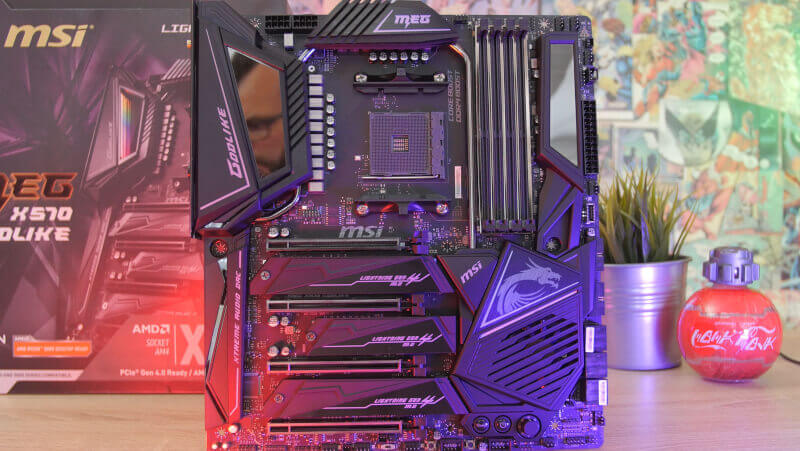
MSI MEG X570 Godlike
Corsair Dominator Platinum RGB RAM (32 GB) - Read our review here
Corsair MP510 960 GB M.2 NVMe SSD
ASIS ROG Strix RTX 2080 Ti
With hardware of this caliber, this is of course a PC system that should provide the best circumstances for enjoying Cyberpunk 2077 to the fullest, once it releases later this year.
These primary components are further supported by a total 2 TB of SATA SSD storage. This should give us enough room for games while we wait for Cyberpunk 2077.

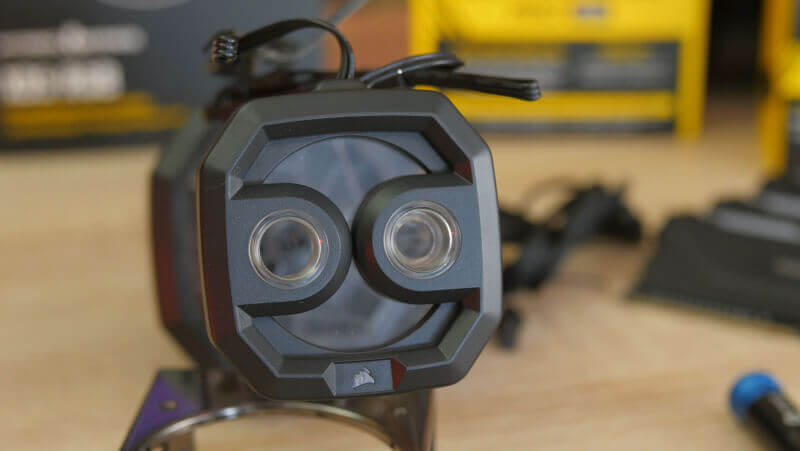
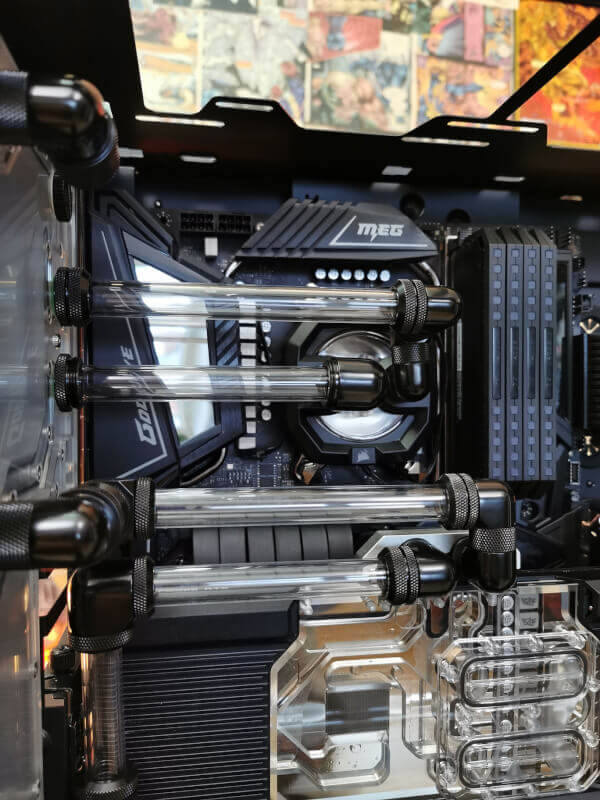
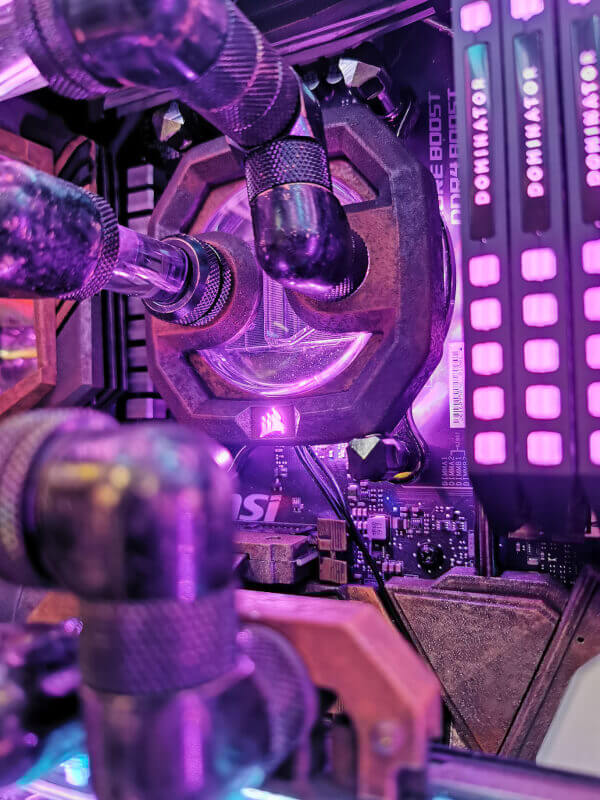
In terms of cooling, we didn’t really see a way around custom water cooling of both the CPU and GPU.
This was accomplished with Corsair’s Hydro X-parts that we’ve checked out on an earlier occasion, and which we’ve had some really good experiences with in the past.
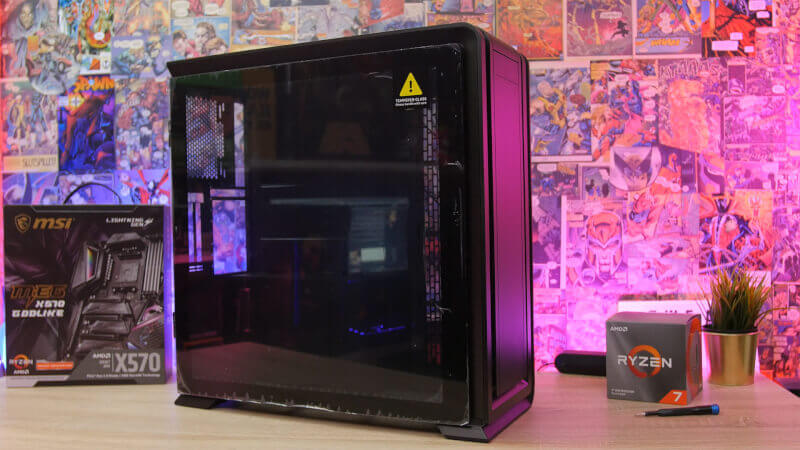
In order to piece it all together, we needed a case that would provide us with a reasonable amount of space for the custom water cooling, but also for some of our other ambitions with the build.
We decided on the Phanteks Enthoo 719 (previously known as Luxe 2), which will give us exactly what we need to realize some of our ideas.
Working on the style of this system proved to be one of the biggest tasks with this build. With the world that we’ll be experiencing in Cyberpunk 2077, we had a lot of options to choose from ranging from high-tech to slum and decay.
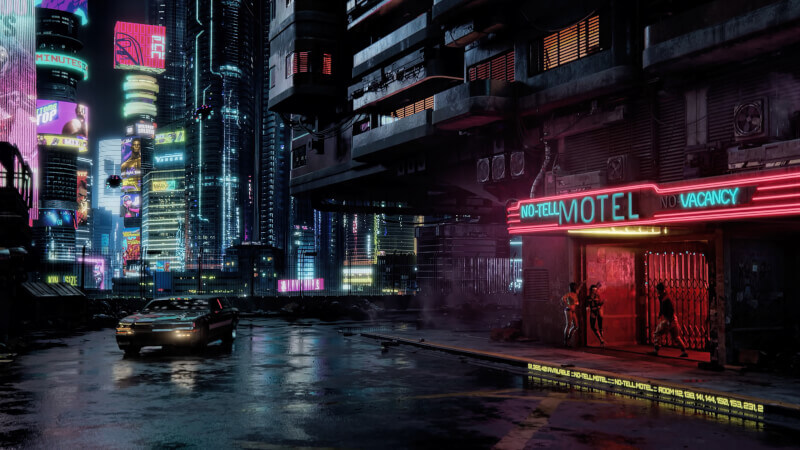
What we found to be most interesting was the combination of technology and dystopian decay, which in many ways can be seen in the cyberpunk genre, both in games like Cyberpunk 2077, but also in movies such as Blade Runner.

So, the ambition was to aim for a mix of neon glitter and decay that in combination with references from the Cyberpunk 2077 world hopefully would end up giving the perfect look and feel.
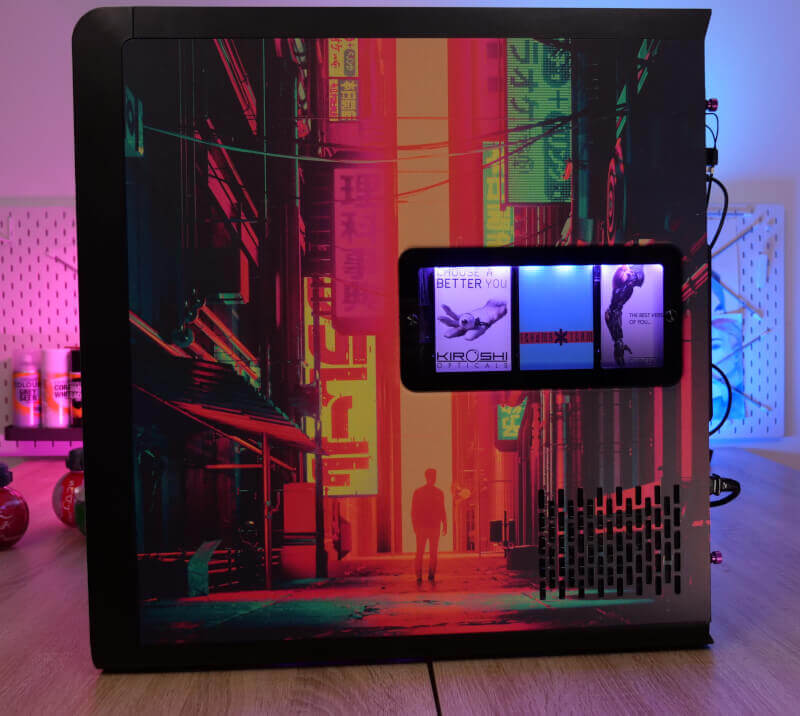
One of our first ideas was to integrate a small display inside the system that together with the RGB lights would invoke the sense of a metropol with lots of neon lights and advertisements.
To this end, we acquired a 7-inch LCD display from Joy-It with an HDMI-input. This is a type of display that you’d normally use with a mini-PC e.g. a Raspberry Pi or similar.
Once it had arrived, along with the case and the other parts, it was time to get started on what would soon prove to be a lengthy process of turning normal hardware into something that would fit into the slums of Night City.
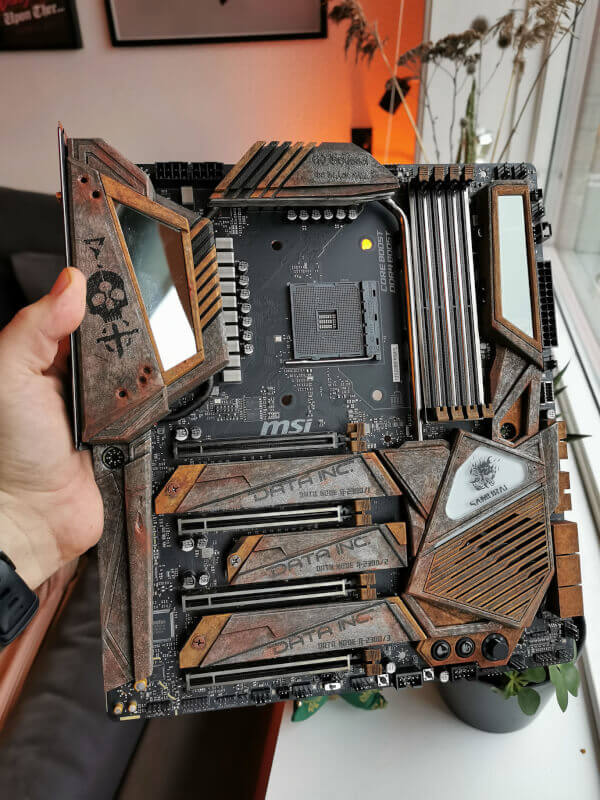
We considered different ways of approaching this, but eventually decided that there wasn’t much else to do than to hand paint the parts if we were to ever achieve the desired result.
So, we summoned our experience with painting Warhammer miniatures, and started gathering the necessary materials and tools in order to get started with the project.
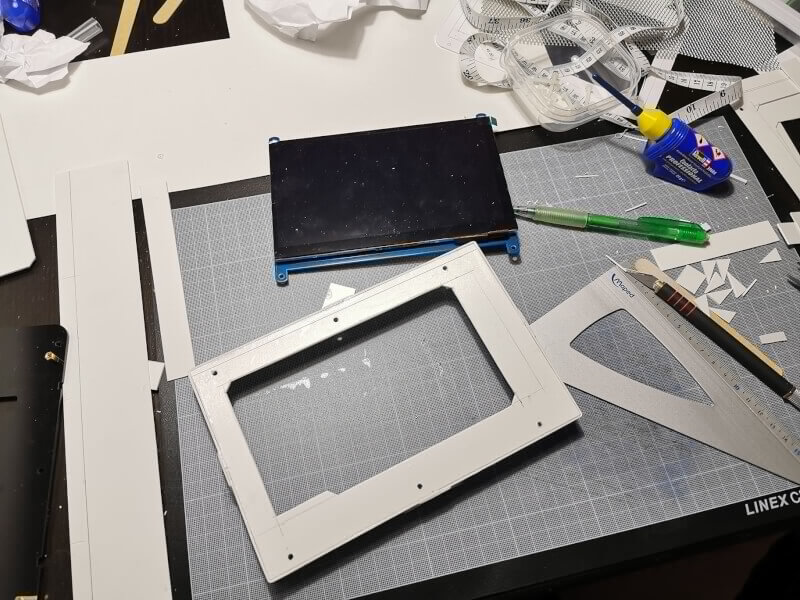
It did require a lot of preparation, before we were able to start painting. The small 7-inch display didn’t exactly fit into the system. So, the first step was to build a frame for the display so that it would better fit in, and resemble a screen that you’d run into in Night City.
We managed this with some XPS polystyrene plates of the same kind that model builders would use. They were trimmed and glued together with the parts that came with the display until we arrived at a look that pleased us and that fitted into the style that we were trying to achieve.
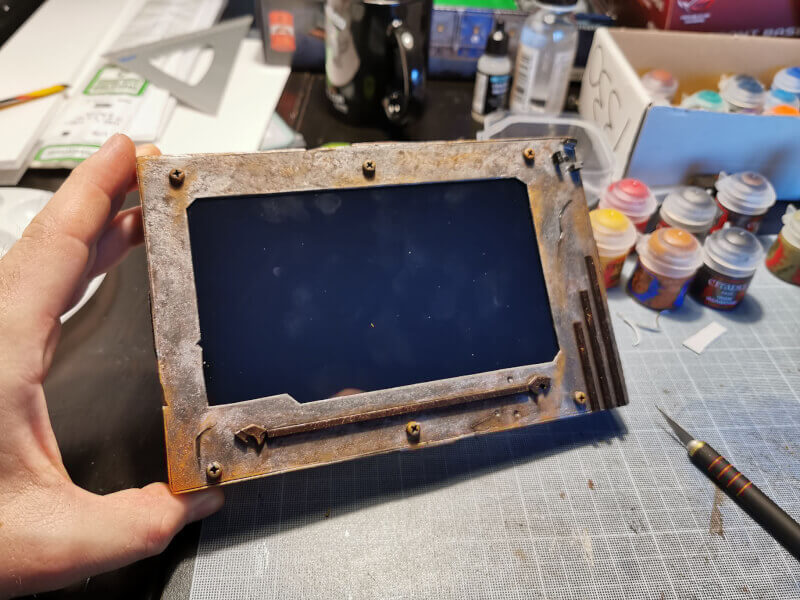
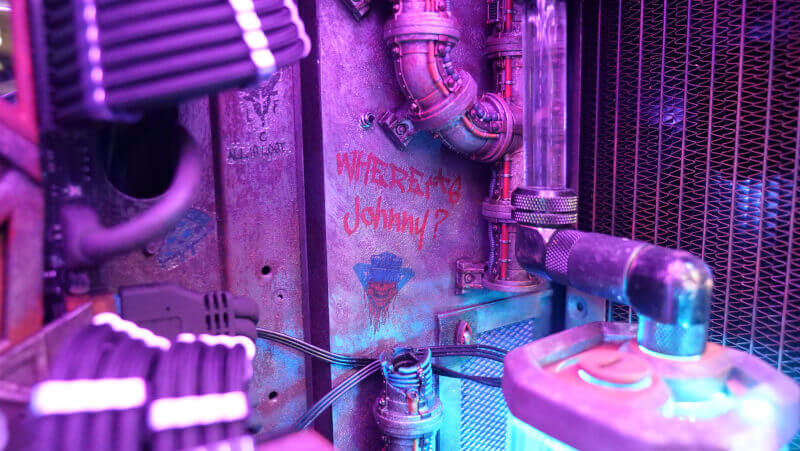
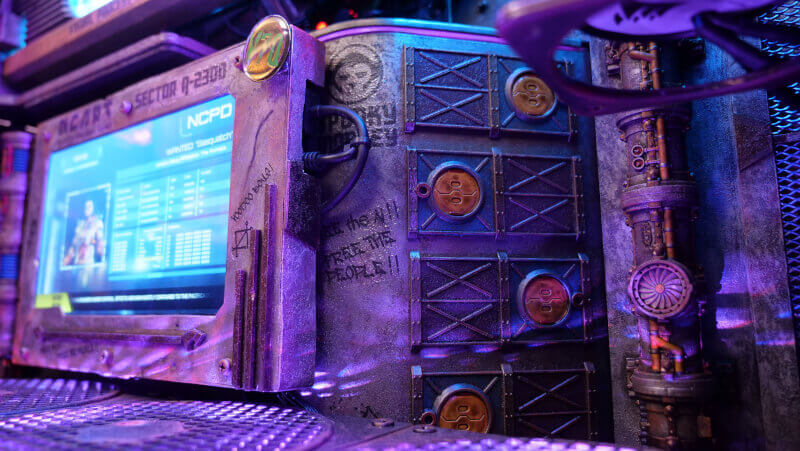
From this point on, the process of painting everything really took off. It was done in multiple layers in order to build up the look of wear and tear and rusty metal that we were trying to replicate, and to us seemed befitting of something that you’d encounter in the futuristic slums of Night City.
The effect of course also had to be evident on the rest of the hardware in the system. So, as soon as we felt happy with the result of the frame for the display, we applied the same approach to the rest of the system.
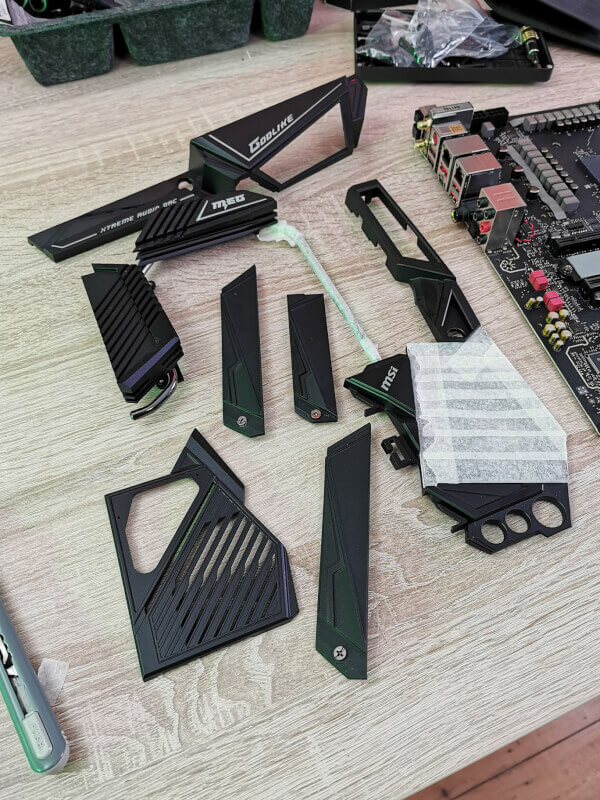
We took the system apart as much as we could, in order to make it easier to work with the parts. This included the motherboard, the case and the water cooling parts. This way, the individual parts that we wanted to paint were separated from the fragile electronic parts so that we didn’t have to worry about those.
It was a slow and incredibly time-consuming process since it often took a handful, or more, layers of different colors in order to achieve the right result.
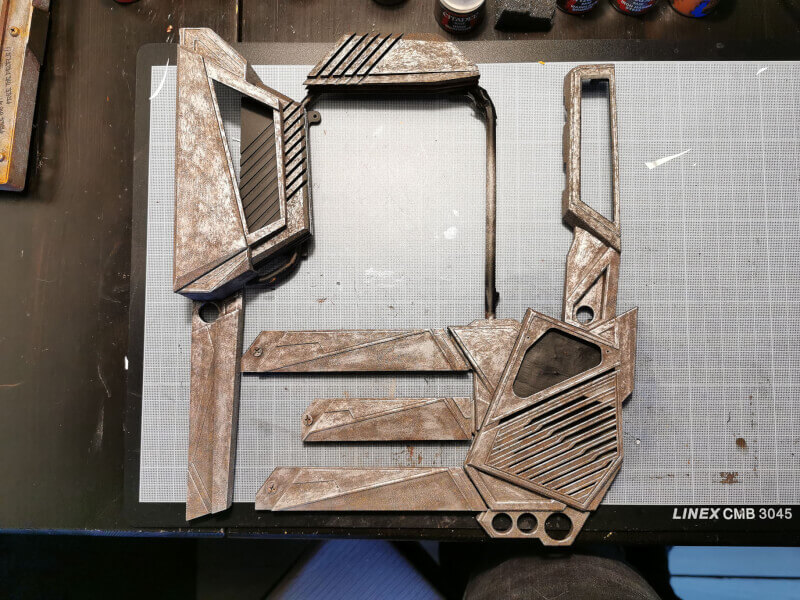
This, combined with our persistent attention to detail on all of the parts, including the ones that might not even be visible once everything was assembled meant that it took more than a month to paint and finish all of the parts.
The process of painting all of the parts also meant that we over the course of the process discovered other things that required our attention in order to fit into the build.
One example of this were the fittings that were going to be used for the water cooling. They simply looked too polished and factory-new compared to the rest of the system and therefore had to be worn down a bit. This was accomplished by putting them in a container with some rocks. This gave them a nice and battered look. To finish things off, they were also subjected to a nail file in order to bring forth even more detail.
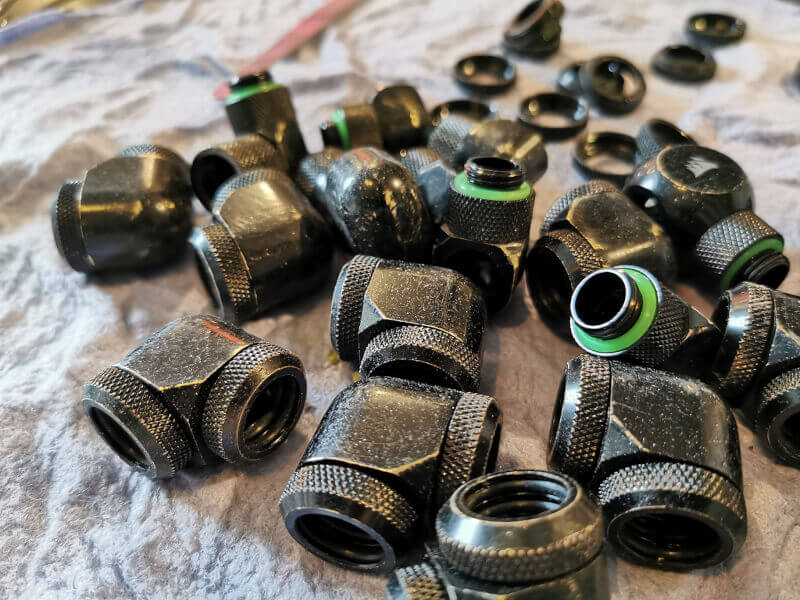
While doing this, we of course were mindful that these parts had to stay intact since they were there to ensure that the water cooling solution would remain sealed when water was actually introduced into the loop.
The case was given the same treatment. However, it was further customized with some extra parts since it had a lot of blank surfaces that ended up looking rather empty and unexciting, which didn’t really fit into the style that was elsewise highly detailed and resembled industrial slum.
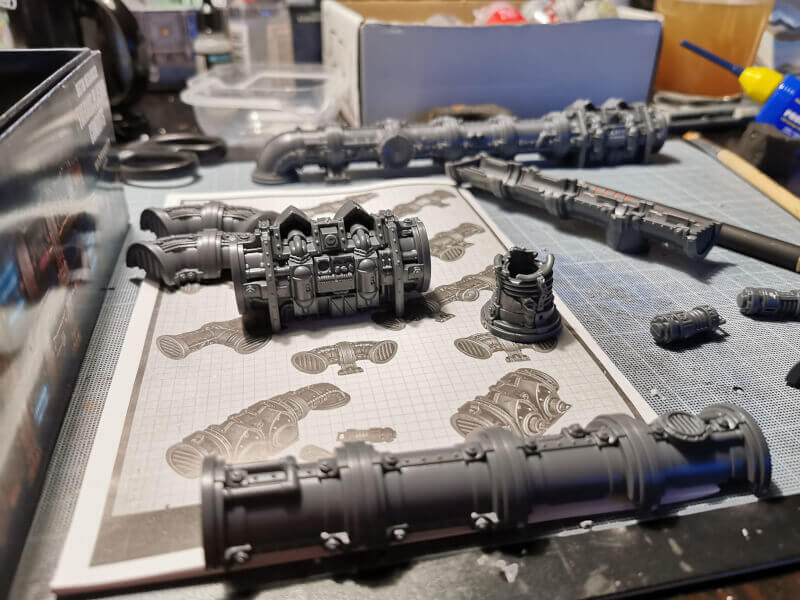
Here, we decided to add some home-made parts along with parts that we had scavenged from the local Warhammer store. These were of course painted in a style that fitted in with the rest of the build. Aside from the paint job and the added model parts, we also added small details such as graffiti that referred to the Cyberpunk 2077 game.
Once everything had been done, we turned our attention towards the system itself. It’s been a while since we’ve worked on a PC where assembling it was quicker than the rest of the build process.
With that said, it of course did take some time to assemble the whole thing. The elaborate water cooling solution, for instance, took longer. Choosing to go with hardline tubing instead of flexible tubes of course didn’t make things easier.
Before doing the final assembly, we had run a number of tests in order to make sure that everything would fit together according to our expectations. So, once everything was approved, and the painting was done, it was relatively easy to put it all together.
One thing that took a long time to overcome was the cable management. There were a lot of cables for the fans and RGB controls, but they also had to be routed in the right order. By having a vertically mounted graphics card, and with the use of hardline tubing, it was almost impossible to reach certain areas of the system. This meant that everything had to be ready and set up before the graphics card and the tubing were installed.
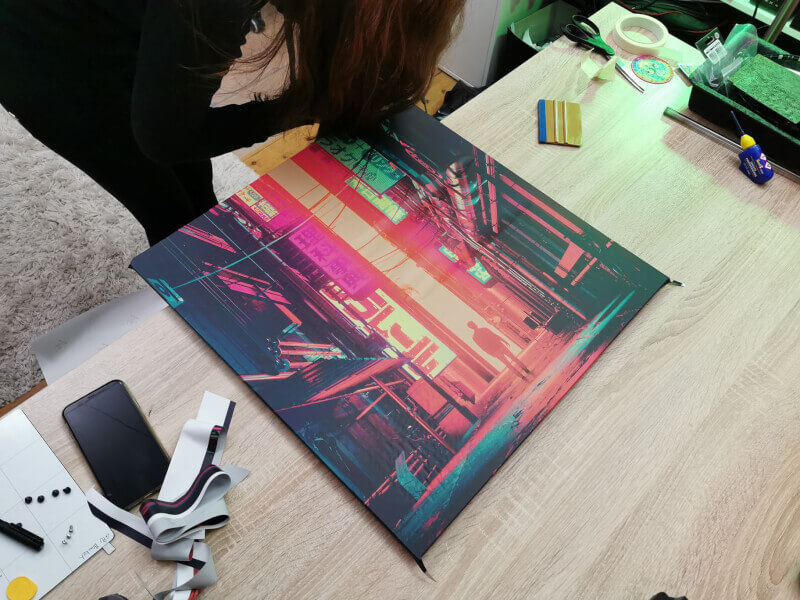
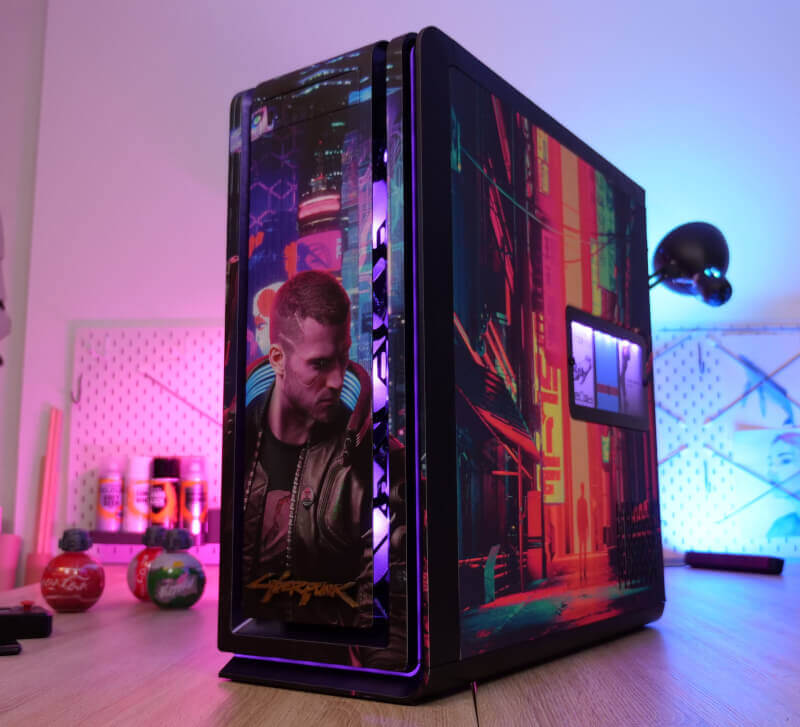
The final detail on our list related to the exterior of the case, which of course couldn’t just remain unchanged. We decided to add vinyl foil of the kind that is usually used for advertisement on cars or show windows.
Here, we came up with a design that would fit with the system and the overall theme. The same foil was also applied on the three SSDs that were installed and visible on the backside of the case through a small window.

They were decorated with some advertisements from companies that exist in the Cyberpunk 2077 universe. With a bit of extra effort, we also managed to insert some lights here so that the three SSDs would be lit up.
Finally, we added a 3D printed Cyberpunk logo that was fittingly painted and then placed on the front of the case.
![]()
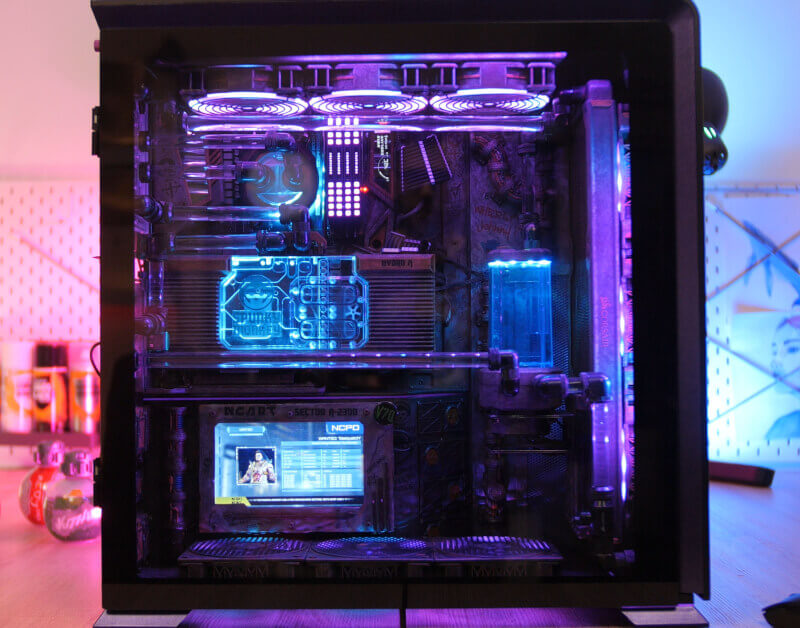
We now had a complete system that fortunately booted up perfectly on the very first attempt. After having set up Windows and all of the RGB lights, we had finally reached the final stretch.
To add the final touch, we created a custom video that could run on the small internal display. It would feature advertisements and wanted posters from Night City. This perfectly made the whole system and the theme come together in a glorious way.

The final result has been long in the making, but we feel that we’ve reached our goal with this build. It perfectly captures the sense of dystopian decay and industrial look in a way that fits well into the world of Cyberpunk 2077.
It has by far been the most comprehensive project that we (Kenneth) have ever worked on. It features incredibly many details and parts that all had to come together in an aesthetically pleasing way.
It’s been almost half a year since Kenneth started outlining the very first drafts and until we find ourselves here today, with this finished build.
It’s a beautiful combination of a really powerful gaming system that is ready to take on whatever we’d want to throw at it, and a design that we find perfectly encapsulates the style of Cyberpunk. There’s no doubt that this system is more than ready, and capable, to receive Cyberpunk 2077 once it is released later this year.
Even though this is a powerful system, everything is kept quiet and, not the least, cool with Corsair’s Hydro X water cooling. The system had room for a 360 mm and a 420 mm radiator, and they, along with the three extra 120 mm fans, at the bottom of the case, keep the system below a temperature of 65 ℃ on the CPU and 57 ℃ on the graphics card during gaming. These are certainly temperatures that one can be happy with. Especially when the system at the same time is almost completely silent.
The result is a system that really stands out, and even though it’s been a long and time-consuming process, we feel that it’s been worth the time and effort. It’s been a fun and educational process along the way.
Now, you might think to yourself “why even bother?” Well, if all that you are after is a fast and powerful system then all the work that goes into a project like this might seem pointless. There’s no doubt that the majority of the hours that have gone into this project have been spent on things that have to do with the aesthetic appearance of this system. Something that doesn’t affect the performance of the system at all. However, if you are a hardware geek like most of the readers on this site are, the pure performance isn’t the only thing that counts.
It’s definitely the physical appearance of this build that makes it stand out, and that’s certainly also something that I consider worth spending time and money on. There are many ways to be a nerd, after all.


