15 Apr
computer case


![]()
Specifications and Features
Fractal Design has provided us with the specifications along with the case itself. I’ve gone ahead and listed these below, and included a couple of illustrations that pretty much covers all of the relevant features and aspects of the Define 7.
Type: Mid-Tower
Dimensions: 547 x 240 x 475 (LxWxD)
Weight: 13.5 kg
Materials: Metal, plastic and glass
Available versions: Black, White, Gunmetal, Black/White
Motherboard support: Mini-ITX, Micro-ATX, ATX and E-ATX
Front panel I/O: 2x USB 3.0, 2x USB 2.0, 1x USB Type-C and audio in/out
Expansions slots: 7 + 2 vertical
CPU cooler clearance: 185 mm
Cable routing space: 30 mm
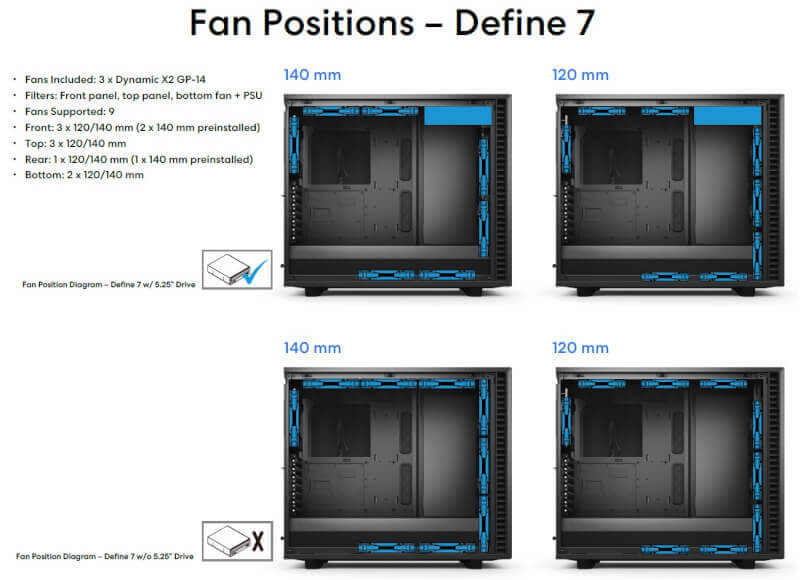
Included fans: 3 (Dynamic X2 GP-14)
GPU clearance:
Open layout: 467 mm
Closed layout: 315 mm (drive cage at the front)
Drive bays: 6 SSD/HDD trays + 2 SSD brackets + 1 Multibracket included
6 universal HDD/SSD brackets included with 14 positions total in Storage Layout
2 dedicated SSD brackets included with 4 positions total
A Closer Look at the Fractal Design Define 7
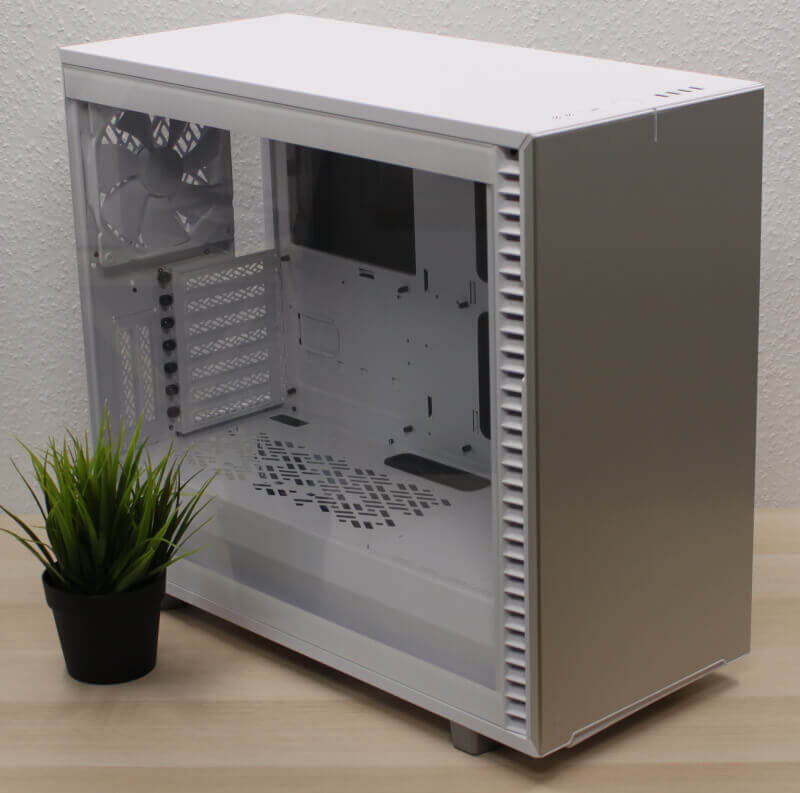
That’s it for the technical specifications. Let’s approach the case from a real-world perspective now. We’ve received the all-white version of the Define 7 that also features a tempered glass side panel. The case also comes in a black, black/white and gunmetal version, all of which also come with or without the tempered glass side panel. At first glance, the case looks very familiar.
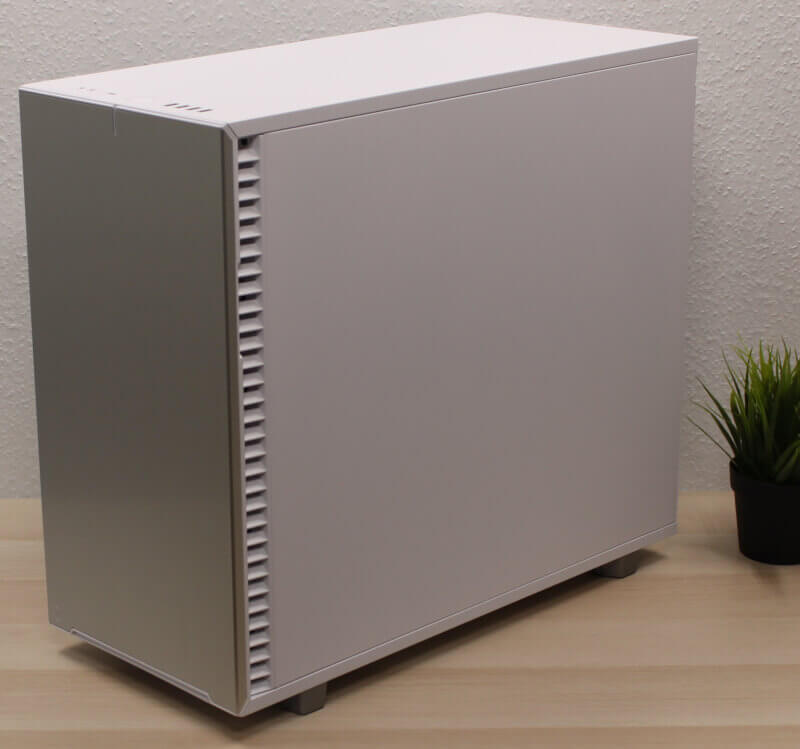
On the right-hand side, we find an empty white surface without any ventilation or anything. Only at the front do we spot some vent for the fan intake. This vent is located on both sides of the front panel.
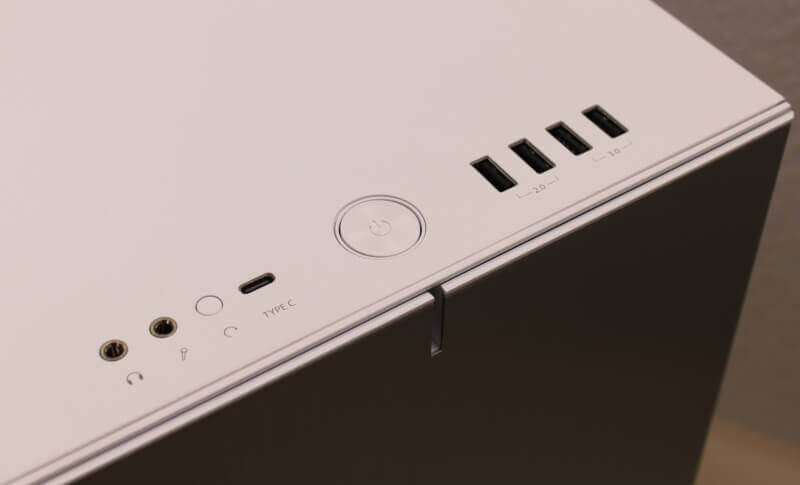
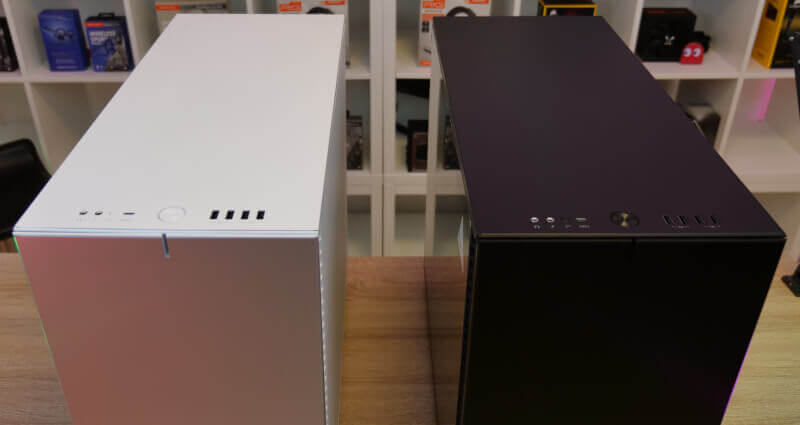
At the front we also have the I/O panel at the top, which is quite impressive in terms of options. Aside from the mandatory power and reset buttons, we also get audio in/out, two USB 2.0 ports, and two USB 3.0 ports. Last, but not least, Fractal Design has also included a USB Type-C connector, which is nice to see. While it is becoming more and more common to find the USB Type-C connector on cases, it still is far from all cases that include it. Kudos to Fractal Design for this.
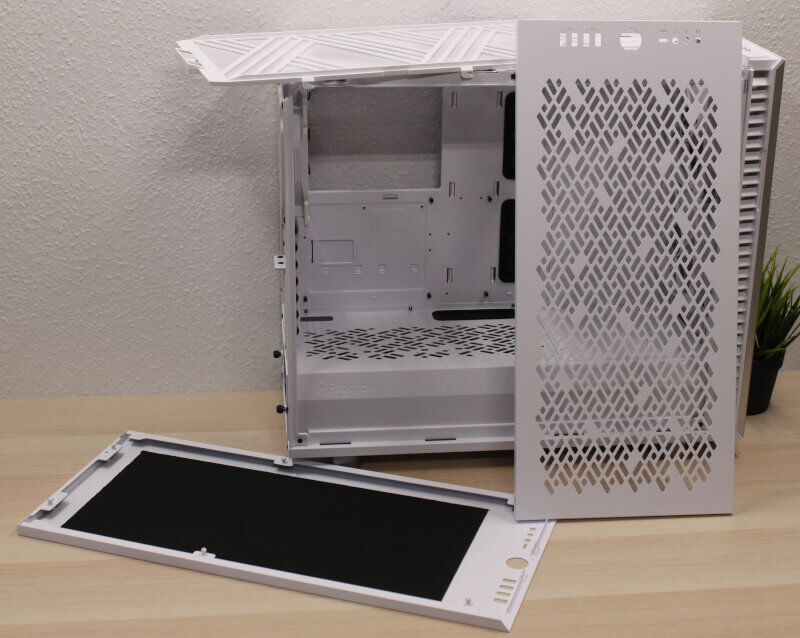
One thing that characterizes the Define series from Fractal Design is the front cover that holds a large dust filter, as well as support of a 5.25-inch drive. I really didn’t see this coming since optical drives are pretty much extinct on today’s market. Either way, I’d rather have one too many features than one too few. Behind the large dust filter, we find two 140 mm high quality fans. However, the dust filter and the plastic behind the front cover both feel a bit cheaper with a more fragile plastic. This is a shame since the build quality of the case in general is very high.
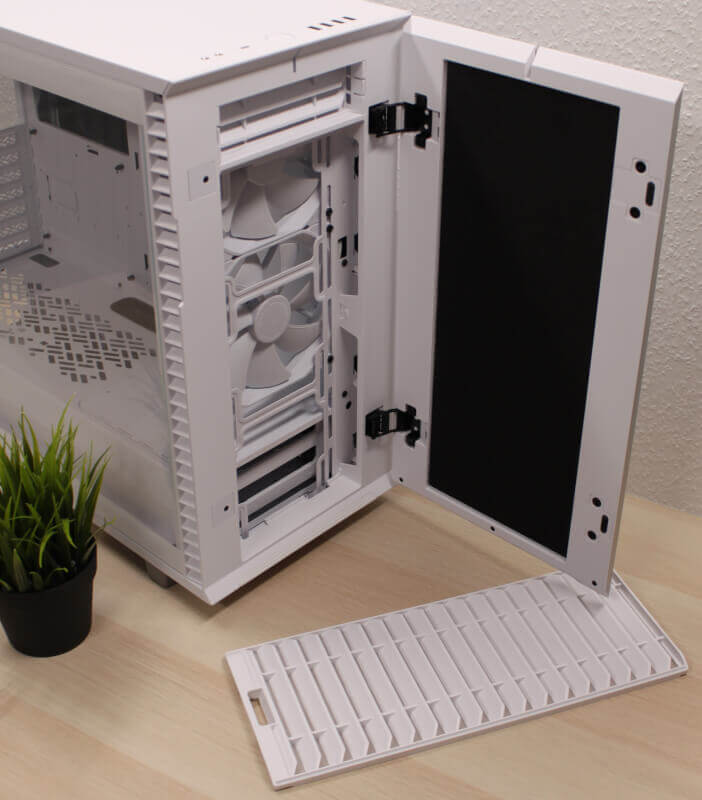
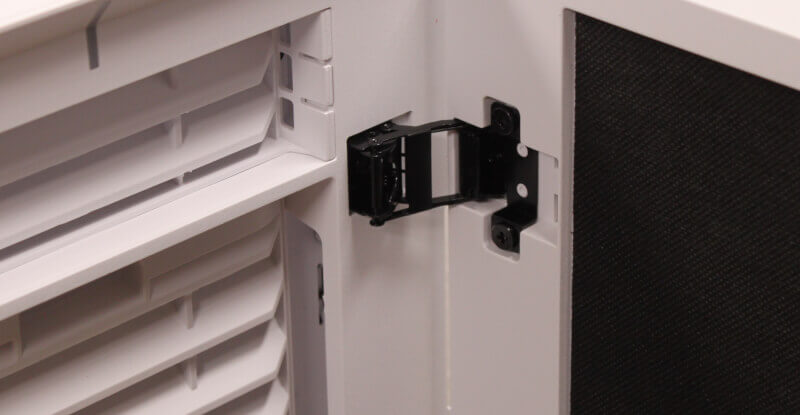
Fractal Design does deserve some applause for the solid hinges that hold the front cover in place on the Define 7. These are not your standard cheap plastic hinges, but rather some solid metal hinges that are spring-loaded and soft-closing, when pushing in the front cover. I’ve not seen something like this before, on other enclosures, so Fractal Design certainly deserves some praise for this feature. It’s really nice! You of course also have the option of moving the hinges to the opposite side, if that suits your setup better. This is the same as on previous versions of the Define case.
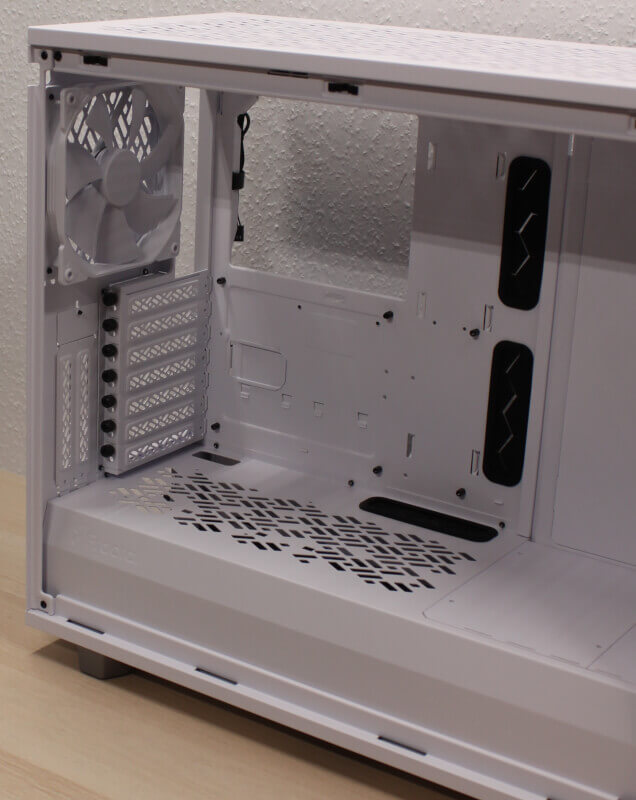
If we have a look at the back, we find a standard layout. We have the power supply located at the bottom, with 7 + 2 expansion slots above it. We also see the hole for the I/O shield as well as a third 140 mm included fan. All of the fans that are included with the Define 7 are Fractal Design’s own Dynamic X2 GP-14 that have a very low noise level but a high air flow.
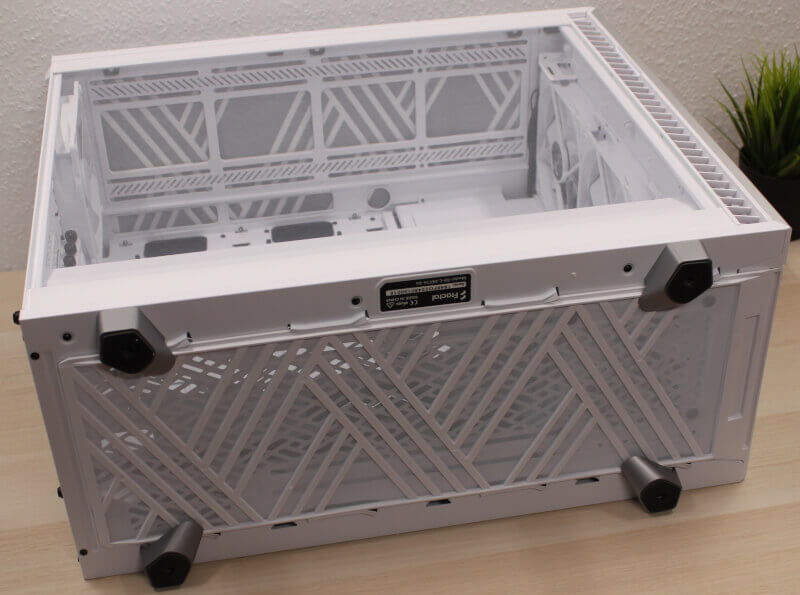
On the bottom of the Define 7, we find four solid feet that have rubber at the base in order to reduce vibrations. We also find an enormous dust filter that covers the entire bottom of the case and that can be pulled out from the front when it needs to be cleaned. This is brilliant since cleaning can then be done without having to really move the PC around.
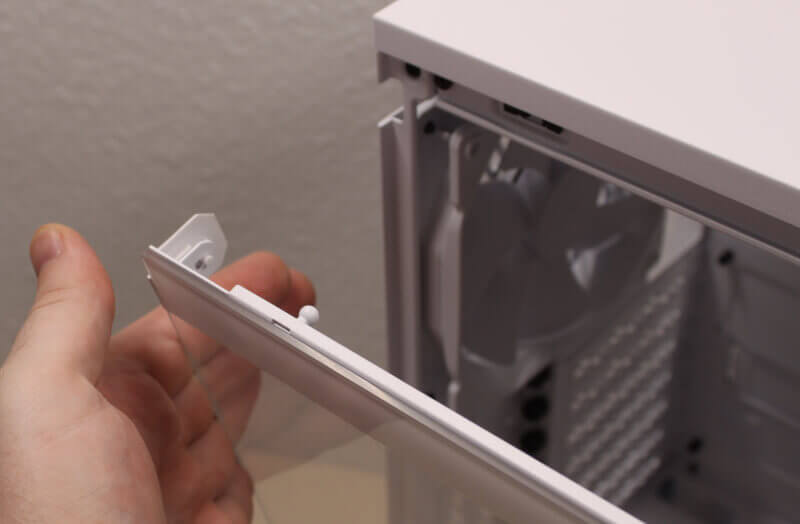
Let’s remove the side panels of the Define 7 and have a look inside. Contrary to many other cases that also feature a tempered glass side panel, or a regular metal panel, for that matter, there are no screws on the Define 7 that are fixing the side panels in place. They are simply clicked into place by some small ball head mounts. They are surprisingly good at holding the side panels in place, whilst at the same time giving a stylish and unique look. It’s possible to fix the glass panel even more with a single screw at the front, if you want to secure it a bit more.
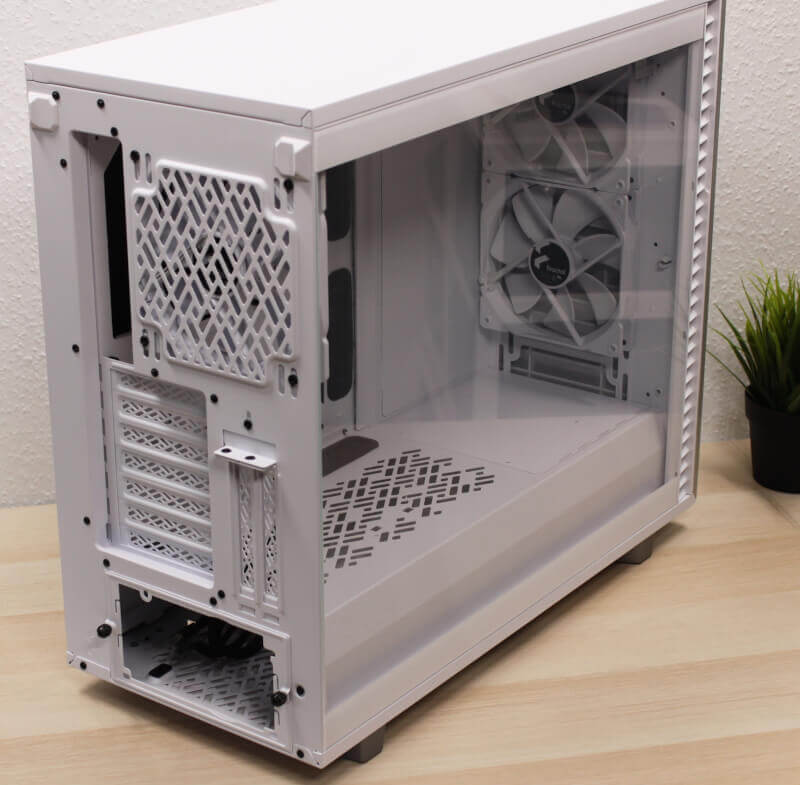
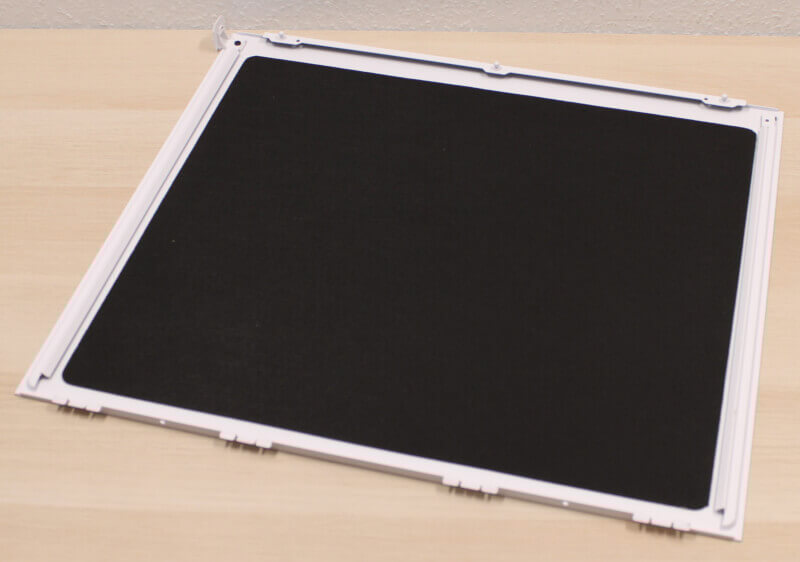
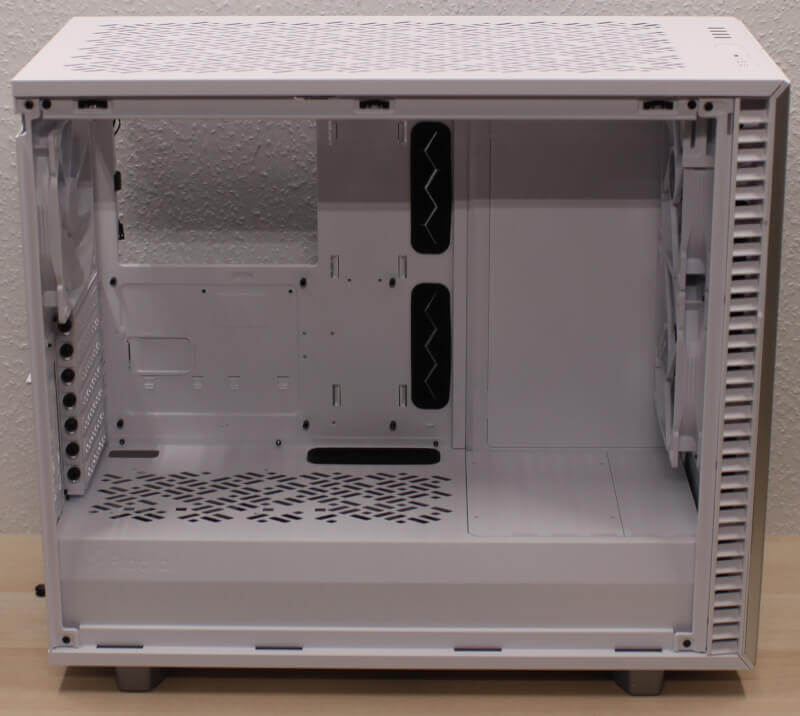
The right side panel is made from a large piece of metal, and a large piece of noise dampening material has been attached to it. This is similar to that seen on the front cover. This keeps noise levels down, but also adds to the overall weight of the case. So even though it’s a relatively compact case, the Define 7 still weighs more than 13 kg without any hardware installed.
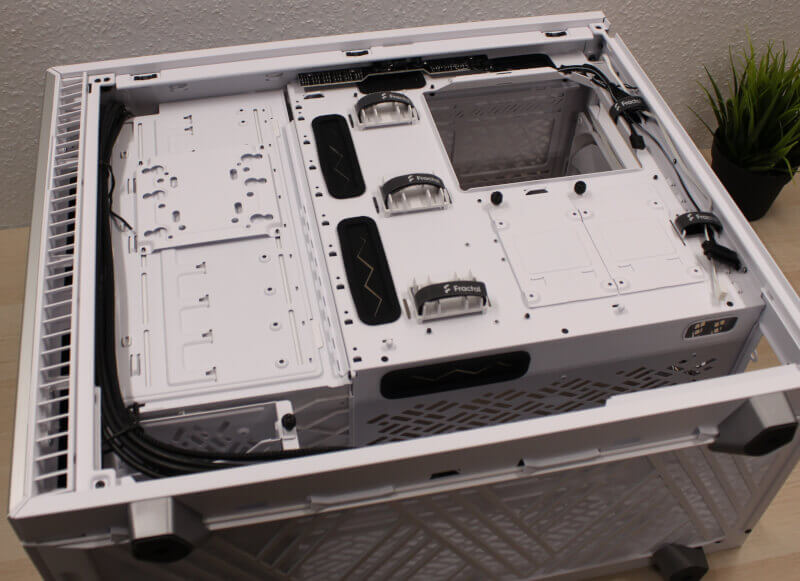
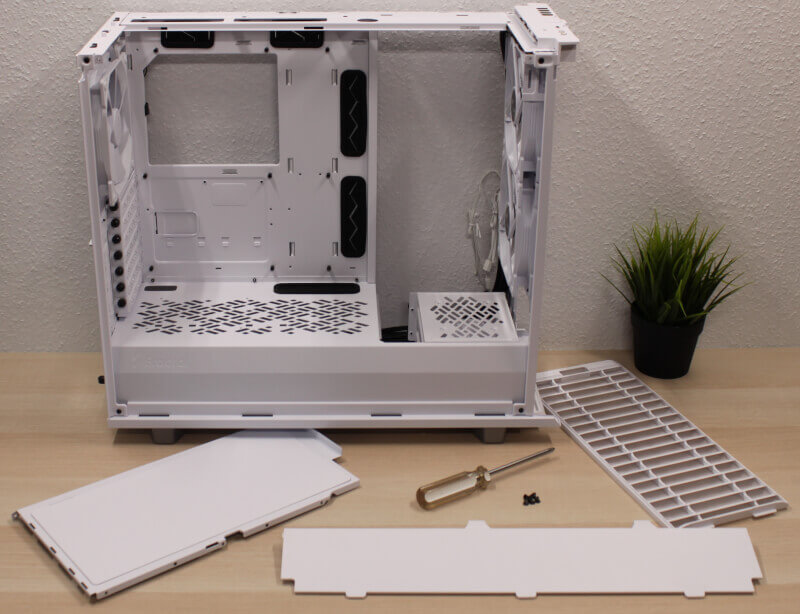
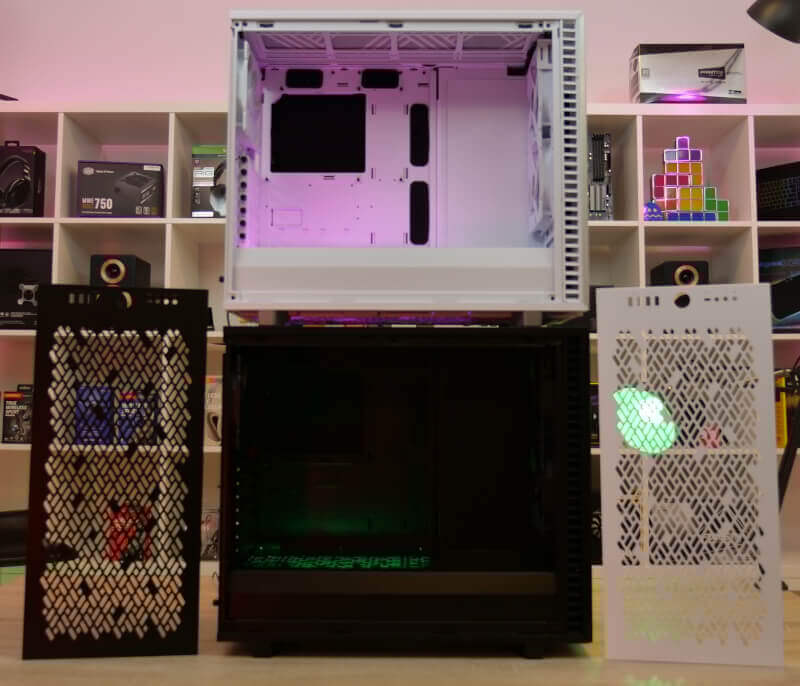
Another cool feature of the Define 7 is that you can pop off the regular top panel and switch it out with another top panel that is included in the box. It snaps off in a similar fashion to the side panels. Grab the rear of the top panel, pull it a bit, and it pops off as seen below.
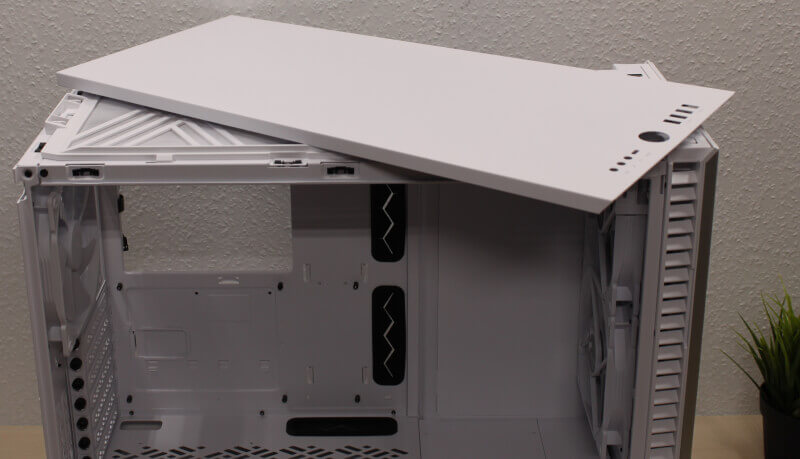
The regular top panel is closed and equipped with the same noise dampening materials as the right side panel. However, if you want to install a radiator or just some fans at the top of the Define 7, you can use the included extra top panel since it has ventilation holes. It’s refreshing to see how Fractal Design has opted for a more interesting hole pattern here rather than your typical ventilation holes. This sets it apart from other cases. The dust filter at the top is also easily removed, which makes it easy to clean.
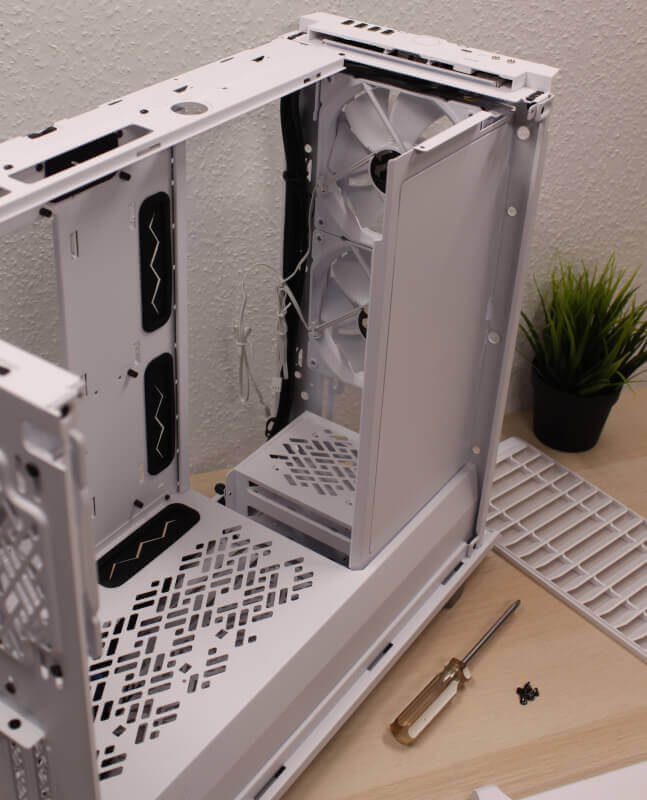
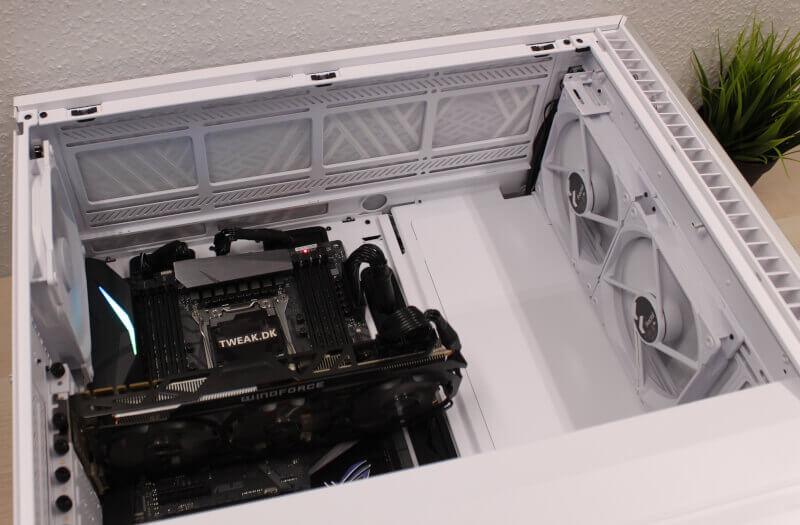
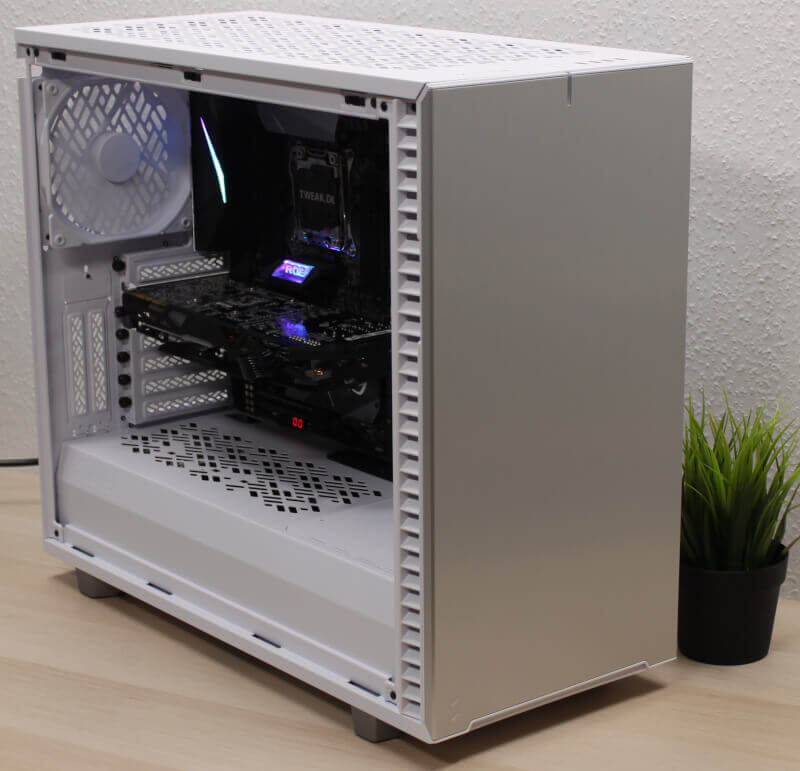
I’ve installed the ventilated top panel in the following segment. As can be seen, the layout of the Define 7 is very open and there’s open space between the two 140 mm fans at the front and the motherboard and graphics card. We find the same ventilation hole pattern on the PSU shroud, which is nice. The all-white color lives on inside the case and if you were to have the black/white edition, you’d see more of a mix of colors going on here.
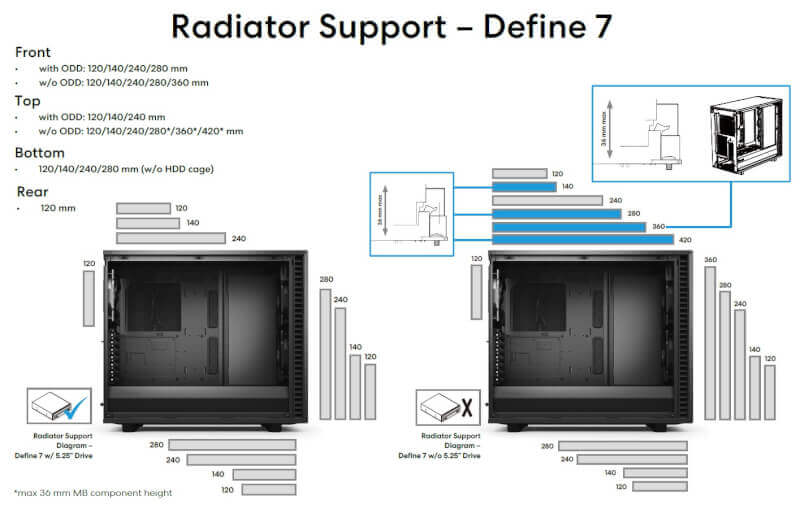
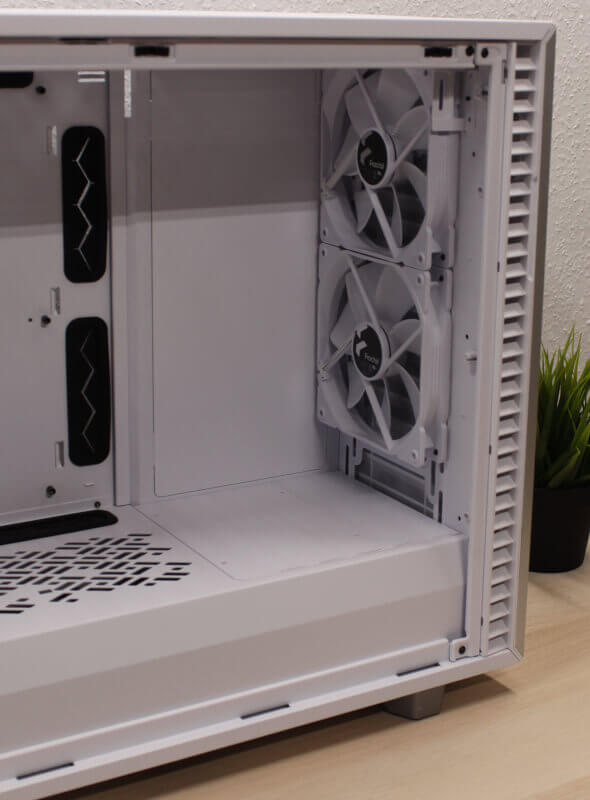
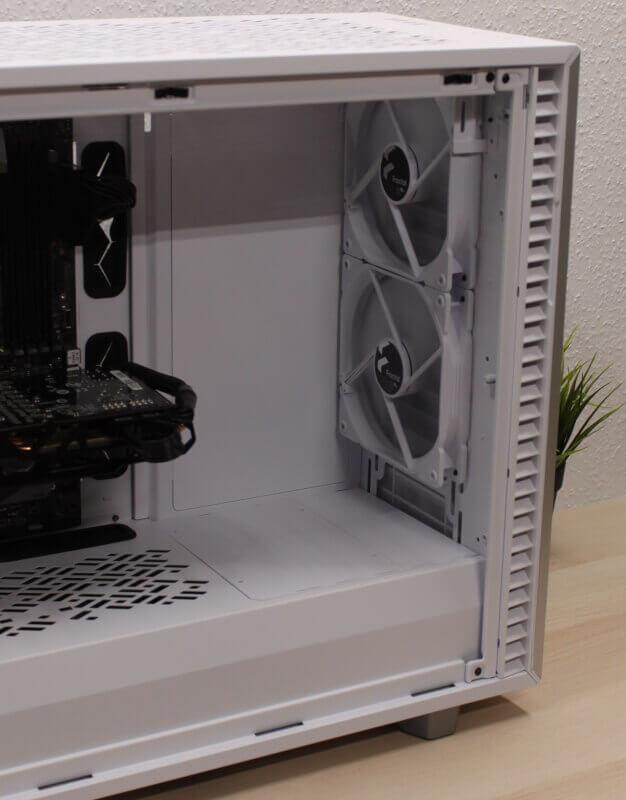
Here’s a close-up shot of the two 140 mm fans at the front of the Define 7. Here, you also have the option of adding a third fan of the same size, or you can add a 360 mm radiator. However, this requires that you don’t use the 5.25-inch drive at the very top. But who really uses that these days anyways. If you want to install a third fan or a large radiator, you can easily remove one or both of the panels on the PSU shroud. Do note the four holes on the larger of these two panels. This fits with various mounting brackets for a pump, if you are inclined to do your own custom water cooling in the Define 7.
If we look at the rear section we see the 7 + 2 expansion slots that are all ventilated and equipped with thumb screws. You can buy a separate vertical mounting bracket for your GPU so that it can be displayed behind the glass side panel. There’s of course also a large hole on the motherboard tray to help you mount a CPU cooler and some cable routing holes at your standard practical locations.
On the back of the Define 7, we also see that a lot has changed compared with previous renditions of the Define case. We find what Fractal Designs calls a multibracket that can be used for both 2.5 and 3.5-inch drives. We also find cable routing channels and velcro bands at the ready, which makes cable management a breeze. There’s even 30 mm of room to work with back here.
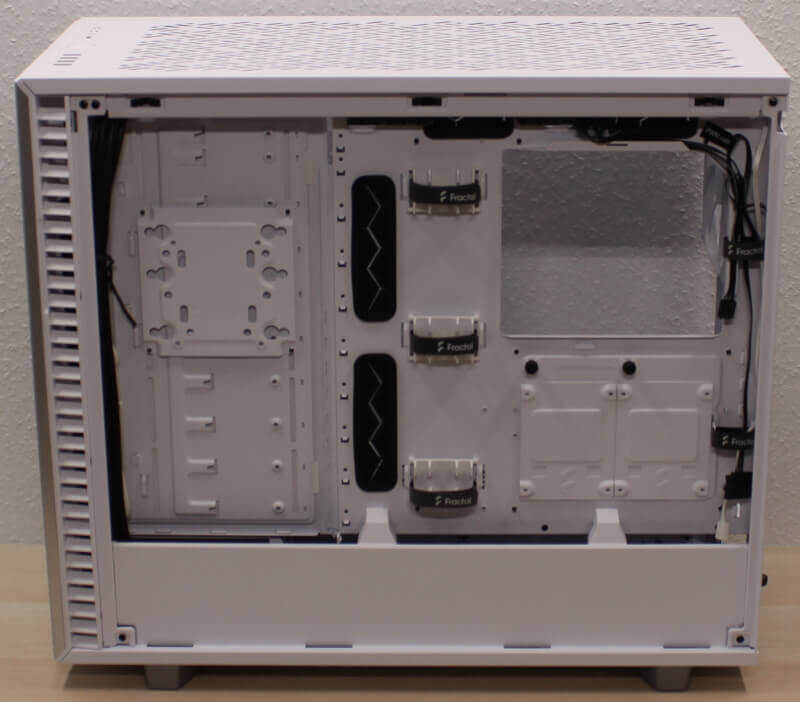
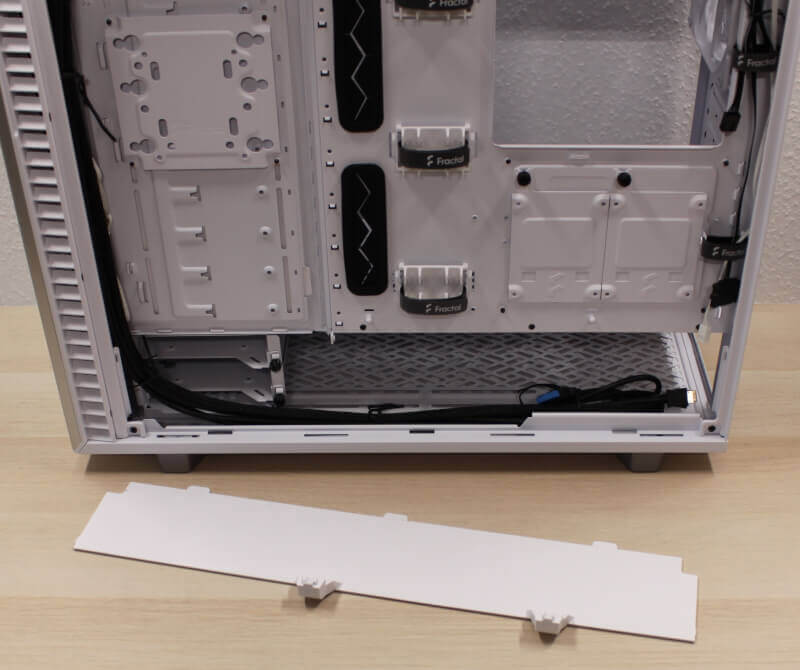
There’s also a plastic cover at the bottom so that you can “hide” all the cables in the basement so that they cannot be seen when you remove the side panel. There’s also two dedicated 2.5-inch SSD mounts. These can even be removed and be used on the other side of the case, on top of the PSU shroud, in case you wish to show off your SSDs.
Another cool feature is that Fractal Design has made room for routing your cables along the edge to the right. This is where you’d normally also route the EPS (CPU) power cable. We find dedicated velcro bands installed here too, which is really cool. Another cool thing is the pre-installed Nexus+ 2 fan hub that can be seen at the top of the below image. This unit allows you to connect up to nine fans (six normal and three PWM), and connect these to a single PWM header on your motherboard. This way, you can control all of your fans from a single header, which is really awesome.
Modular Design and Hardware Installation
Before moving on to the hardware installation, let’s have a quick look at the modular design of this Define 7. As you can see below, this case features a very high level of customizability when it comes to planning your layout. You can essentially convert it from a standard open layout to a more closed layout, in case you want to add a lot of drives to it.
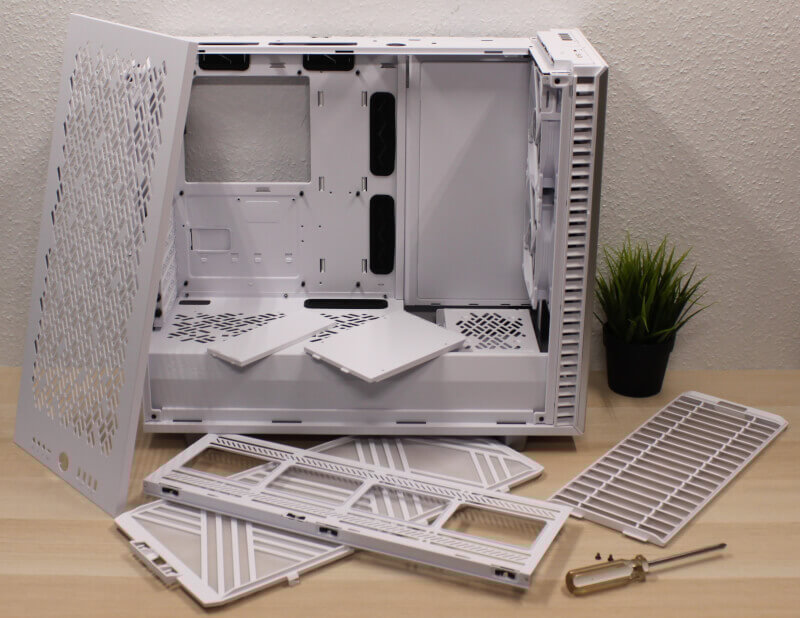
In addition to the two drive brackets in the “basement” of the case, Fractal Design includes an additional four that will support both 2.5 and 3.5-inch drives.
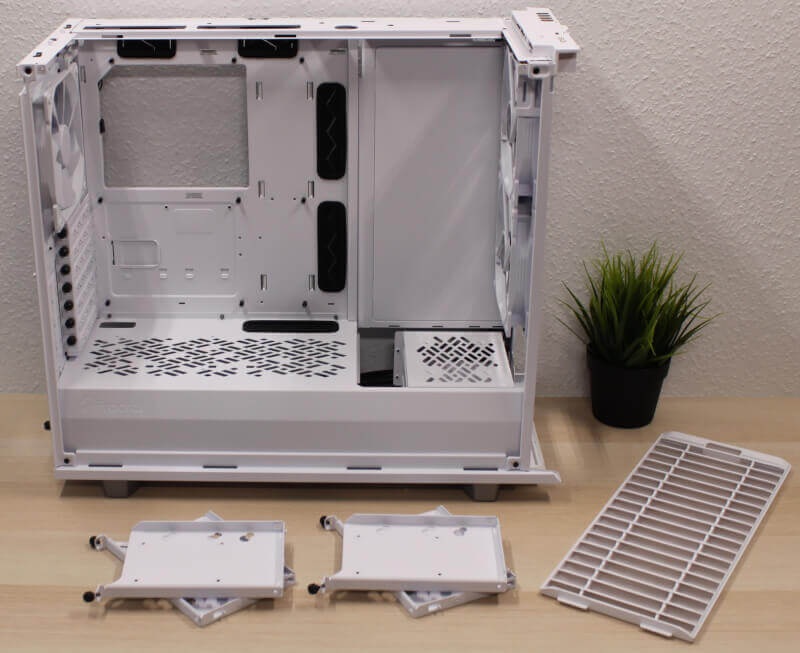
The plate/wall that is located on the right-hand side can be removed by removing four screws. Once this is done, it opens up the entire front section of the case. You can also simply move the plate towards the front i.e. the glass side panel.
I’ve done this in the image below. This allows the installation of up to a crazy amount of 14 drives in the Define 7. Let’s move on to the hardware installation.
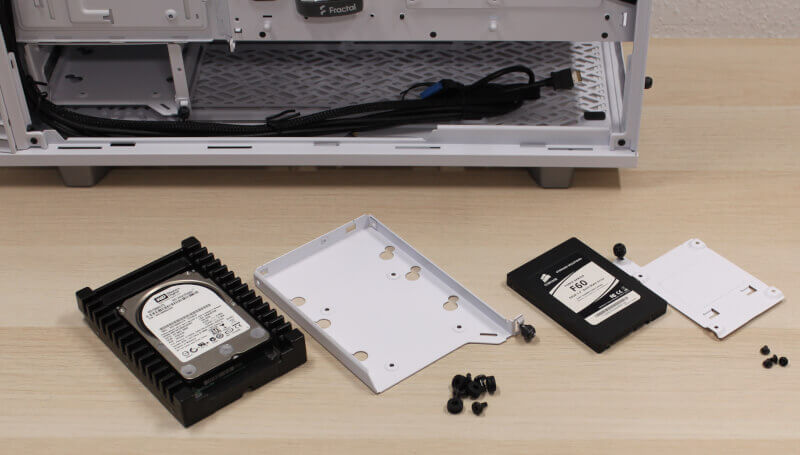
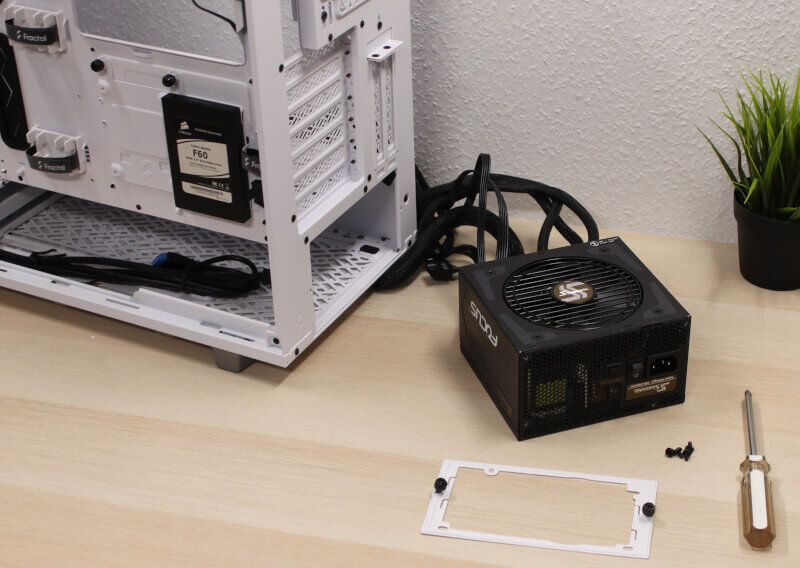
You’ll be needing tools in order to install both 3.5 and 2.5-inch drives in the Define 7. However, instead of getting cheap plastic mounting brackets, you get these awesome ones made in metal, with rubber, in order to reduce vibrations.
The power supply is attached to the included bracket, and is then pushed in via the back. The PSU shroud cannot be removed, and this is therefore the only way to go about it. This is quite common to a lot of modern cases, so nothing special here. It is recommendable to install all of the cables that you will need for the rest of the build before inserting the PSU. If you use a modular PSU that is.
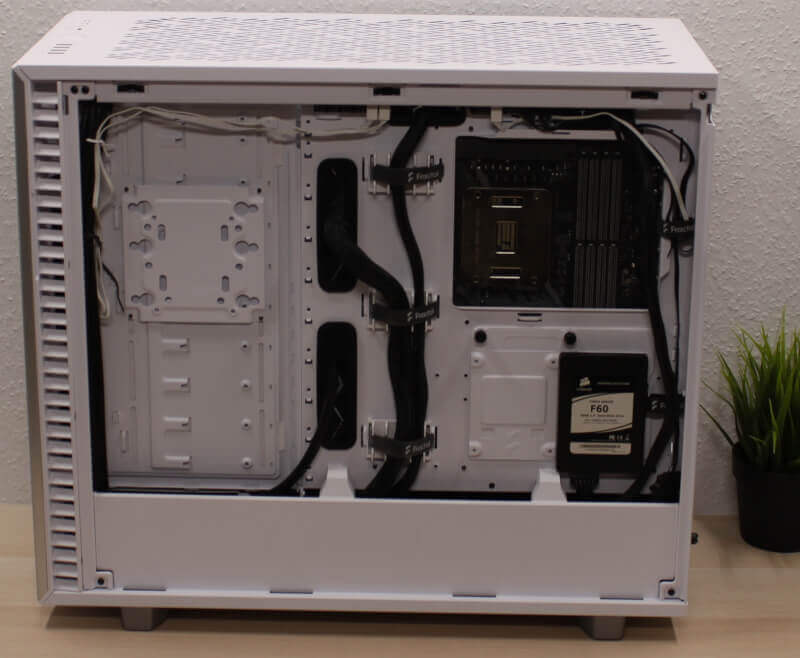
Below is a rear shot of the Define 7 with all of the hardware installed. It was a breeze to build a system in this case since there’s plenty of room to work with and the cable routes and velcro bands makes it easy to figure out how to handle all of the cables. This way even inexperienced builders will be able to get some awesome results with this case.
Even with a full-size ATX motherboard and a large GPU, the Define 7 feels almost empty. There’s a lot of available space towards the front, but you could just install a radiator, a custom water cooling pump or convert the case to the closed layout and install a bunch of hard drives. It’s up to you what to do with the room.

The CPU cooler clearance is up to 185 mm. This means that the Define 7 will fit pretty much any air cooler on the market without a problem. The same applies to large graphics cards with custom PCBs and coolers that typically are more space demanding than the reference cards. All of the expansion slots are of course ventilated, and you’ll notice that they even feature the same hole pattern that we’ve seen in other places in this case, including the PSU shroud. Cool detail.

In a configuration as the one we’ve set up here, you’ll have free passage of air from the two 140 mm front fans to the hardware components. Even with a large radiator installed and two rows of fans, there’s still plenty of room to work with here.
The same goes for the top of the case, which is roomy enough to support both fans and a radiator. Fractal Design has moved the mounting holes towards the left side, which means that they won’t clash with the neither the cooling elements on the motherboard, nor any tall RAM you might apply. This is something you experience on a lot of other cases.
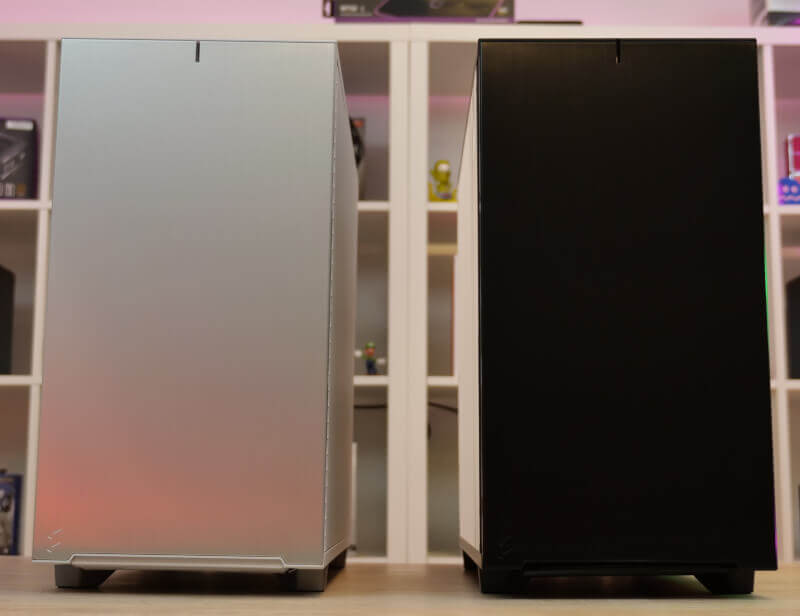
Below is an image of the finished product in all its glory. It’s been a true pleasure building in the Define 7, and it’s a worthy addition to the Define series of cases. The fact that it comes in a variation of color combinations, this is a case that will satisfy most if not all buyers.
While on the subject of colors, my colleague, Kenneth, has taken a few extra shots of the white one we are looking at today, but also the all-black version. Check out his photos below.
Price
The MSRP of this case will be $169.99. This is a very reasonable price compared to the rest of the market. It might be more than what most are willing to pay for a PC case, but you get a lot of value for your money here, and a bunch of awesome features.
If you want to learn more about the Define 7 from Fractal Design, you can stop by their website by clicking this link.
![]()
Conclusion
It’s now time to wrap up our thoughts on the Define 7 from Fractal Design. I’ve personally always been a fan of the minimalistic design philosophy of Fractal Design, and its latest Define 7 is a fine continuation of this. We get the classic look, but the case overall has been spiced up in order to meet the standards of 2020. This leads to a highly modular case. With just a screwdriver in your hand, you’re basically able to tear this case apart, and customize it exactly to your liking. This is great to see.
We get plenty of room for radiators, fans and of course hardware. If you choose to convert the case to the closed layout, you get the option of installing up to 14 drives, which is quite insane, to be frank, but impressive nonetheless. If you are not in need of that many drives, you can stick to the open layout, which in turn allows you to install lots of hardware, water cooling or whatever else you feel like. The many fans can be plugged into the integrated Nexus+ 2 fan hub, which means that you only have to connect a single connector to your motherboard, and this way gain control of up to nine fans. Another modern feature is the inclusion of a USB Type-C connector on the front.
Overall, there’s not much to flaw about the Define 7 from Fractal Design. The case does so many things right, and on top of that it just looks great. Modern, but still sticking to its roots. It comes in a variation of colors, and the option of getting the tempered glass side panel or just a plain solid look instead. The only thing that I can think of that could have been better is the weight. This is a relatively compact mid-tower, but it still weighs 13 kg. This is of course because of the noise dampening material and the overall metal construction. However, this simply means that once you’ve got all of your hardware installed, this becomes a very heavy system, and not something that you’d want to move around a lot, or bring to LAN events. Another thing that annoyed me a little was the plastic behind the front cover. It feels fragile and cheap, and doesn’t match the sense of build quality that you get from the rest of the case.
What about the score, then? There’s no doubt that Fractal Design has created a worthy successor to the Define 6. It has nailed most details, and the case is well thought-out and generally awesome, with only a few minor complaints. As such, I’ve decided to give the Define 7 from Fractal Design a score of 9 out of 10 as well as our Great Product Award. You can a fine mid-tower with lots of features and options. The Define 7 targets the builder that seeks a silent high-end mid-tower, who is willing to pay what it costs, and doesn’t want to compromise in terms of features and upgrading potential. With the option of buying additional accessories for this case, it’s basically only your wallet that will limit your possibilities here. Well done, Fractal Design.
Pros:
Classic Define design in a modern version
Modular construction
Solid radiator and fan support
Several different color variations
Nexus+ 2 PWM fan hub
USB Type-C on the front panel
Room for lots of hardware and drives
Three high-quality fans are included
Good build quality with regard to detail
Dust filters and noise dampening material wherever possible
Cons:
The weight is high for a mid-tower
The plastic behind the front cover feels cheap
Score: 9 + Great Product Award