15 Apr
computer case


As all hardware enthusiasts know, a cougar is not only a mid-sized or middle-aged predator. It is also, as the gaming hardware manufacturer Cougar state themselves, real gear for real gamers. So, if you’re one of us who go to the computer store to find our Cougar, and not the local zoo or dyke bar, then we have another fine specimen for you today.
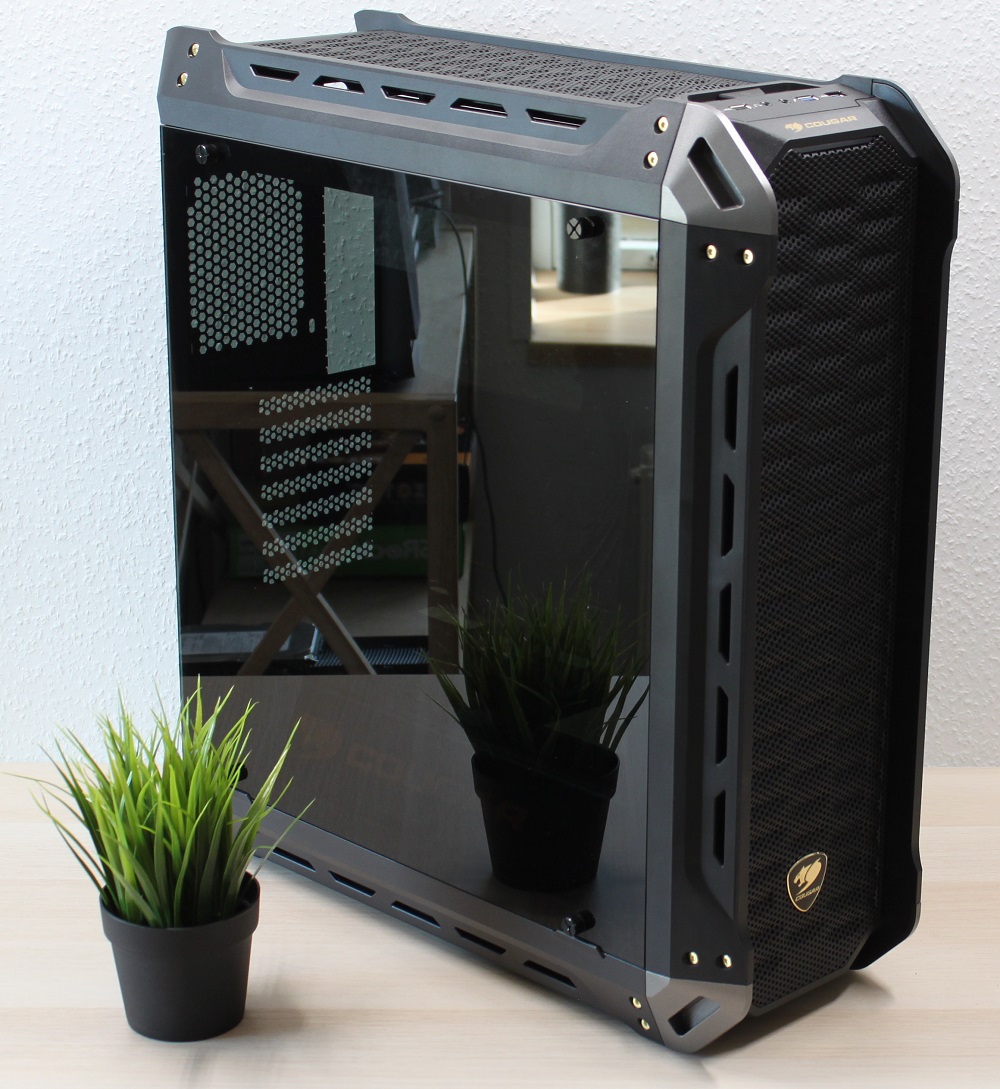
This time it’s the Panzer-S, a fully matured mid-tower that offers everything you can expect from a case anno 2019. Tempered glass panels, open design, and room for loads of cooling are just some of the things presented here. And it’s not even that expensive.
Without further ado, let’s get acquainted with the Panzer-S case and see if it is worth the moderate stack of cash.
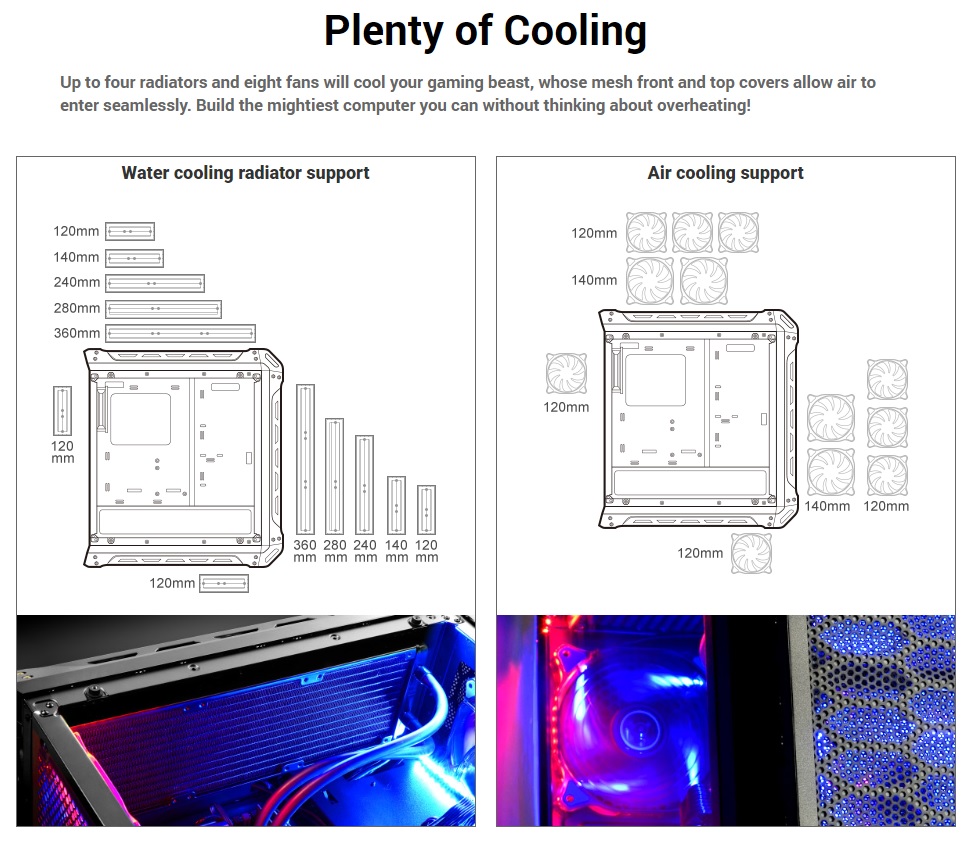
I’ve done some digging on the Cougar website and unearthed a small list of specs, saving you from getting your hands dirty. As a major bonus, Cougar have provided us with a brilliant illustration showing its fan and radiator support.
The most notable thing about the Panzer-S is the sheer size of it. Especially since it is not a heavyweight champion, it is “only” a mid-tower.
The next thing that catches the eye is the raw, industrial design. The top, front, and bottom all have that assembly line aesthetic with metal beam finishing and added touches of gilded screws. It's one cog and exhaust away from being genuinely steam punk.
In most computer cases, tempered glass refers to left side only. Cougar have taken that natural step further, though, and made their Panzer-S case transparent with see-though glass casing on both sides. This is cool, but puts extra pressure on your cabling skills, as you can’t hide any entanglements behind your graphics card. Both windows are tinted, but still…
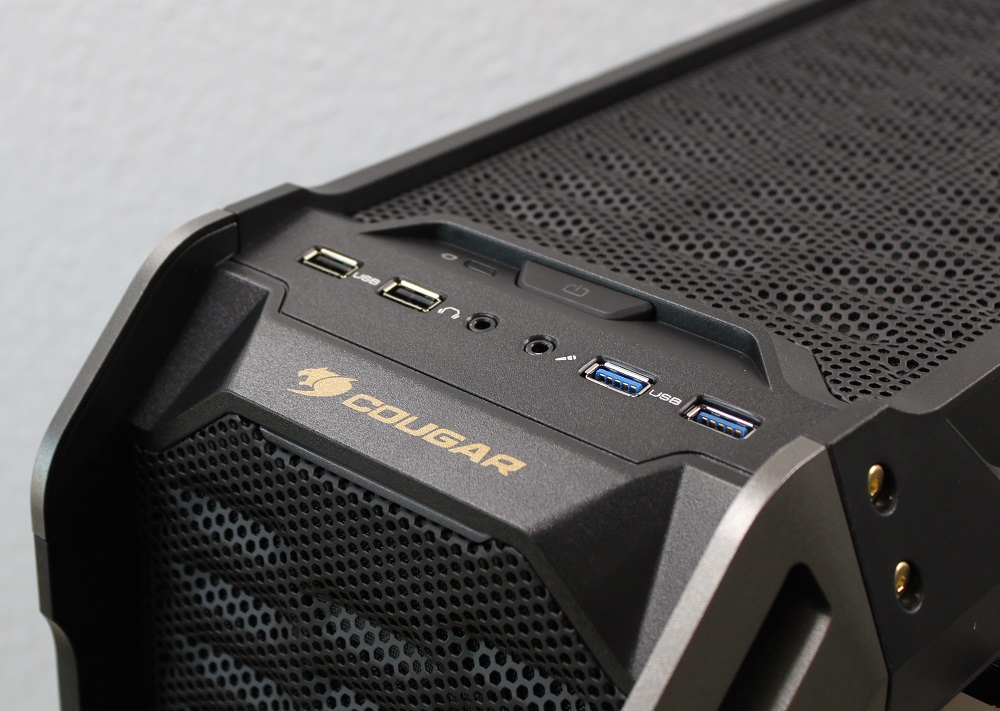
On top of the chassis you find two USB 2.0, two USB 3.0, and mic/audio connections. And power and reset buttons, naturally.
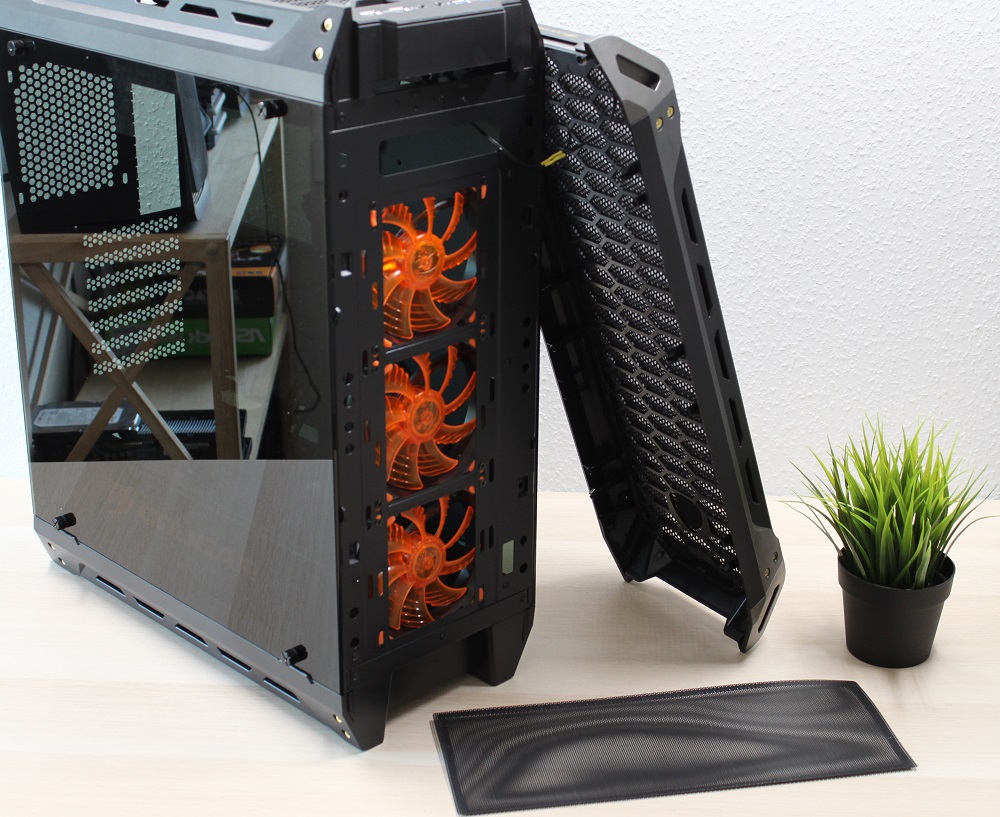
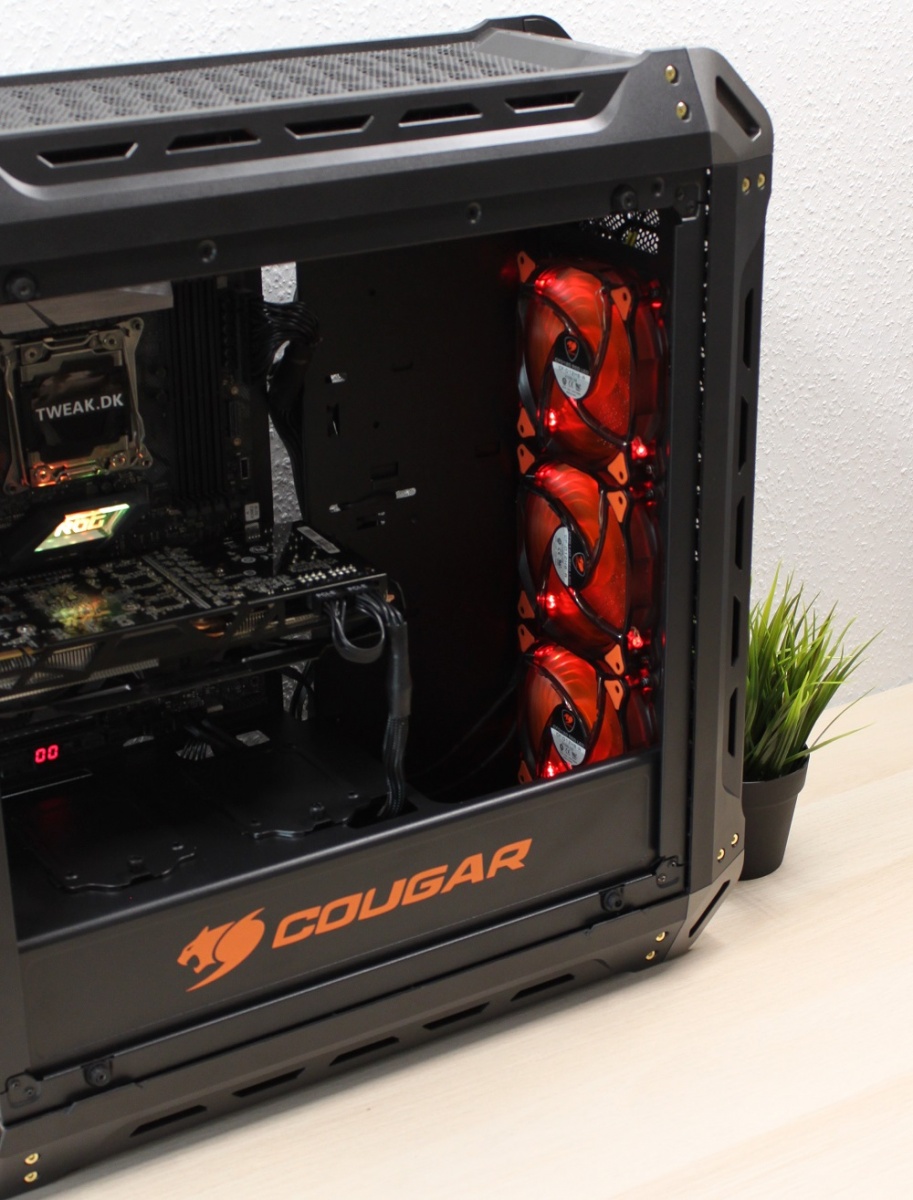
It is easy to detach the front panel by just grabbing the back and pulling it off. Behind it we find a magnetic dust filter that covers three 120mm fans, equipped with red LED lights. Here, I’d have loved to see some RGB lights instead, as they would have given me some more options, not just one predetermined color.
The top panel is likewise easily removed, or sort of… All cables to the plugs on top are attached to this, which can make cleaning it a nightmare. Especially if you have fastened the cables from these plugs. Therefore, be extra careful when cabling in this cabinet!
Let’s continue our tour around Panzer-S and look at the backside. This has a layout familiar to most of us. The PSU sits at the bottom, followed by seven PCI slots. The upper half offers room for the I/O panel of the motherboard and one 12mm fan.
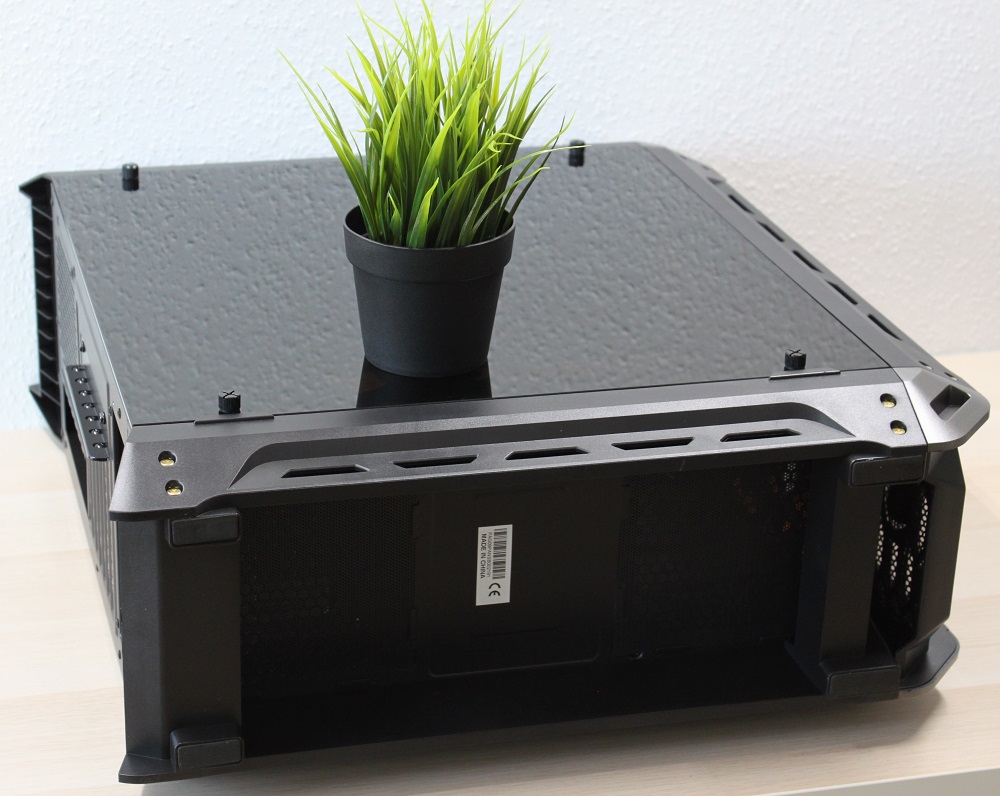
Below the chassis we find to large rubber feed attached to the faux metallic frame running on each side along the bottom. The rubber has been added to minimize vibrations.
Furthermore, we find two dust filters. However, these are these are rigid and hard to access from inside. This makes a spring cleaning unnecessarily complicated, as you need to lay down the Panzer-S computer case to find your way in there.
By removing the two side panels we get access to the interior. The tempered glass requires eight screws in total to remove both sides. Notice the dark tint of the windows. This is a little overdone to my taste, as it requires some serious RGB on your hardware to be truly visible on the outside.
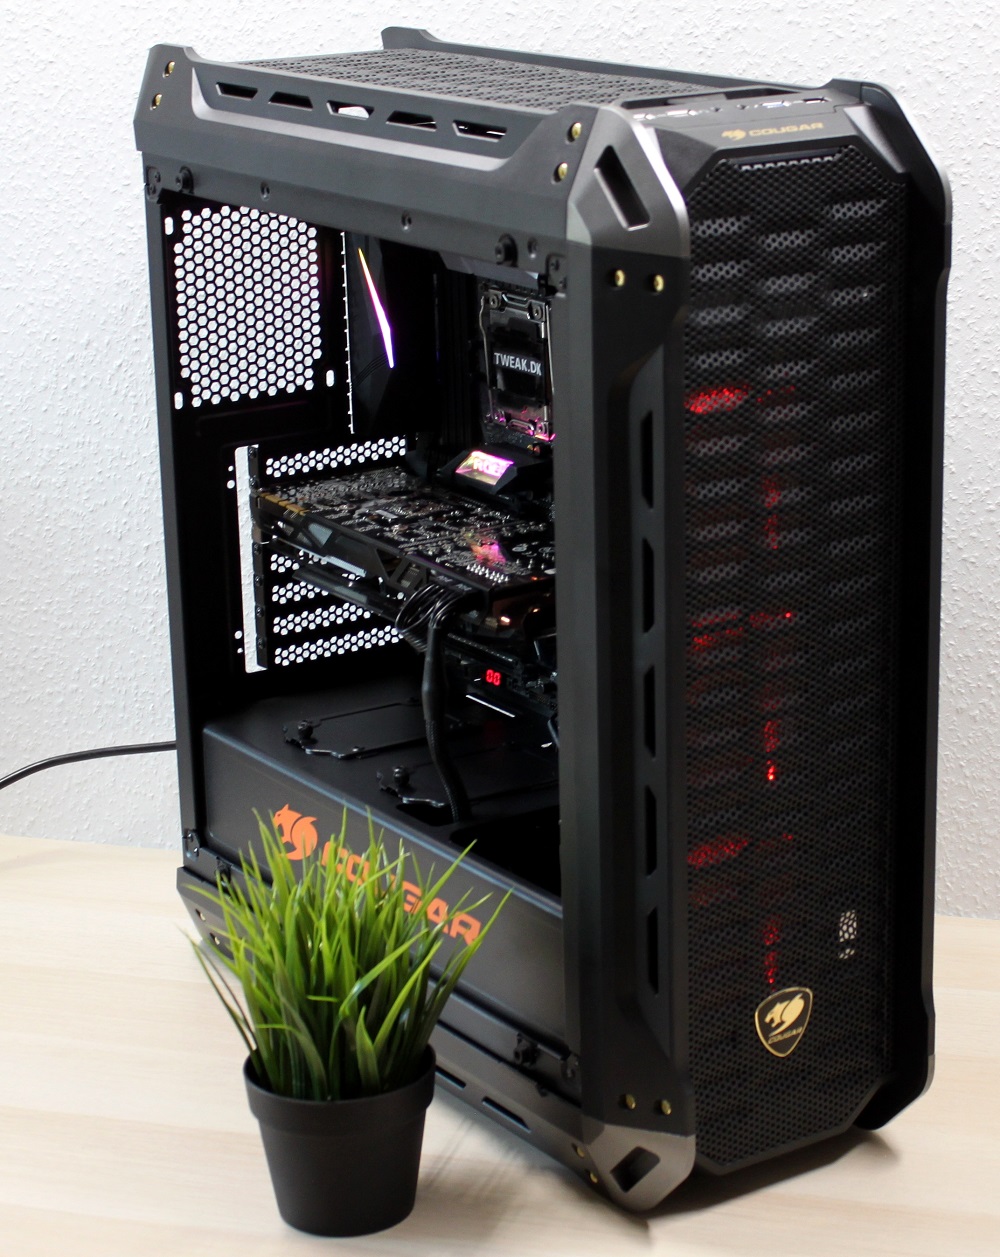
With both glass panels put aside, let’s refocus on the inside of the Panzer-S cabinet. As in most other cabinets these days, we find an open design with free passage from the front all the way to the back. This provides lots of free air to all the hardware (at least when the class panels are off).
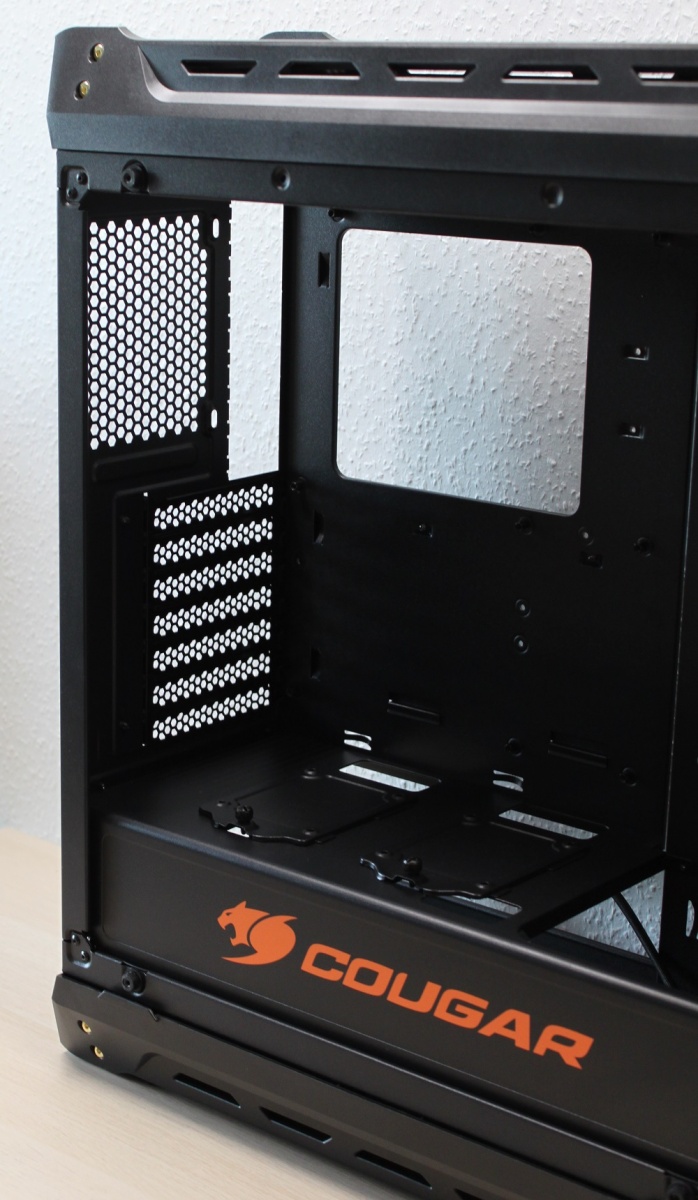
The seven PCI slots are all ventilated, offering plenty of airflow. This is a huge plus with the whopping three 120mm fans at the front.
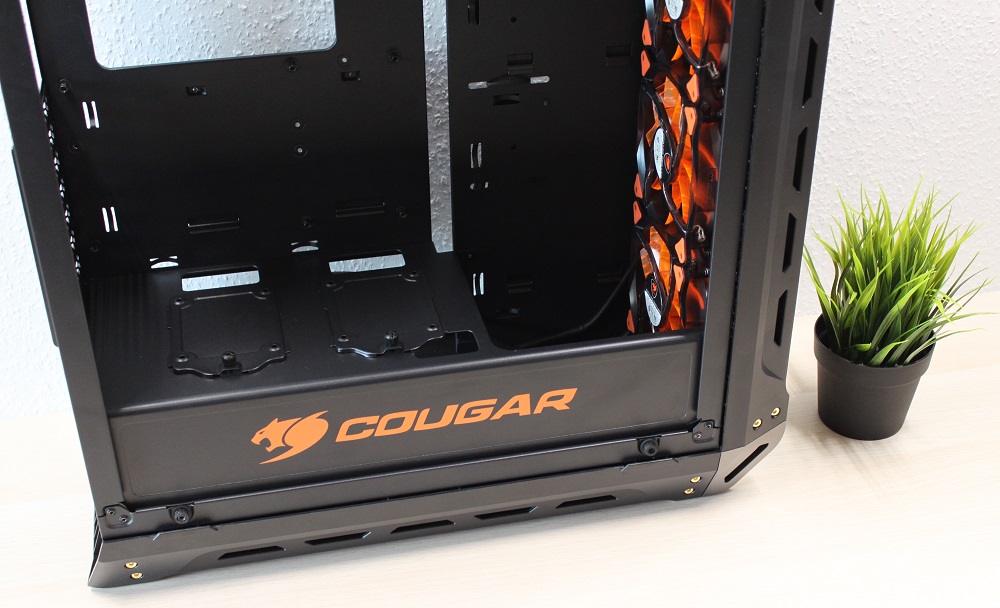
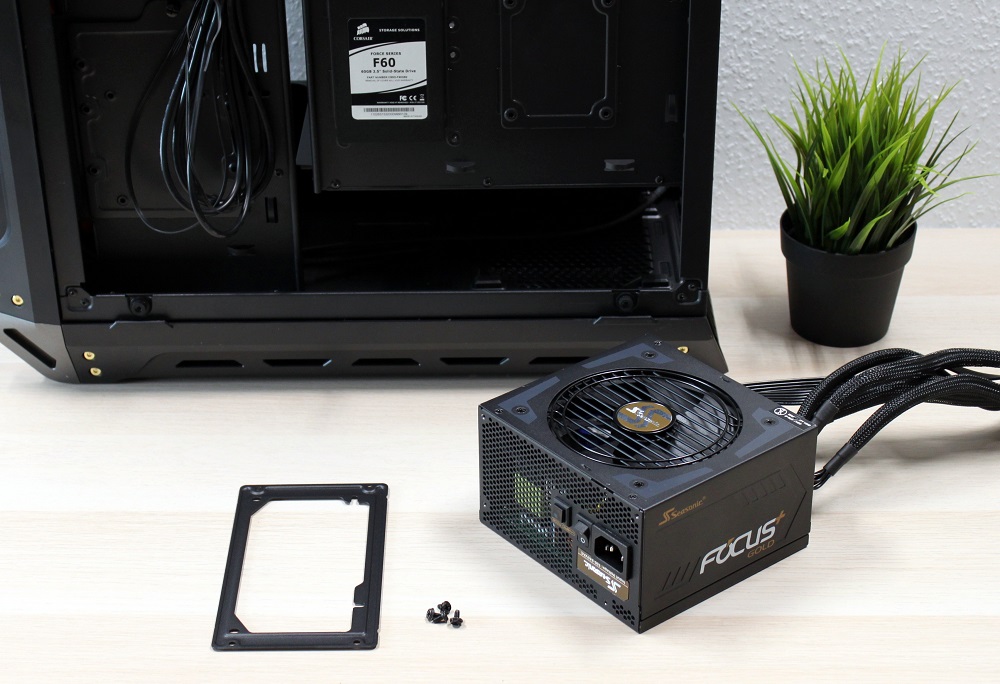
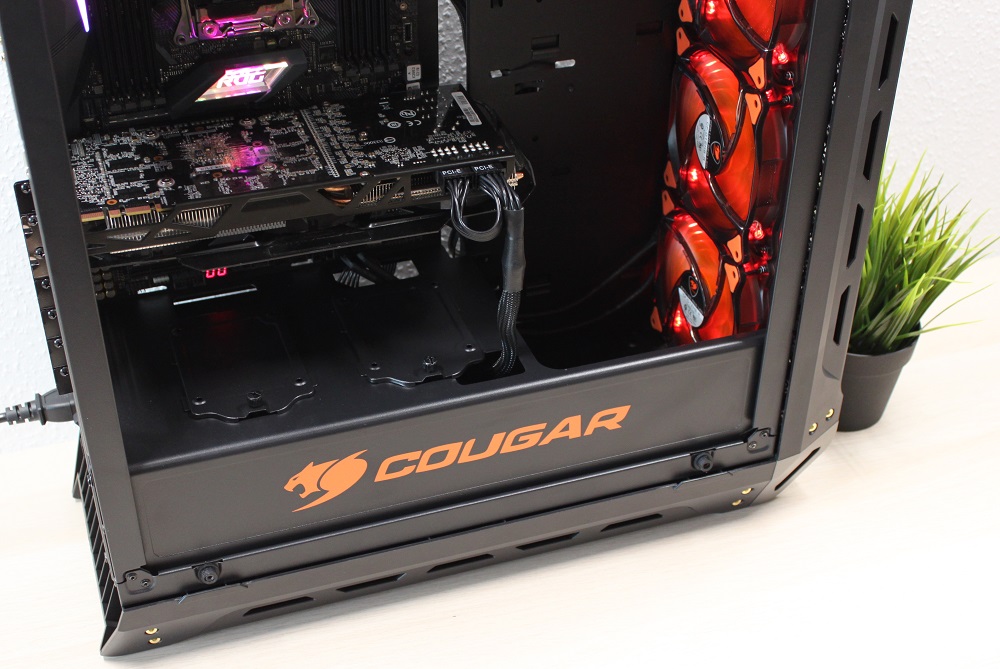
Underneath, we find the cover for the PSU with three holes for cabling and two SSD fittings. The front of the cover has a large indentation making room for radiators up front, or even a bottom fan.
Even though the upper inner space seems a bit tight, it provides plenty of room for a radiator up here. This is due to 30 millimeters of free space between the metal frame and the plastic top cover.
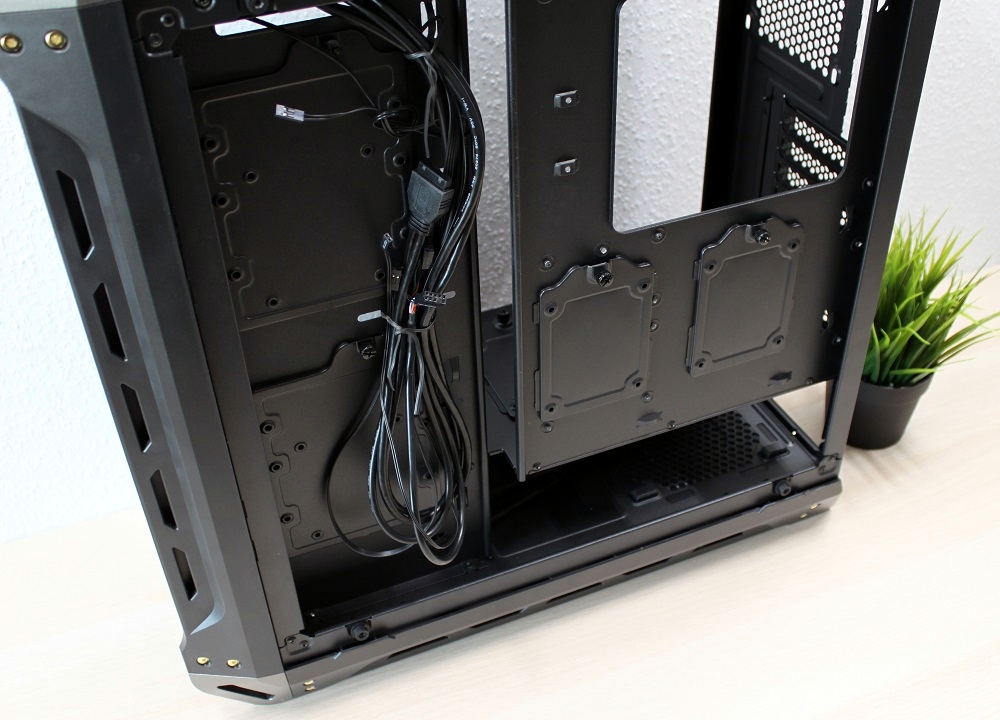
The inner backplate gives us the last fittings, namely for tidying cables and mounting another two 3.5” SSDs. This gives a total of four 2.5” plus two 3.5” SSDs, or six 2.5” if you so choose. The backplate also contains a big opening for replacing your CPU cooler plus providing room and maneuverability for cabling.
We have now reached the most important part: Squeezing in all the hardware into the Panzer-S case.
Cougar have provided a bit of help in the form of three Molex/3-pin adapters, a bag of screws, some strips, a manual, and a PSU bracket needed for inserting the power supply from behind, as this will be your only option due to the integrated PSU cover.
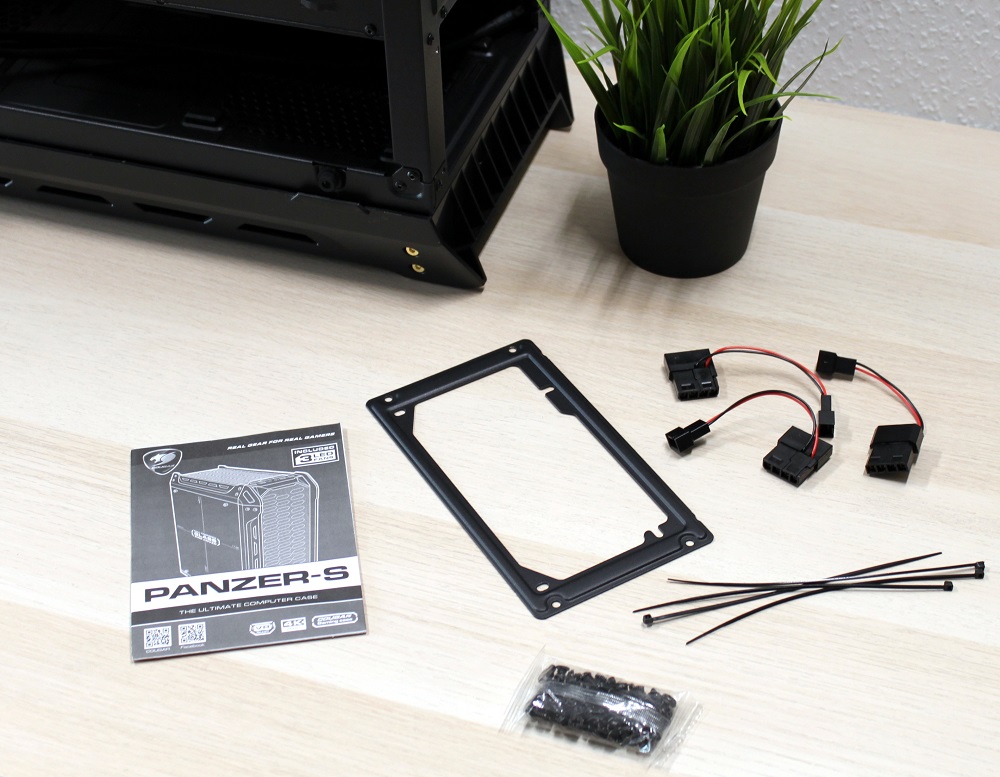
A good advice is inserting the cables into the power supply before installing it in the case (if you’re using a modular version, obviously). Trust me, it requires some serious ninja skills to do it once the PSU is fitted in the case. So, when cables are 100% secured to the PSU, first then insert in into the bracket and the case.
Whatever you use 2.5” or 3.5” drives, you will need a screwdriver (the tool, not the drink). The installation is basically the same either way.
The assembly of the Panzer-S computer case was simple. You have tons of space to work with, as this mid-tower is as big and open as a modern-day RPG map.
You have plenty of cabling options with large openings and lots of room for the cables on the back end. If you have some leftovers, you can easily stow them away out of sight underneath the PSU cover.

Let us turn the camera to the size with all the action and look at all the Christmas lights (I’m talking about RGB) turned on.
Even with an ATX motherboard and a fully-grown graphics card, you still have ample legroom inside Panzer-S. It supports GPUs ranging up to 400mm in size and CPU coolers ranging up to 160mm, so it’s fair to say that this case can contain a lot.
The hole in the PSU cover for cables is brilliantly placed; it fits perfectly with our PCI-Express power cables. Had we mounted our SSD here, it would have been beautifully displayed.
As I mentioned earlier, at first glance, there doesn’t seem to be much room to play with above the motherboard. But in reality you can easily place a radiator as thick as 25mm without any issues as there is lots of free space above the metal frame.
Let us round up this cabinet with a nice portrait of the front with every light turned on. Overall, this is a solid mid-tower that meets most requirements of the modern-day computer, but it does have a few shortcomings.
So, let’s put away the screwdriver (the drink, not the tool) and finish up with some concluding remarks.
At a suggested retail price of $159, this mid-tower cabinet is good value for money. Especially with is any features.
If you can live with the small flaws and shortcomings, you get a lot in return for a moderate investment.
With Panzer-S, Cougar have managed to produce a full-grown mid-tower which is reasonably priced without compromising with many of the features you need from a modern computer case in 2019.
For instance, you get doubled up on tempered glass on both sides of this cabinet, not just on the left.
The “S”-version of the Panzer case is the luxury version with three LED fans preinstalled. They only have red light, which in my opinion is a shame. 2018 was the year of RGB, and 2019 will only continue that trend, and I would’ve liked to see some RGB fans instead, even though they would have increased the cost a bit.
The overall build quality is impeccable. It is rock solid, especially when taking the price into account.
The open design with a built-in PSU cover makes lots of room for both cooling and hardware inside the case. This makes installing any type of modern system is relatively easy, provided they are within the ATX/CEB form factor standards, of course.
You have four dedicated slots for 2.5” drives and two more for 3.5”. The latter number is not overly impressive, but on the other hand you don’t necessarily need that many, as their capacity continues to rise.
I’ve decided to give the Cougar Panzer-S computer case a solid 8/10. It is an above average case, even with its flaws and details that could’ve been reworked.
Besides the red-only LED fans, the dust filters at the bottom are hard to reach and handle, as they are of the hard and plain plastic kind.
Last, but not least, all cables on the top panel are fastened. This makes cleaning unnecessarily complicated, especially if you have fixed them somewhere inside the case.
These are all minor issues that most of us can learn to accept, maybe even adore. If you can do that, the Panzer-S from Cougar is a computer case worth a look – it is undeniably worth its reasonable value!
Good:
Not so good: