26 Apr
gadgets


Central Specifications
As you can see from the specifications here, we have a printer with a large build volume. The resolution is not the highest compared to other printers on the market, but it is in a range that should be fine for most hobbyists.
A tour around the Elegoo Jupiter SE
The Jupiter SE comes in a large and heavy box, so it can be an advantage to have two to get it in place. However, everything is well packed and properly secured with foam. There is a bit of unpacking and assembly you have to go through before you can get started with the machine.
Jupiter SE is an update of the first Jupiter printer from Elegoo. The goal has clearly been to hit a cheaper price point.
Where the first Jupiter printer had a metal construction and could be opened with a door in the front, Elegoo with the Jupiter SE has taken the same approach as their smaller printers in the Mars and Saturn series.
This means that we have a large red acrylic UV shield over the machine and then the machinery itself at the bottom. The large shield has to be lifted off to access the printer, and with a printer this size it can be a bit of a challenge. In any case, it requires that there is good space above the machine, and you must have somewhere to put the shield while you are working with the machine.
However, Elegoo has made it so that there are two handles that need to be screwed onto the sides of the shield to make handling it easier.
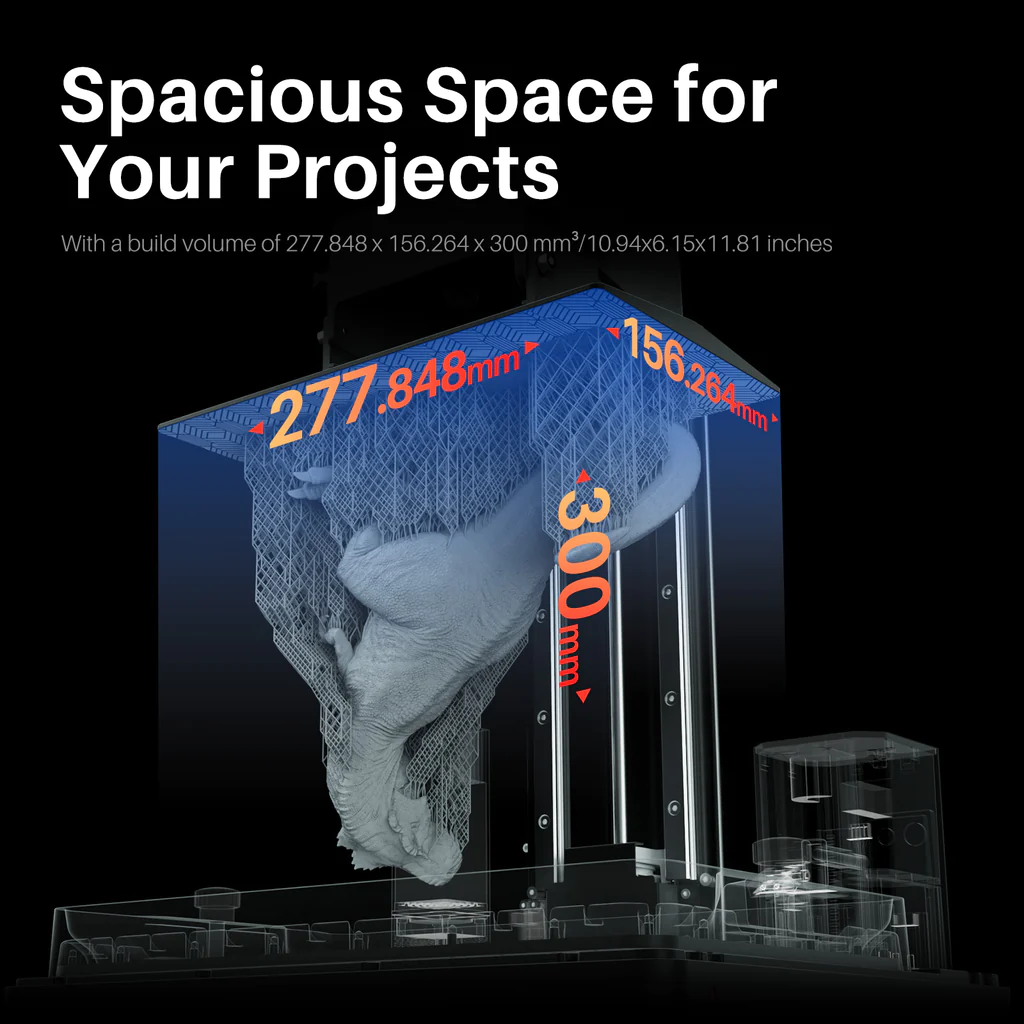
As I said, the Jupiter SE is a large printer and this can of course be seen on the build plate that comes with it. Overall, there is a build volume of 277,848 x 156,264 x 300 mm.
The surface of the plate is the same pattern that Elegoo has been using for a while now on all their newer printers.
The first upgrade compared to the previous Jupiter printer is that we now get a four-point leveling system. When you are up to the size of the Jupiter SE, it is clearly a plus compared to the previous method from Elegoo.
The 12.8” large 6K Mono LCD screen is secured with tape around the edge, but does not come with a real screen protector. The 6K resolution means, together with the screen's physical size, that the pixel resolution on the X/Y axis is 51um.
There are two pieces of functional accessories for the Jupiter SE in the form of an air cleaner and then we also get an automatic Resin pump system. It can use a small sensor to measure the amount of resin in your vessel, and then fill it up continuously from a connected bottle of resin.
If you need to empty your vessel, this can also be done with the system that can pump your resin back into the bottle. The system is designed to fit the bottles that Elegoo has for their own resin. So if you don't have your resin in a bottle of that type, you may have problems using the system.
Both the air cleaner and the filling system are powered by two USB ports inside the print chamber.
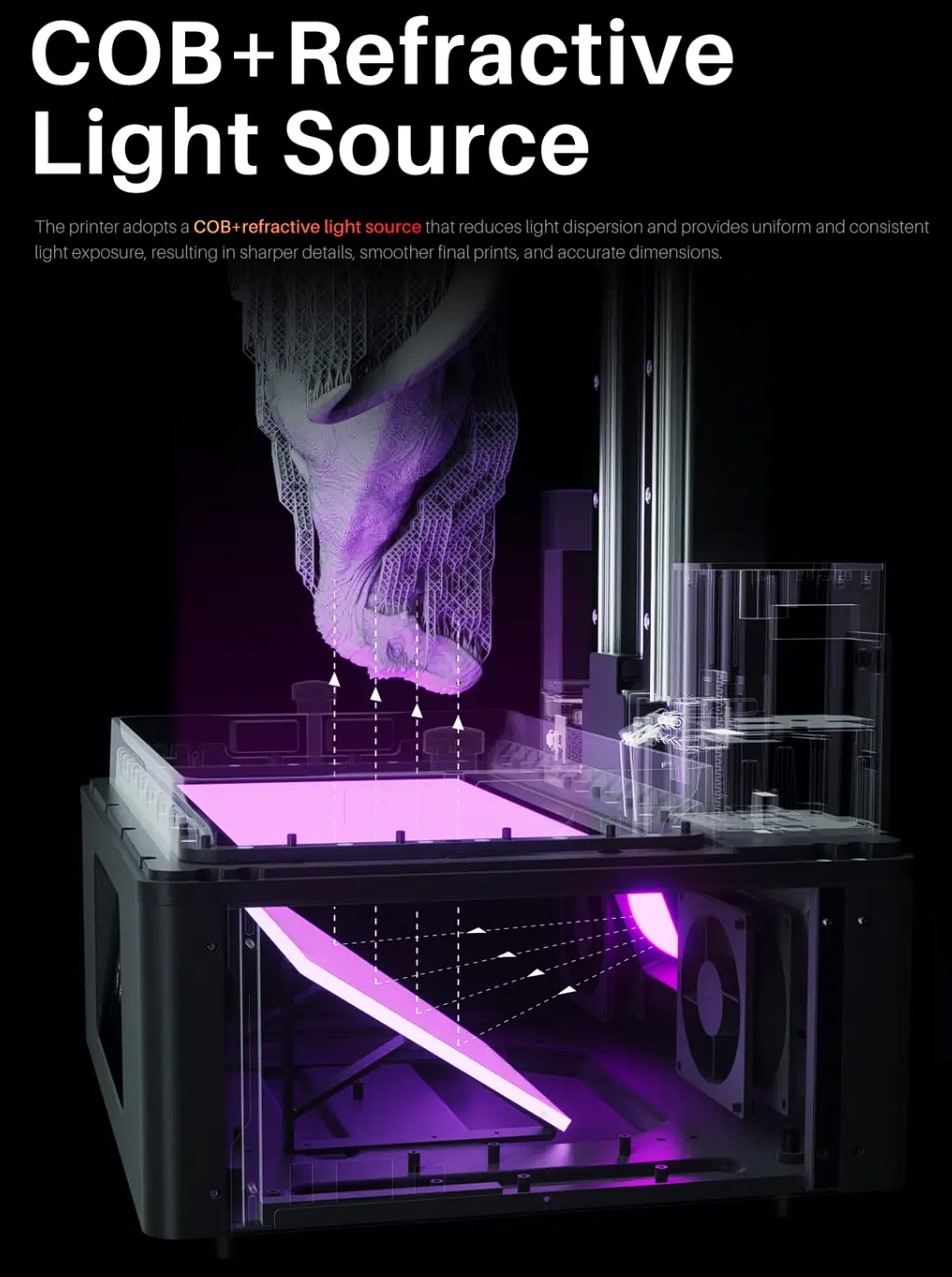
The UV light in Jupiter SE is a COB Refractive source that should help to ensure a uniform light distribution over the entire print area.
However, it all generates a lot of heat, and this means that the Jupiter SE has a rather large cooling system that takes up quite a bit of space at the back of the machine. So that's one more thing to be aware of when you have to find a place to place it.
The resin tub is aluminum and comes with Elegoo's upgraded 2.0 PFA film, which should ensure that your prints do not stick.
All control of the machine can be handled via a 3.5" touch display on the front of the machine. The power button and the USB connector for files are located on the right side of the machine. There are no networking options with the Jupiter SE.
Setup and software
Just like on an FDM printer, the setup of a Resin 3D Printer is also somewhat twofold. One side is the physical setup and the other is the preparation of your prints via software on your PC. On top of that, there is a cleaning process afterwards with resin print that you have to be aware of.
Before you can get started with your Resin printer, you must of course have it physically set up. The main thing in this connection is to make sure that your build plate is level. For that purpose, Elegoo has sent a large sheet of paper, as the Leveling Card. It is slightly stronger than normal printer paper.
From here, you simply have to loosen all four screws on your build plate and then via the touchscreen ask the printer to run your build plate all the way down, while you have the paper lying between the screen and the build plate.
When that has happened, you hold your build plate in place, with a firm pressure on the plate, while you cross-tighten the screws again. After this, you ask the machine to save the new Home Position and you should be ready to print.
It wasn't quite that easy for me though. It took a few tries to get things right. I found that I had to press down on my build plate quite a bit harder while tightening the screws before I got a good enough result out of it.
Here it will help if you have help so that one person can keep an even pressure on the plate, and another person tightens the screws.
However, it worked out in the end and I haven't had any problems during my test after that.
The included resin pump system is easy to set up. Simply plug the pump into its USB slot in the print chamber. The other end is just for screwing into the resin bottle. When you get started, the system automatically measures via the sensor whether there is resin in the tub and pumps in more if there is not. A good safeguard if you want to utilize the entire large print volume. Then you don't risk running out of resin along the way.
The print tank on the Jupiter Se is a big deal, and there can easily be more than a liter in the tank. This means that the system is emptying a whole bottle and would like more if it could.
However, it is easy to skip via the menu on the touch screen and one liter is more than enough for quite a few prints, depending on the size of course.
However, I discovered an unfortunate thing about the resin pump system, in connection with my attempts to get the build plate level process in place. Here I had emptied the tub and taken it out to make another level attempt.
However, the moment I turned on the printer, to run things into place and clamp the plate, the system started pumping resin to fill the tub. The tub which was not there, which resulted in it pumping resin directly onto the LCD screen.
Fortunately, I was right next to the machine and could turn it off immediately, so it was minimal how much it managed to waste. It was, however, an annoying detail, and here I would have liked to have seen the pump system have a manual on/off button, so that you can switch it off when, for example, you have to service the machine.
As it is now, you can only avoid that situation by not having a bottle of resin connected to the system, or simply physically removing it from the machine.
After a bit of tidying up and cleaning, I was ready again after the accident.
On the supplied USB stick, there are a few test files that you can use as an initial test before committing to larger prints. They are ready for printing and I gave the classic Elegoo chess piece a try.
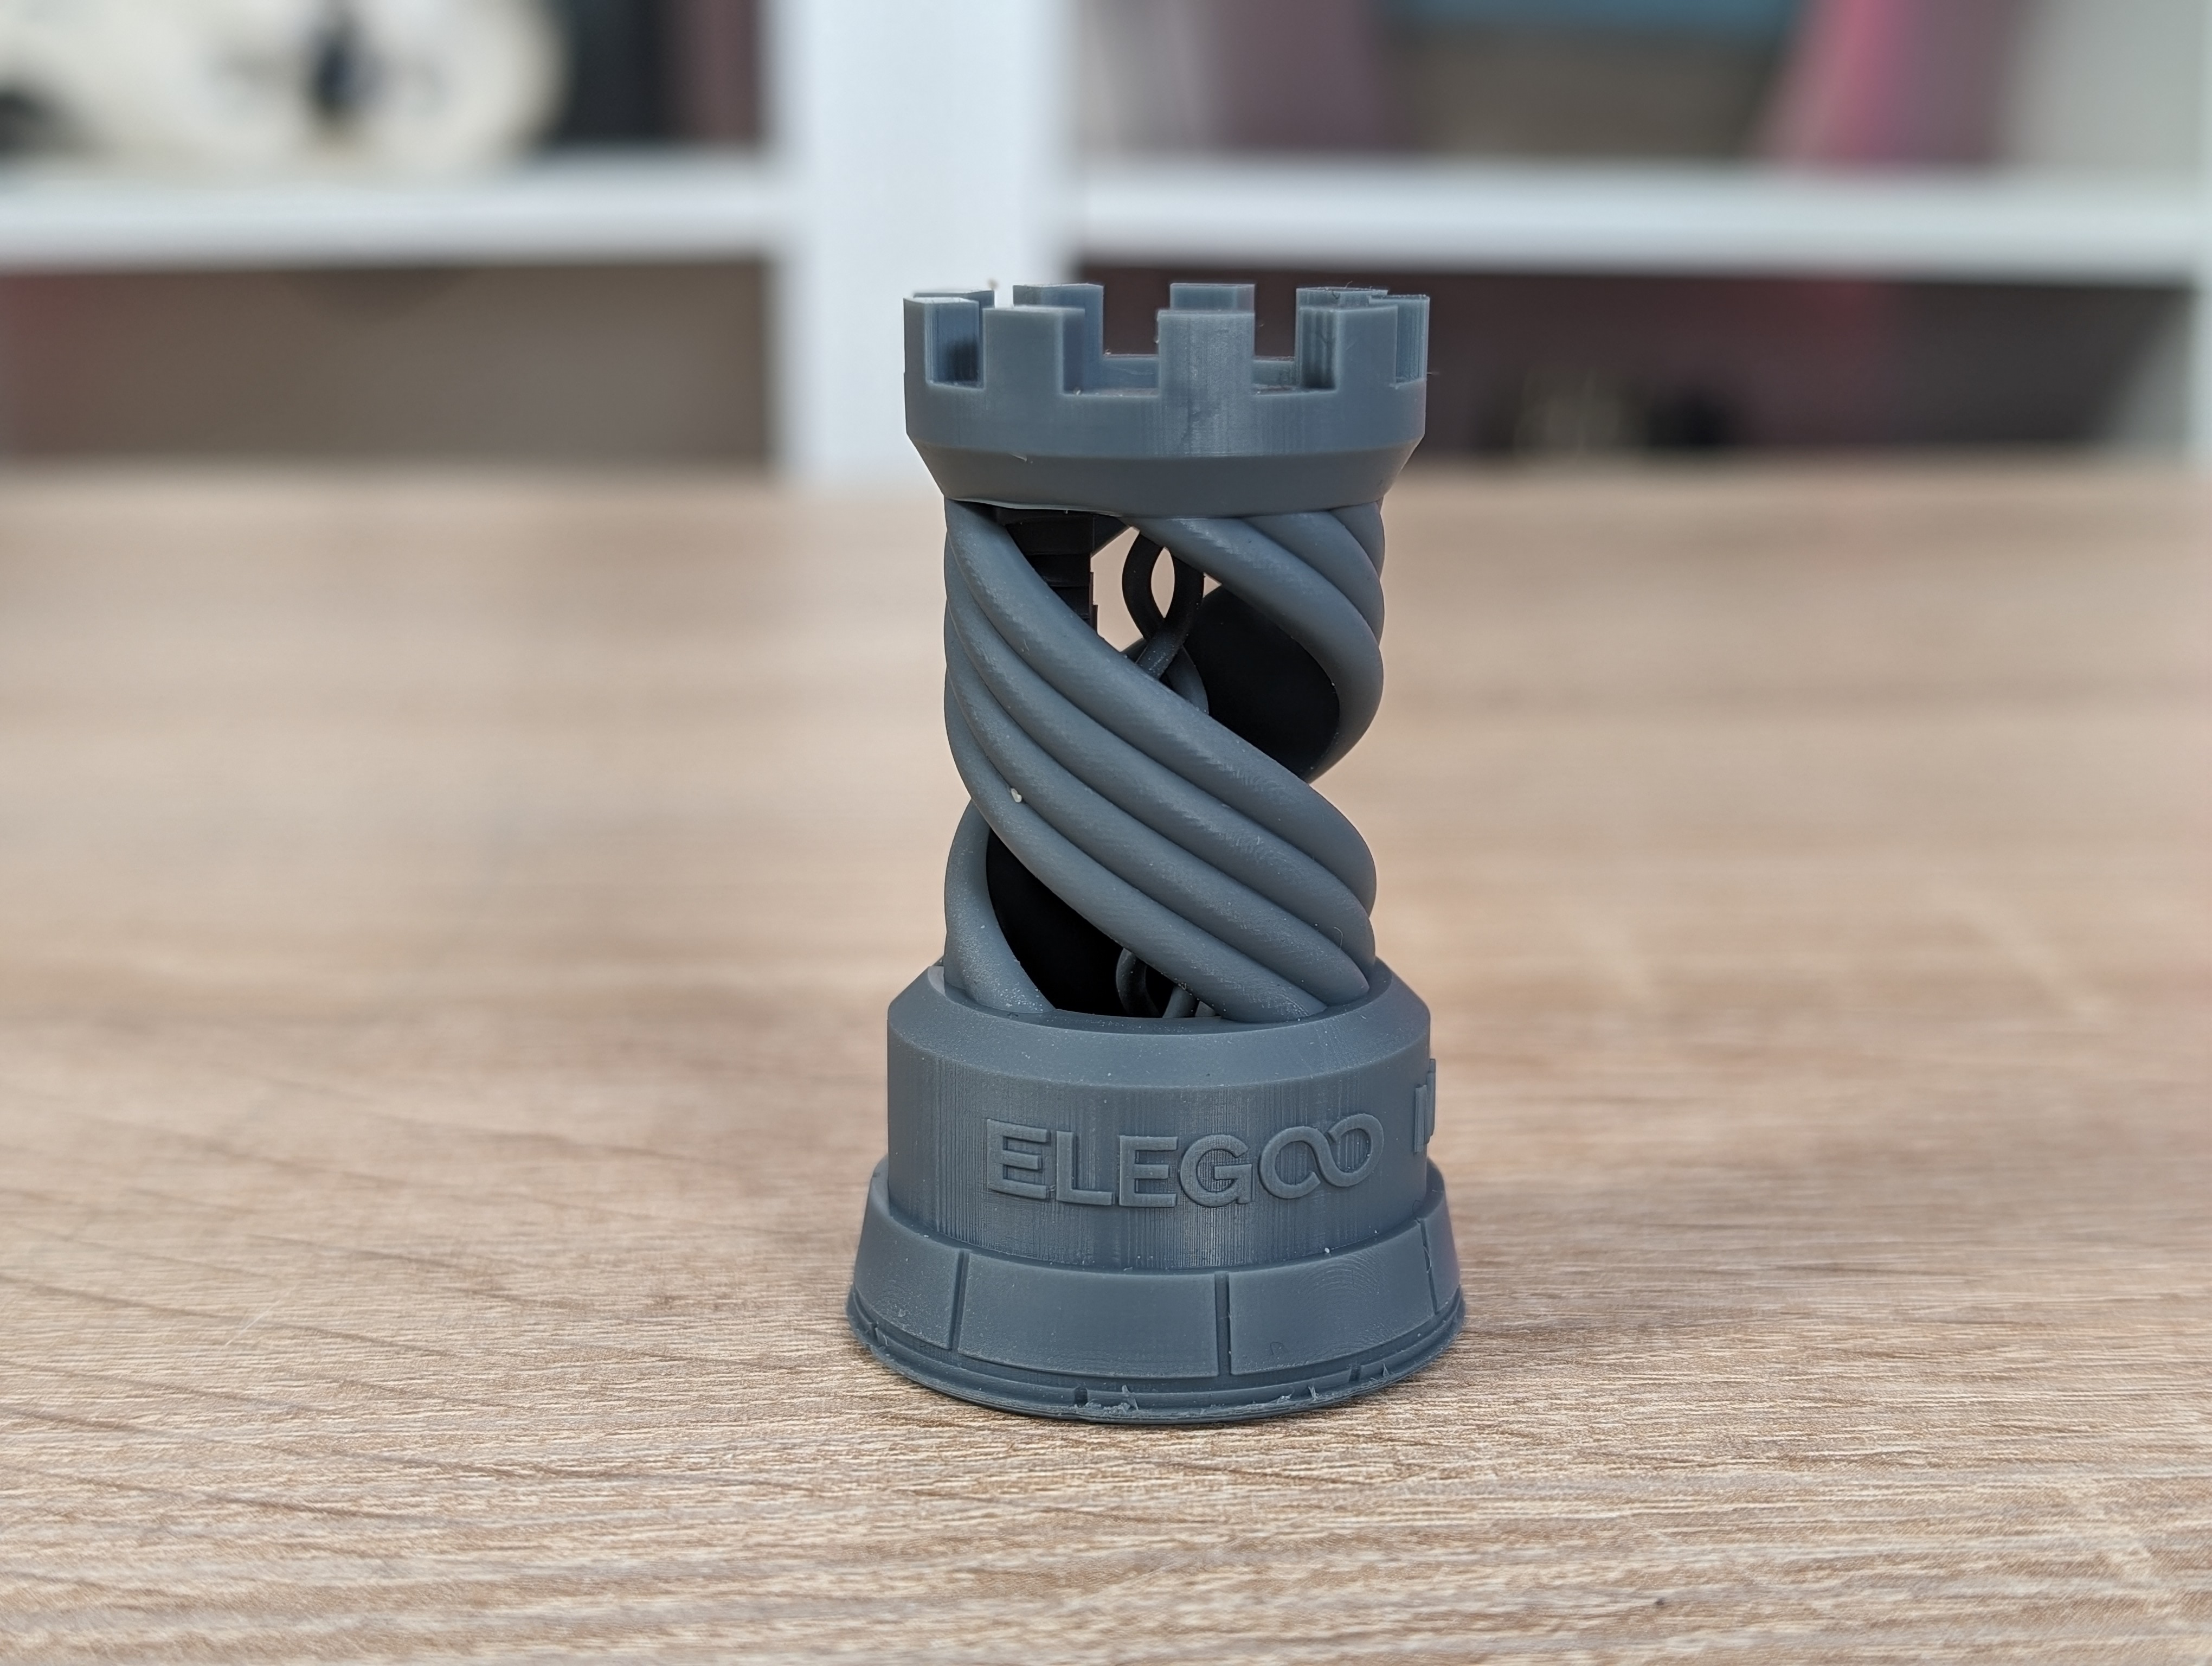
The result was super fine and gave a good indication of what the printer is capable of.
Software
There is a multitude of different software you can use to prepare files for your Resin 3D Printer. Elegoo itself highlights Chitubox, Lychee Slicer and VoxelDance Tango. The first two are fairly widely used, while VoxelDance Tango is a bit newer on the market.
I myself have the most experience with Chitubox and clearly prefer it for slicing my files. If you have to create supports on your files, then there are a lot of really good functions in Lychee Slicer.
Which one you prefer is of course a matter of taste, and I don't have the time and space here to review the pros and cons of the various pieces of software. Elegoo does not develop any of them, so in the end their performance does not fall back on Elegoo.
As I said, I myself prefer Chitubox, and it is primarily the slicer I have used during my test.
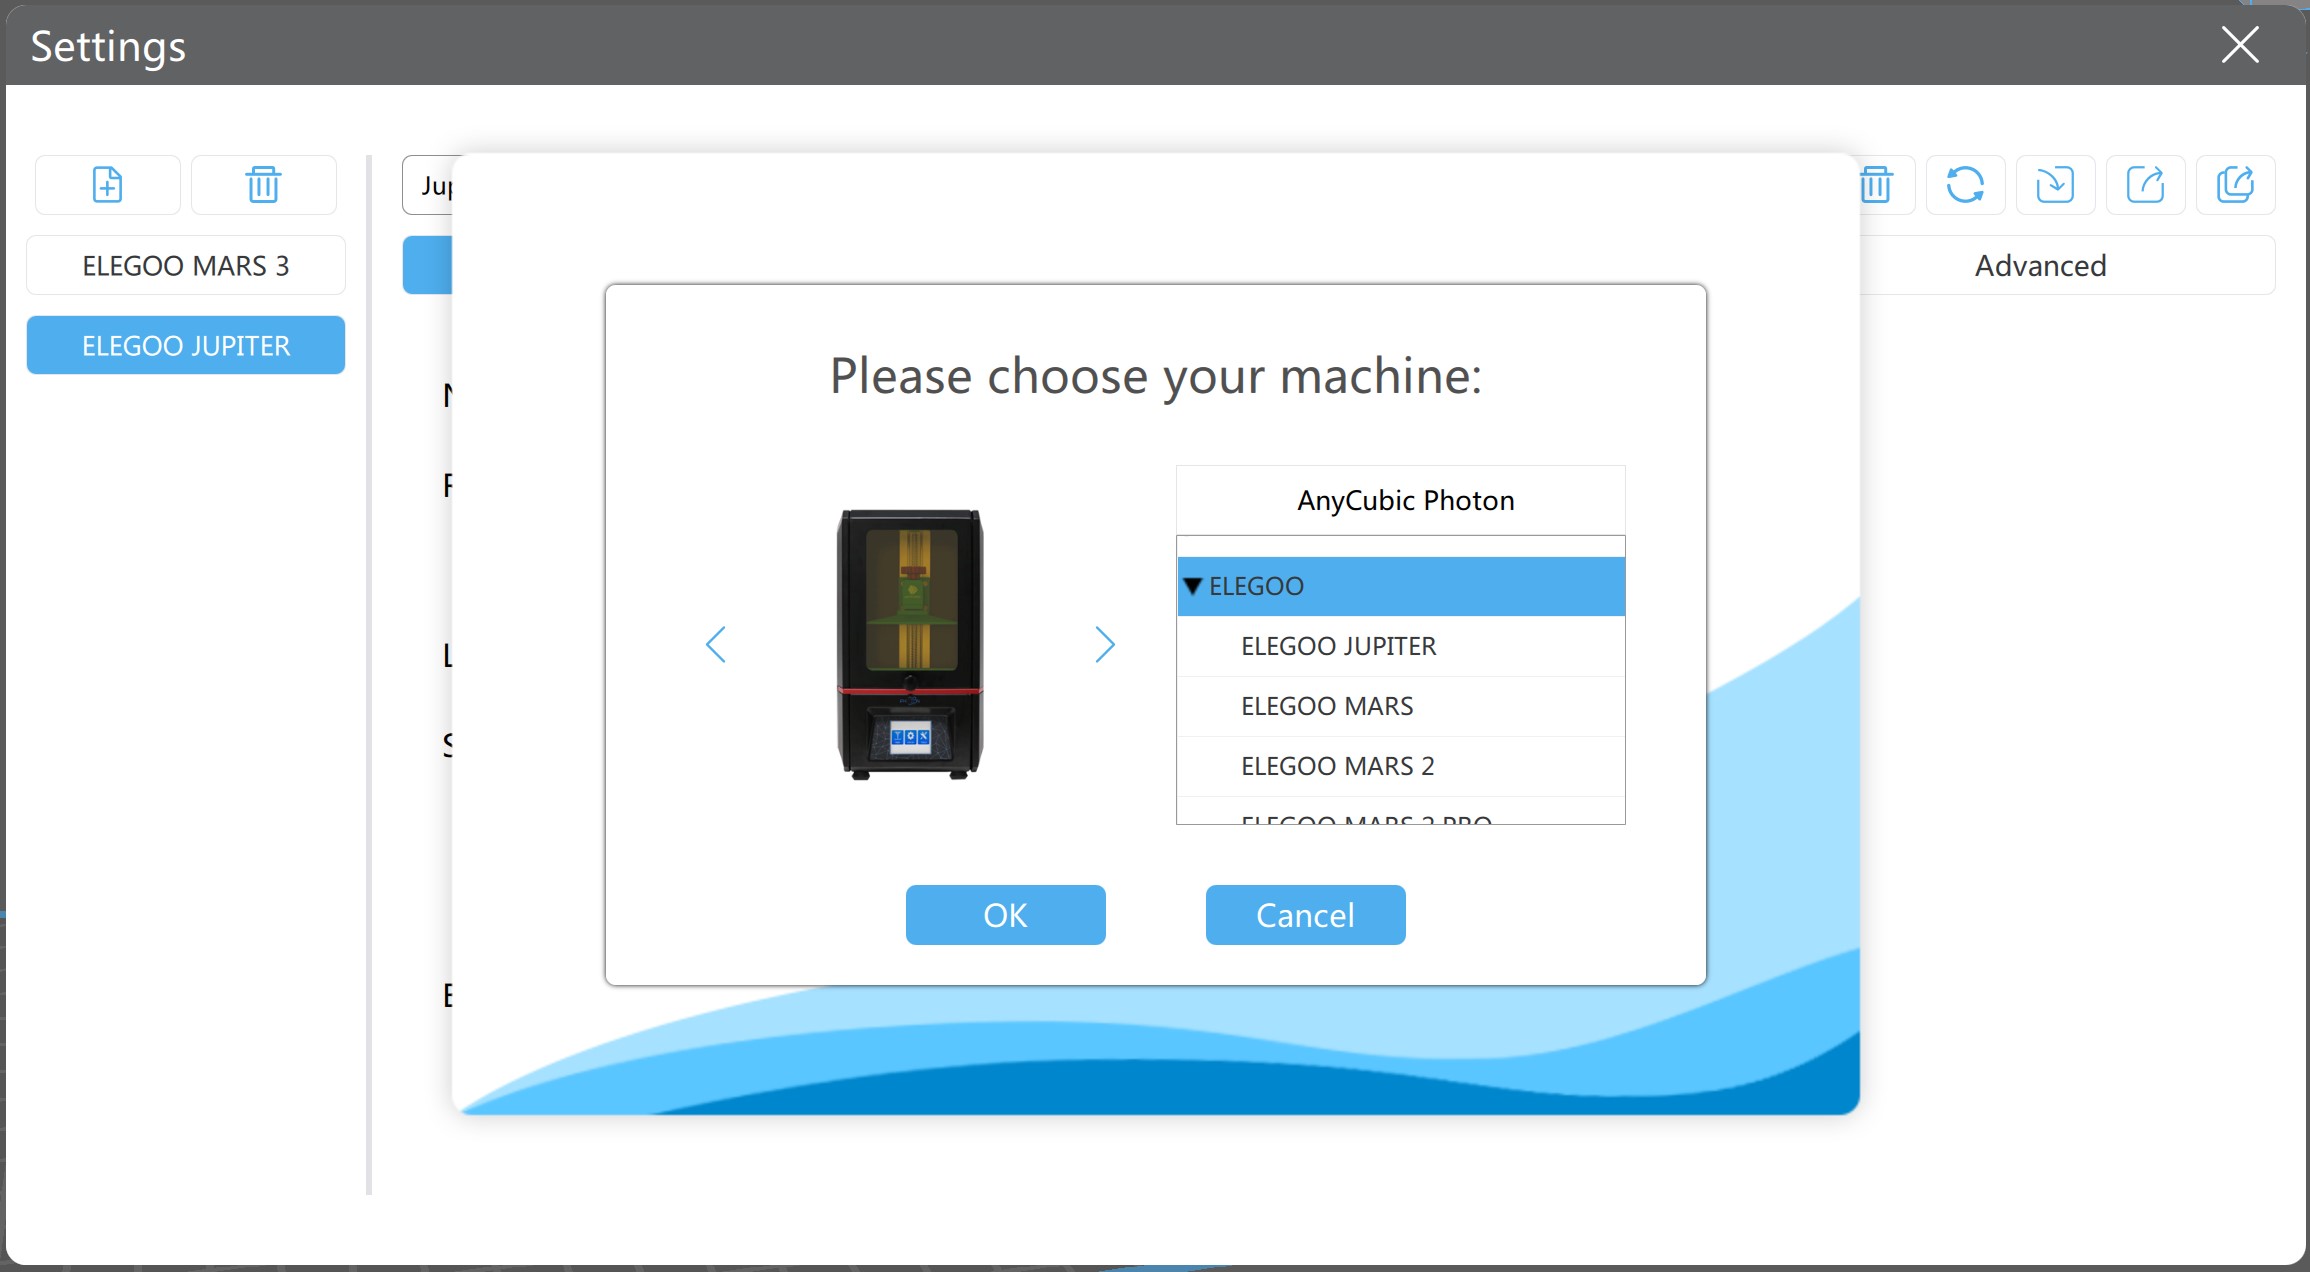
During my test there was no dedicated profile in Chitubox for Jupiter SE. However, there is one for the previous Jupiter and since the hardware is in many ways the same, I chose it and it has worked fine during my test.
The software part on the printer itself via the touch screen is sensible and has been working well during my test. It is possible to continuously adjust settings for your print if you need it, which is a big plus.
Testing
With the test file well over, there was naturally something else to do as well. I started by doing a few exposure tests to see if I could tune the settings a bit.
The exposure time in the Jupiter profile in Chitubox was set to 2.5 seconds by default. However, I was able to get it down to about 1.8 seconds without any problems, cutting some of the print time that way.
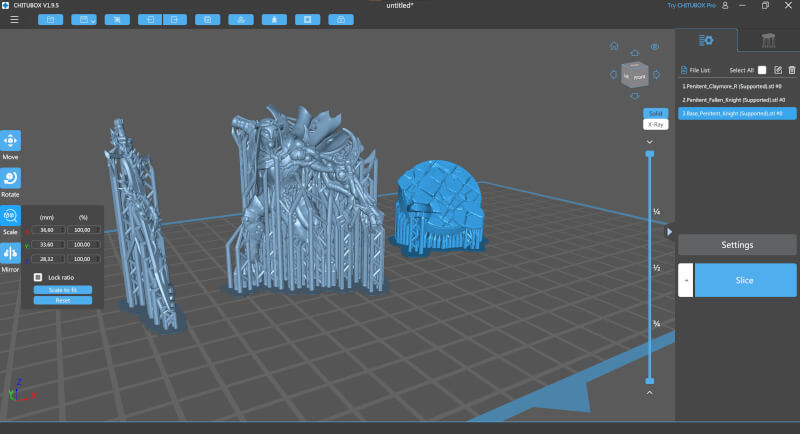
When that fine-tuning was in place, I jumped on to a few files made by the Artisans Guild from their Rodburg Cultist of Melmora release from December 2023. These are files intended for use in tabletop gaming games, like Dungeons & Dragons or similar. Artisans Guild has also made their own Tabletop Skirmish game, in the style of Kill Team or Warcry from Games Workshop, where the characters can also be used.
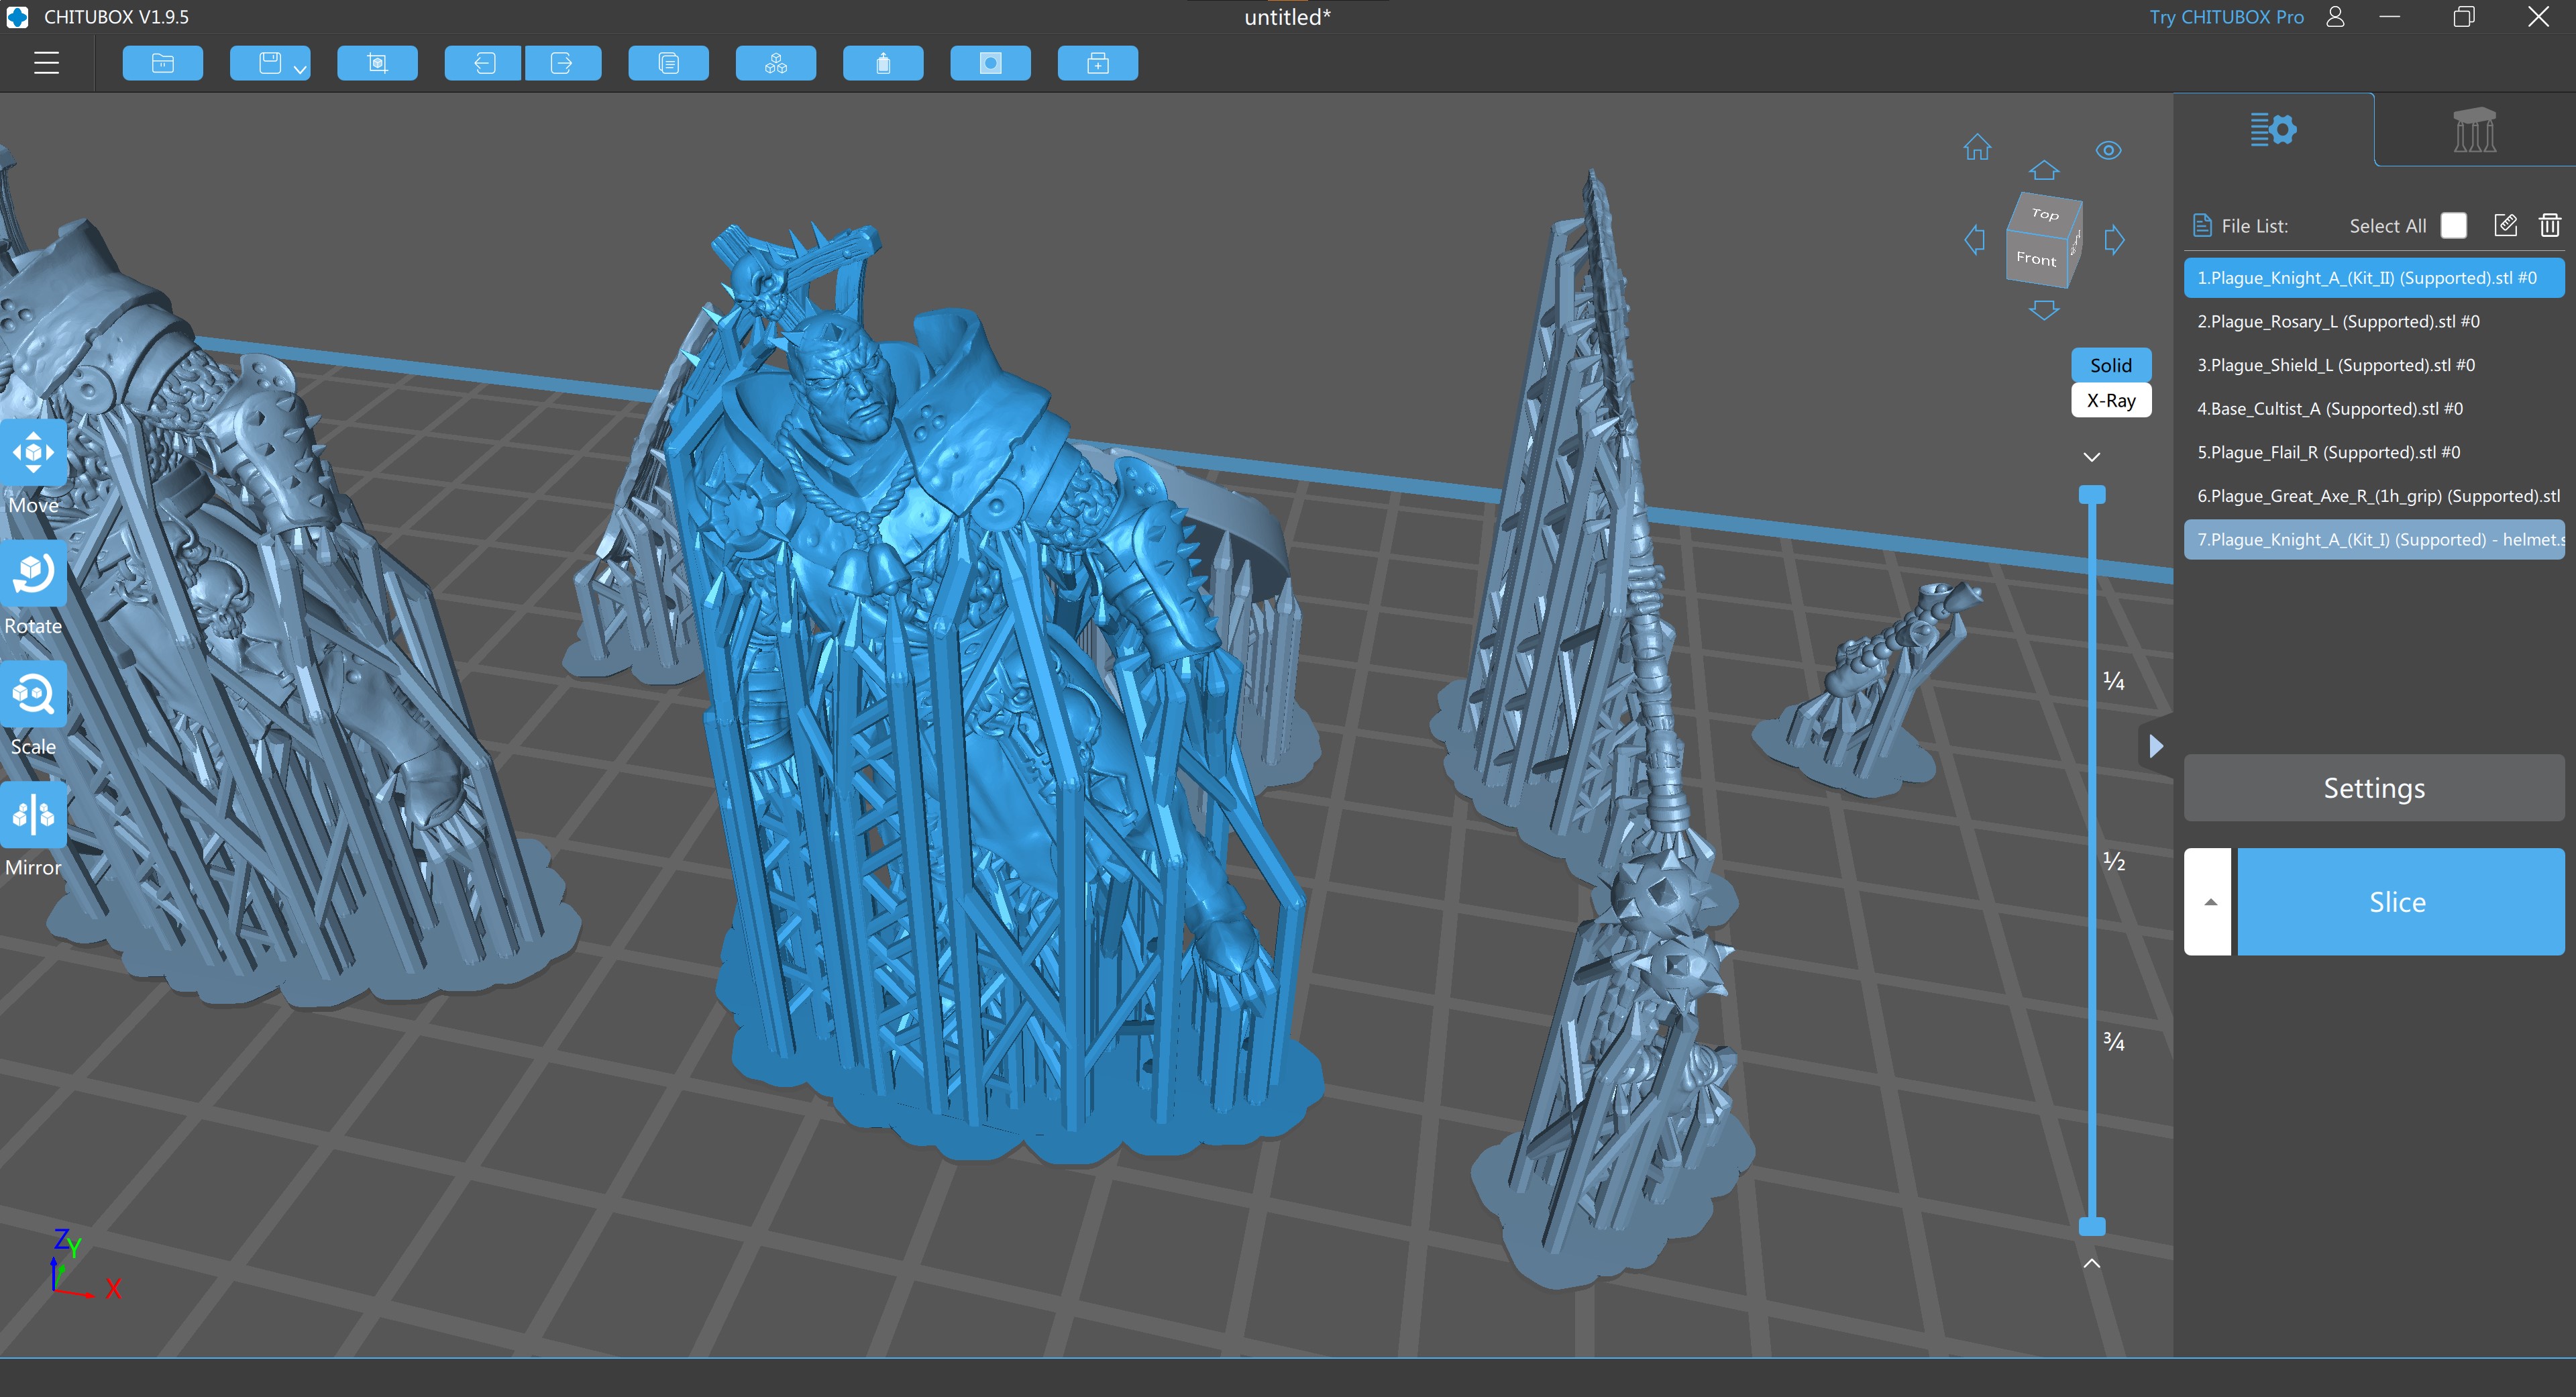
These are files that come with supports, so I did nothing but drag them into the Chitubox slicer, and made them ready with the customized settings.
From here it was straight into the printer and press print. For the prints I made during my test, I used Elegoo's own 8K Space Gray resin.
The result of the print was a small collection of super detailed figures. Even with the large macro lens on the camera, the details were clear in the small 32mm tall figures.
Under those conditions, it is possible to see the small layers in the print, but you have to really look for them to spot them.
With another good print behind me, I switched to something a little bigger. In order to compare the quality with the Elegoo Neptune 4 Pro that we tested not so long ago, our selected benchmark Red Skull file had to be tested of course.
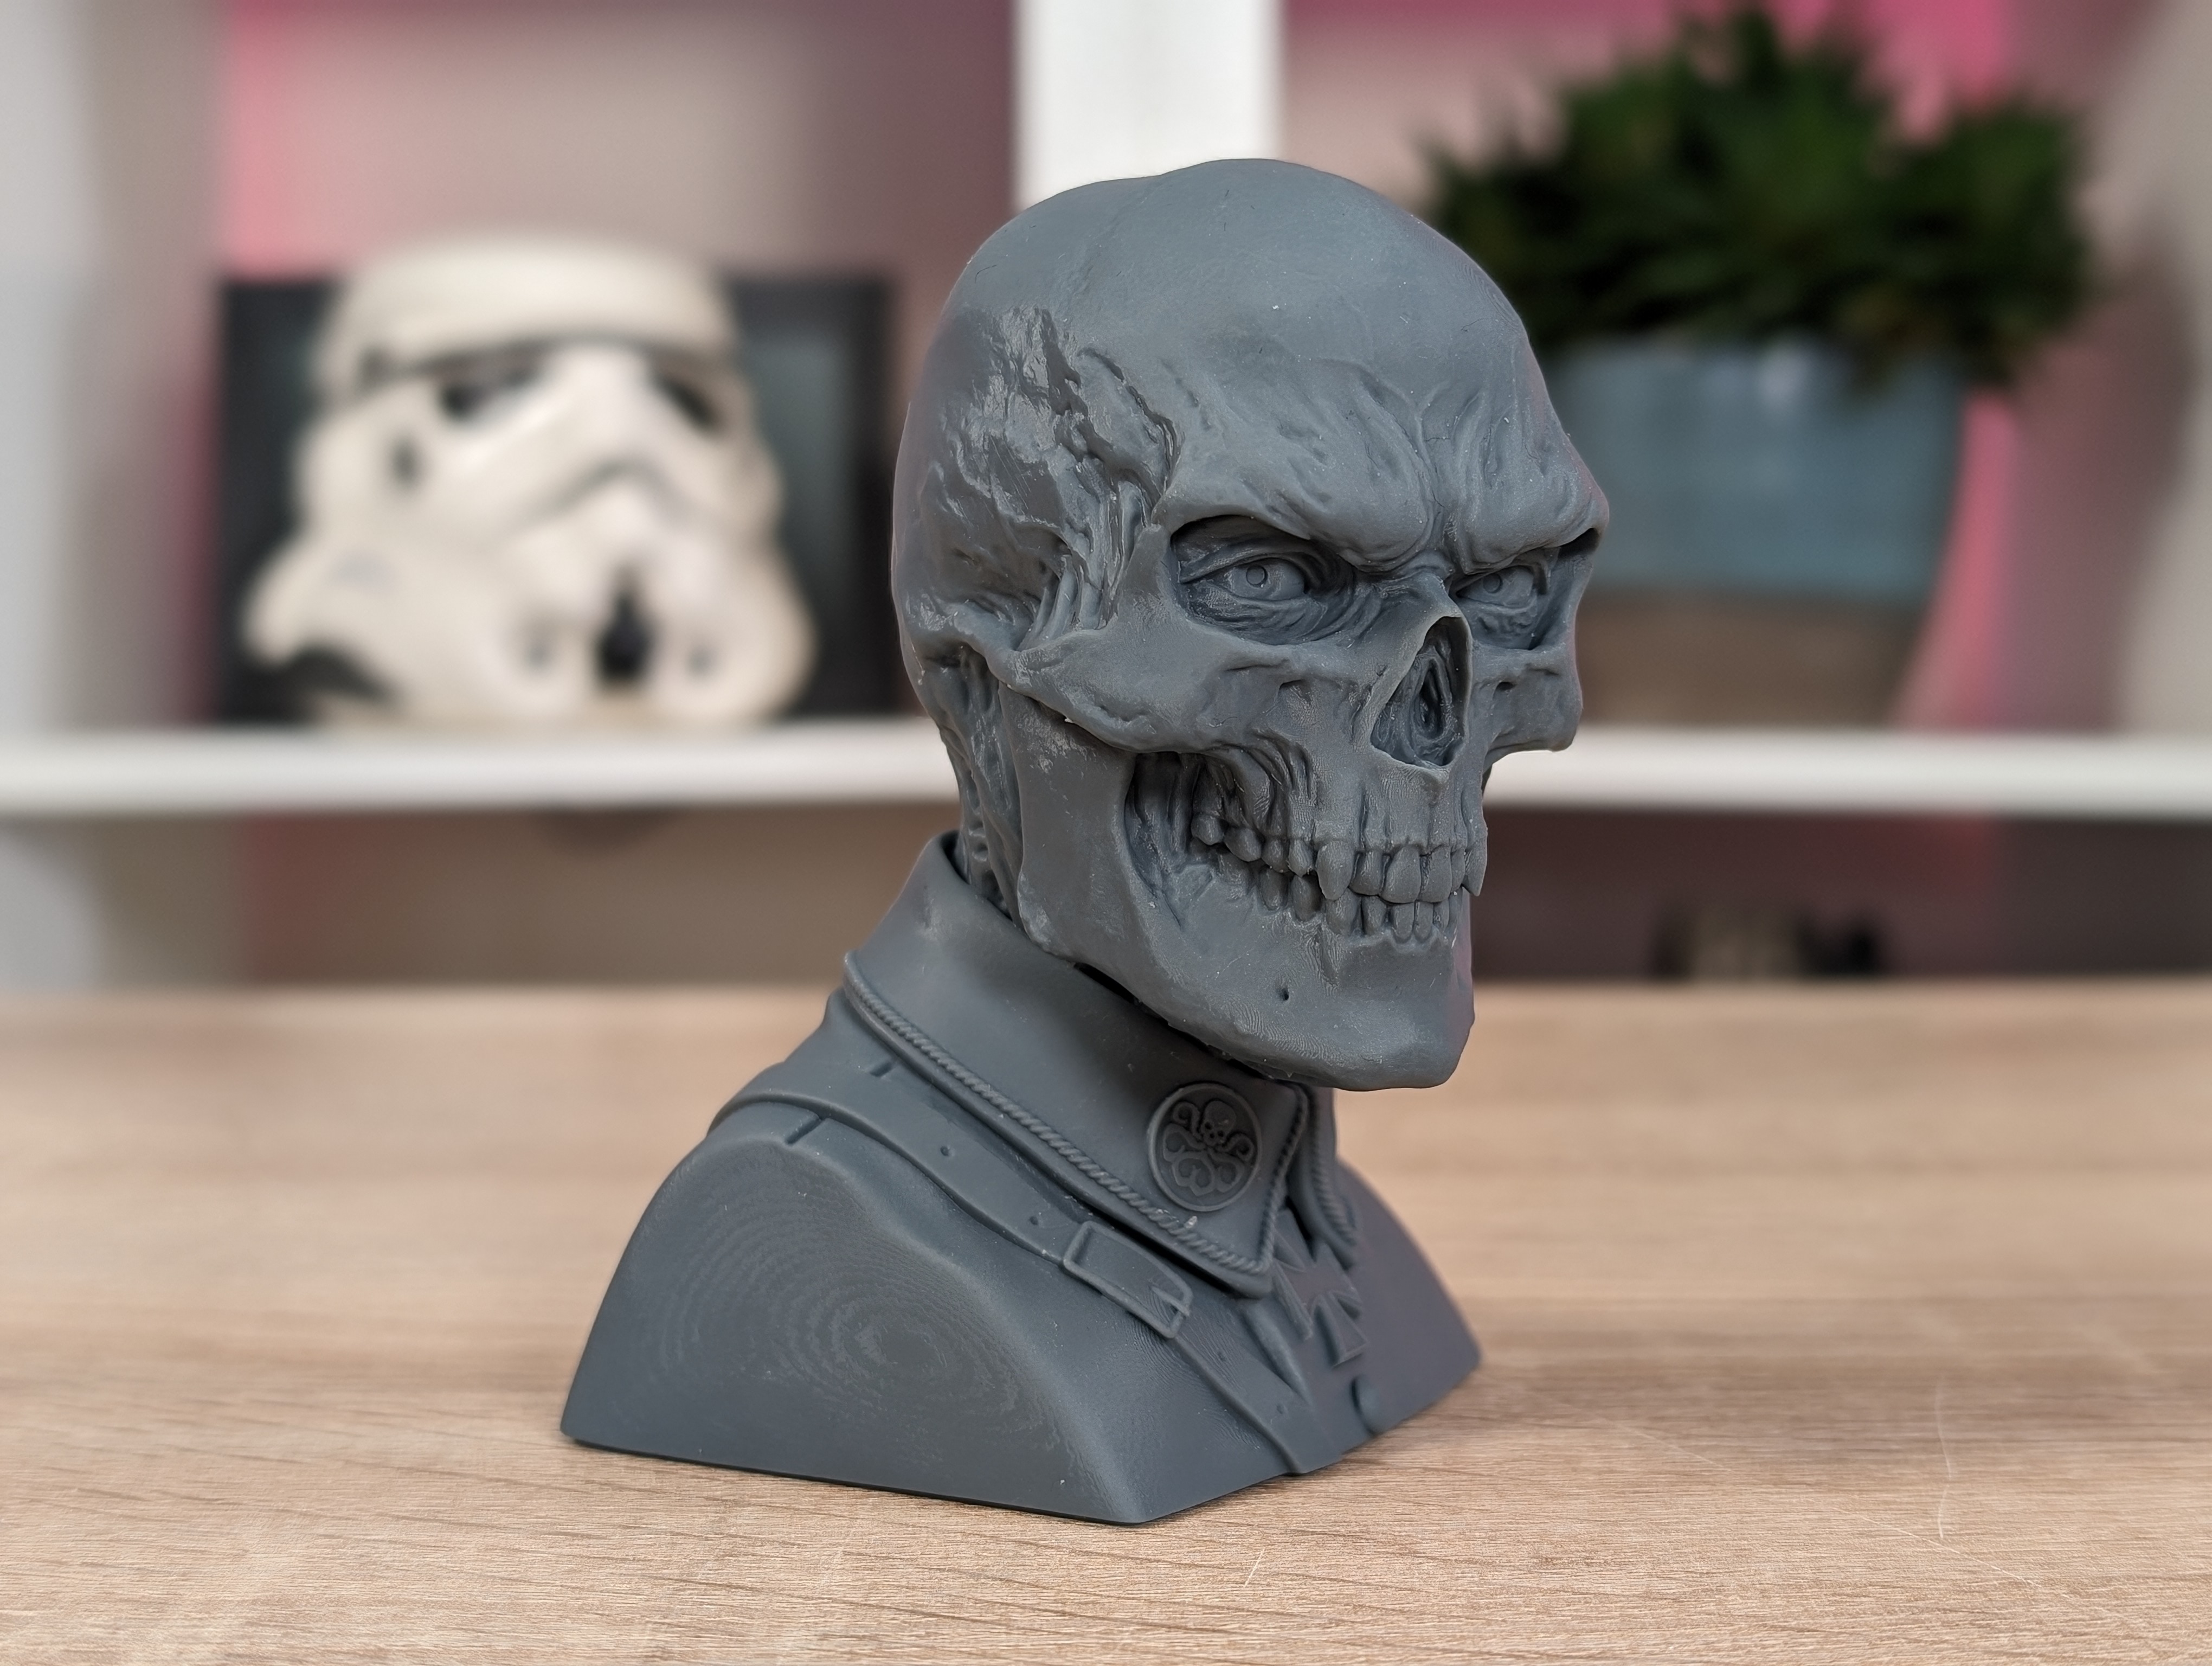
It started with the same settings and here too the print went without problems and I was left with a super detailed print.
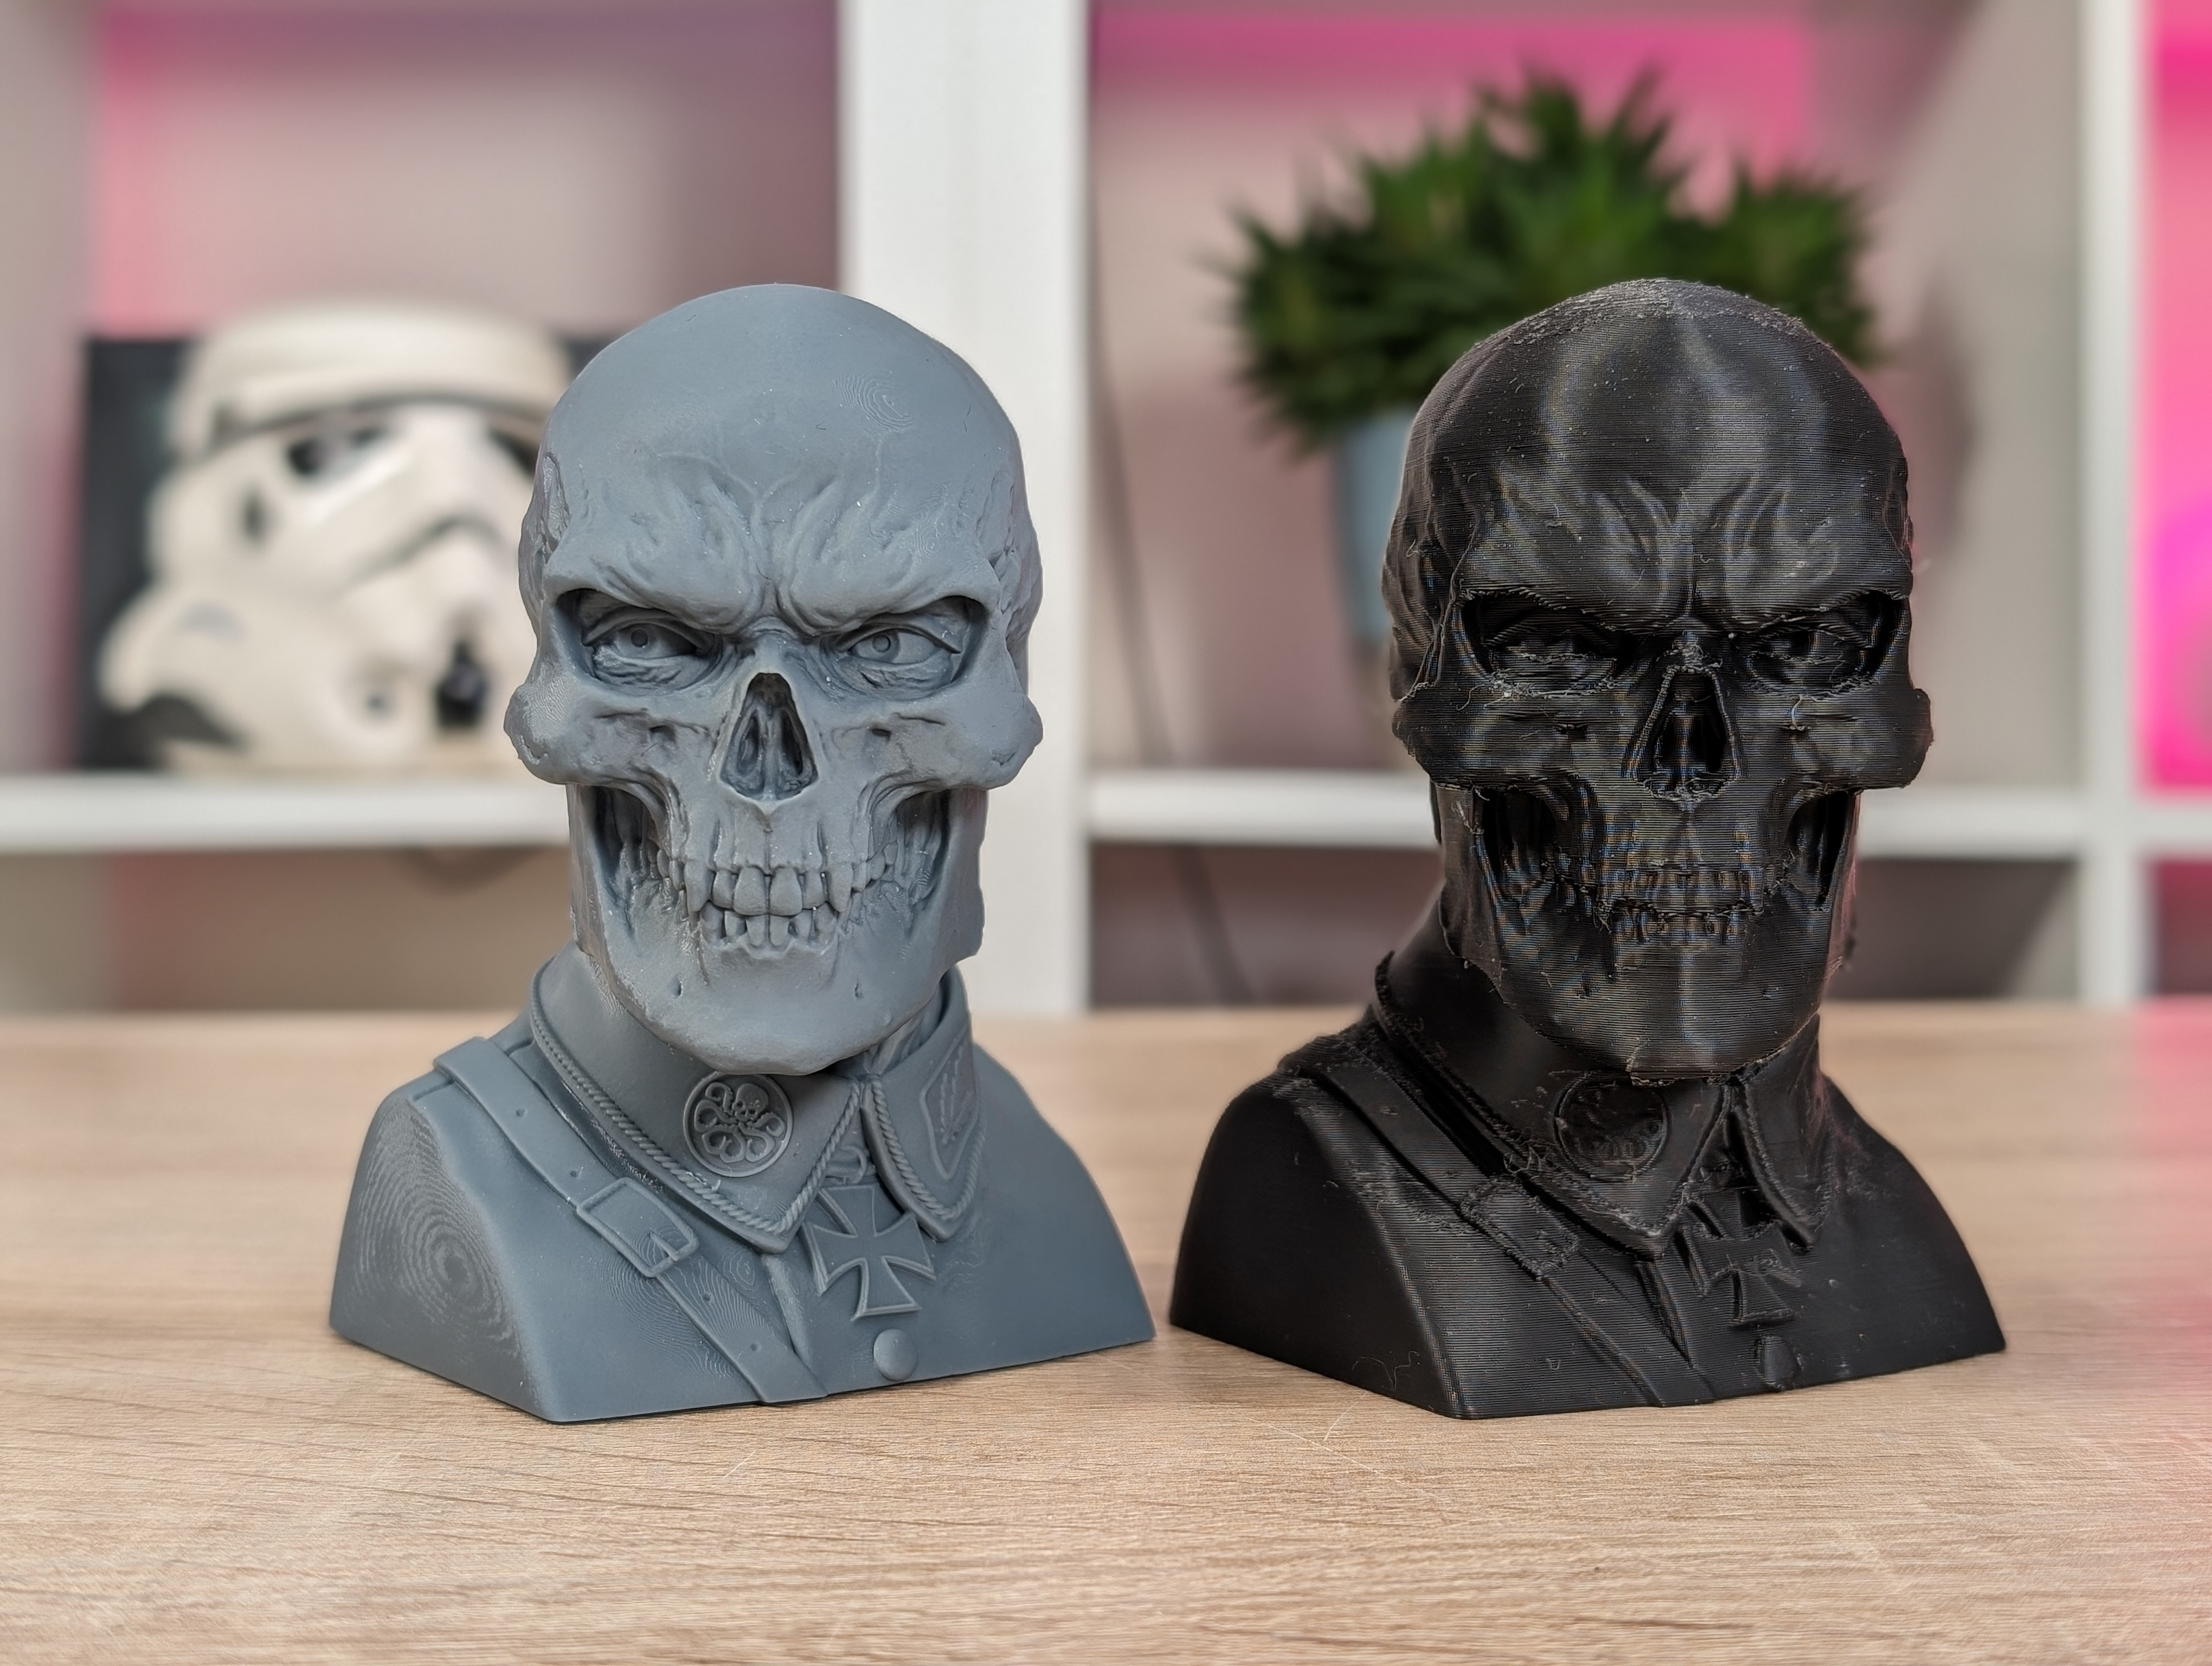
Hold up against the same file, but printed on the Neptune 4 Pro printer, you can really see how much more detailed you can print on a Resin 3D Printer, compared to an FDM printer. On the new print, there are details that are not at all possible to see on the FDM print.
The Jupiter SE is of course designed to be able to print large files, and this naturally also had to be tested. So as the final test I went big and tested a Booknook file from Miniatures of Madness. A print designed to spice up your bookshelf.
It was a print that utilizes the large build plate on the Jupiter SE somewhat more than any of the other things I had printed.
Here, too, the print proceeded without problems. Naturally, it took a bit longer and sucked a lot more resin. Apart from that, it was just off the road and the result was super good.
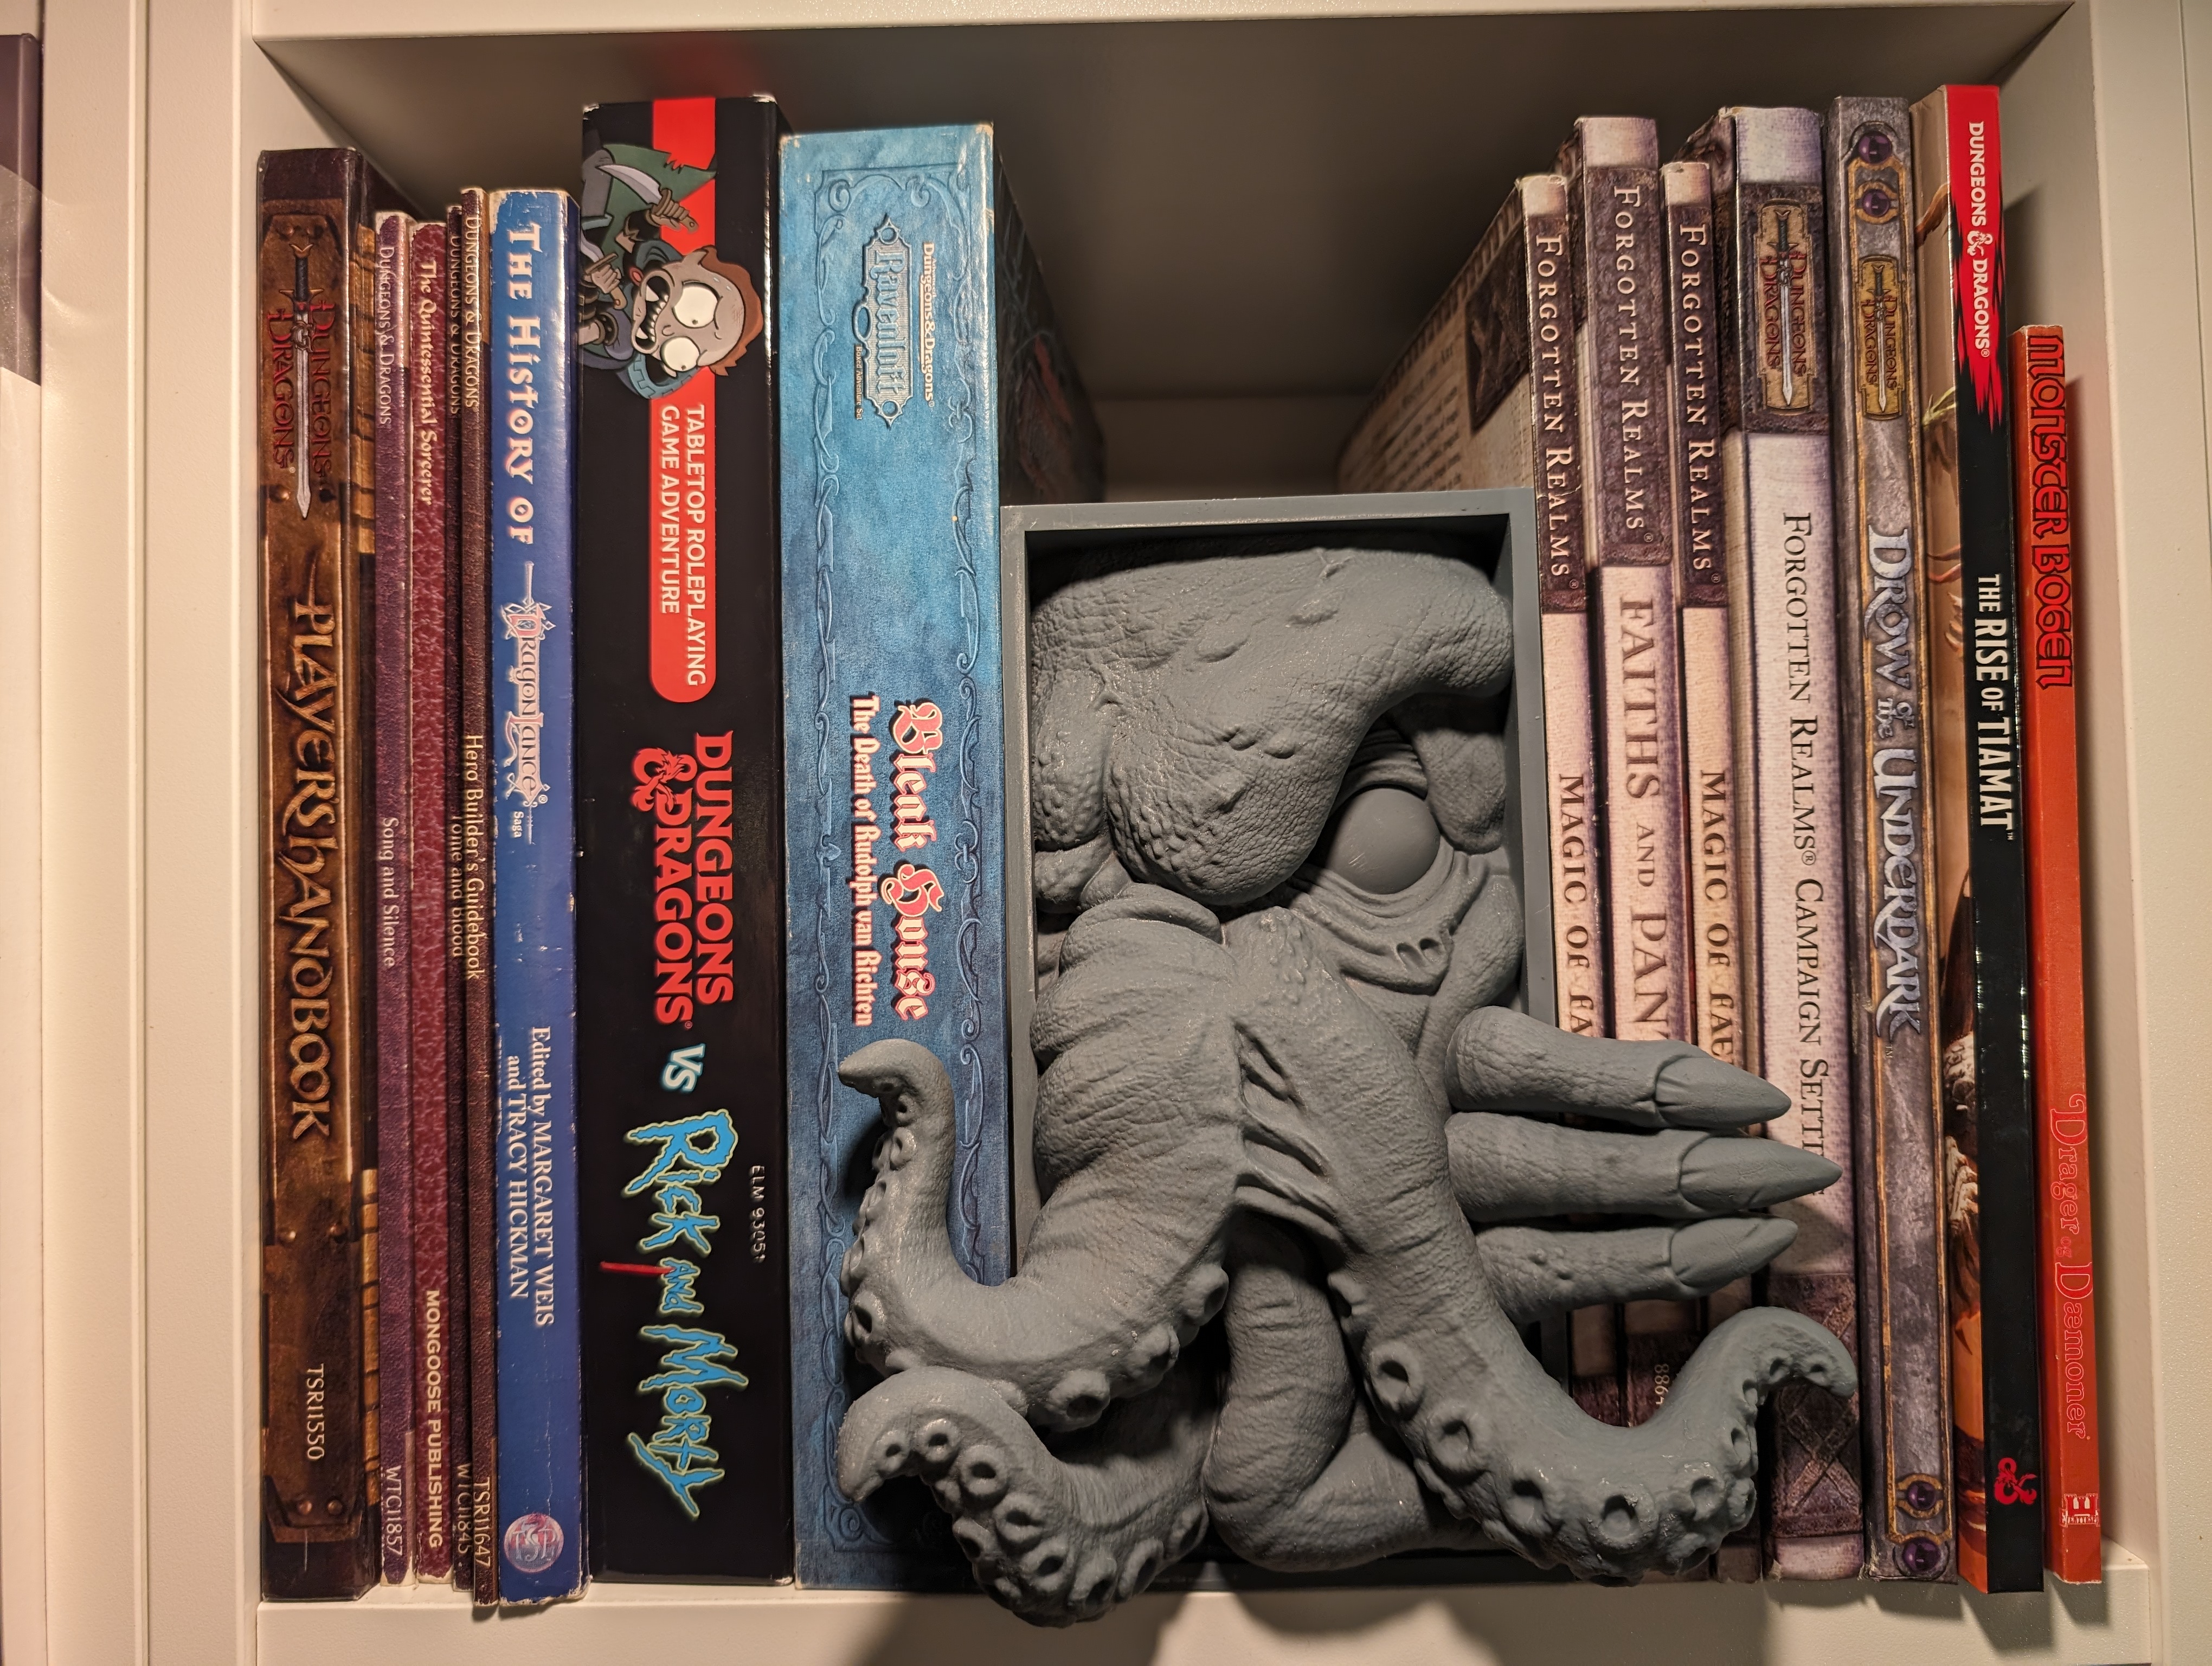
The large print was a difficult task to clean afterwards, but that is not surprising with a print of that size.
The result in the bookshelf looks super nice and really shows what you can get out of having a Resin 3D Printer with such a large build volume about the Jupiter SE.
Price
I can currently find Elegoo Jupiter SE with a currently reduced online price directly from Elegoo's own EU webstore of just over 800$. Compared to other printers of the same size, it is a reasonably competitive price.
Conclusion
If you are looking for a Resin 3D printer that can handle the very large prints, then Elegoo has created an affordable and user-friendly printer with the Jupiter SE.
However, there are a few areas where I would have liked to see Elegoo do a little better. In relation to their Resin pump system, I really would have liked to have seen that there had been a physical on/off button.
As I pointed out during my test, it was about to go wrong because the system starts pumping resin as soon as you turn on the printer, even if you don't have your resin tub in place.
It could also be cool if Elegoo had found a solution other than the large and unwieldy UV shield. It requires a good amount of space and is somewhat cumbersome. It is clearly an initiative that Elegoo has made to keep the price down, and in that connection you can hardly complain about it.
However, a printer of this size is not for everyone. If you want to get to know Resin 3D Print, I would definitely recommend starting with a smaller printer.
If you are aware of the challenges that a large printer brings and the specific "peculiarities" that the Elegoo Jupiter SE has with, for example, its resin pump, then I would say that you get a reasonable printer for the money without it reinventing the deep plate .
We end up with a final grade of 8, for a solid resin 3D Printer in large format that delivers good detailed prints.
Advantage:
Disadvantages: