Twinkly Gaming
The committee
We have previously looked at products from Twinkly which are suitable for outdoor use. This time it's time for a selection of their products, which will lend themselves well to creating the right atmosphere around the gaming setup.
Although the products we looked at in our Twinkly Outdoor Light guide can also be used indoors here, today I am looking at some completely different products.
We take a look at:
They can only be used indoors, but what they both have in common is that, via the Twinkly app, they have the option of a multitude of different light settings. Squares in particular stand out a bit from what else we see on the market for RGB lighting.
Squares
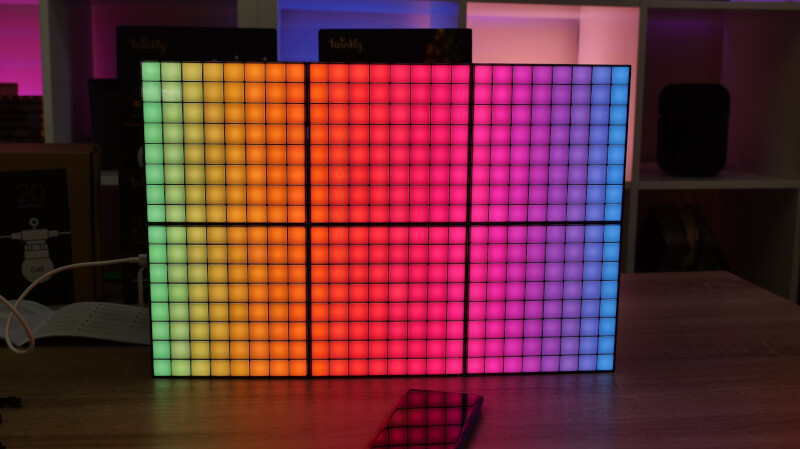
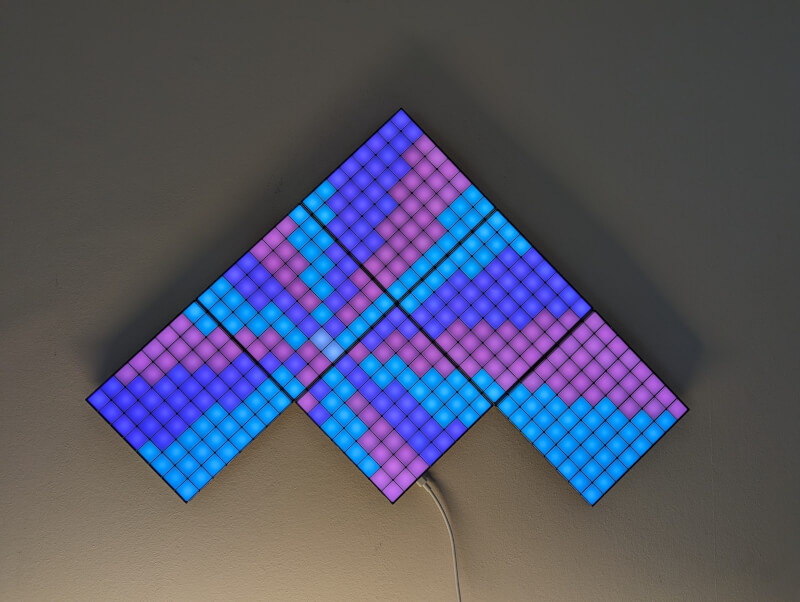
Squares is available in several versions, the one we visited is their Starter Set, which consists of a total of six LED panels.
Squares consists of a selection of LED panels which can be connected to each other and assembled in many different ways. In this way, you can choose a setup that suits your surroundings.
Each of the square panels is made with 64 LED lights, which can be programmed and controlled individually via the Twinkly app if you want.
In the starter set, it is a master panel to which the rest must be added. In the starter set, there is a master panel and five regular panels.
If you want, you can buy additional LED panels. Each master panel can have up to 15 panels connected and in that way you can create some fairly extensive LED setups.
The panels are assembled via connection cables and plastic clips, which are included in the box. It is only the shape of the individual LED panels and your imagination that sets limits on how you want to assemble them.
Flex
Twinkly Flex is a more traditional LED strip, albeit in a slightly more modern version than most probably think when you say LED strip. Twinkly Strip is available in two versions of two or three meters respectively.
It is an assembled and closed unit, and they cannot therefore be expanded with additional pieces. Flex comes with a fixed plug and a control box.
Just as the name suggests, it is of course a flexible strip, which can therefore be mounted in quite a number of ways.
Plastic fittings are included in the box, so you can mount Twinkly Flex as you like. There is a selection of straight and 90 degree brackets, so you can be a little creative with the placement.
Setup and control via the Twinkly app
Just as we looked at in our Outdoor guide here , all setup on the other products here also takes place through the Twinkly app on your phone.
It's a straightforward step-by-step guide in the app that takes you through the setup.
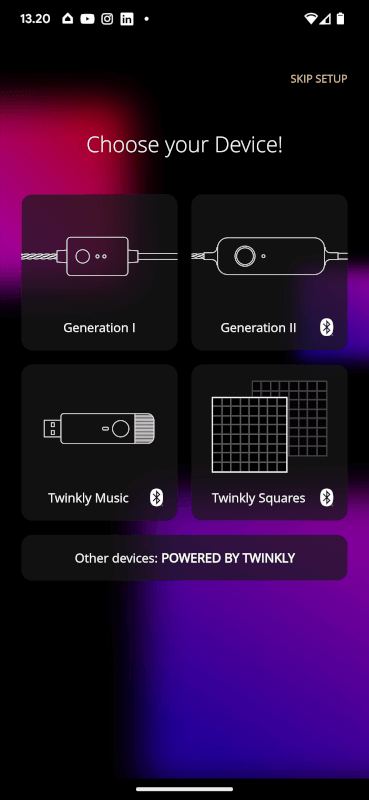
You have to connect the light to your home WiFi along the way, so you have to have the code ready for that along the way.
Once your light is set up, you have a multitude of different options for control and settings via the app. It is also possible to easily and quickly update the firmware on the devices, so that you always have the latest functions available.
On the completely simple front, it is possible to set up timers. In this way, you can let the light turn on and off automatically at an interval you choose yourself.
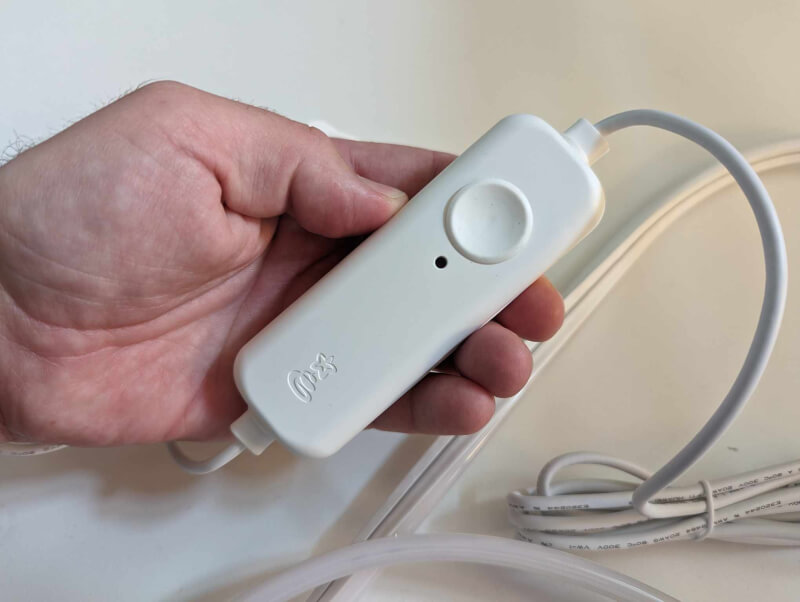
However, the Flex light also has a physical control option on the cable. Here is the small control box that contains Bluetooth and the network. There's also a physical button that you can use to turn the light on and off, as well as switch between a selection of lighting effects and colors.
The Squares set here has a single button on the master panel, which can be switched on and off as well as switch between the light profiles you have saved on the set.
One of the great strengths of the Twinkly app and the light, depending on which light you want, is the possibility of a sea of different effects.
It can be anything from faint flashing lights to the huge rainbow of colors with rotating patterns.

There are a lot of effects to choose from, but there is also the option to adapt the existing ones or create your own from scratch. On that front, there are quite advanced options with different layers and effects that can be built on top of each other.
In order to get the most out of the many effects, however, it is also possible to map your lights via the app. So when you have set up the light where you want it, you can help the app map the light. In this way, the app knows where the different LED lights are located in relation to each other and the effects can then be used most effectively.
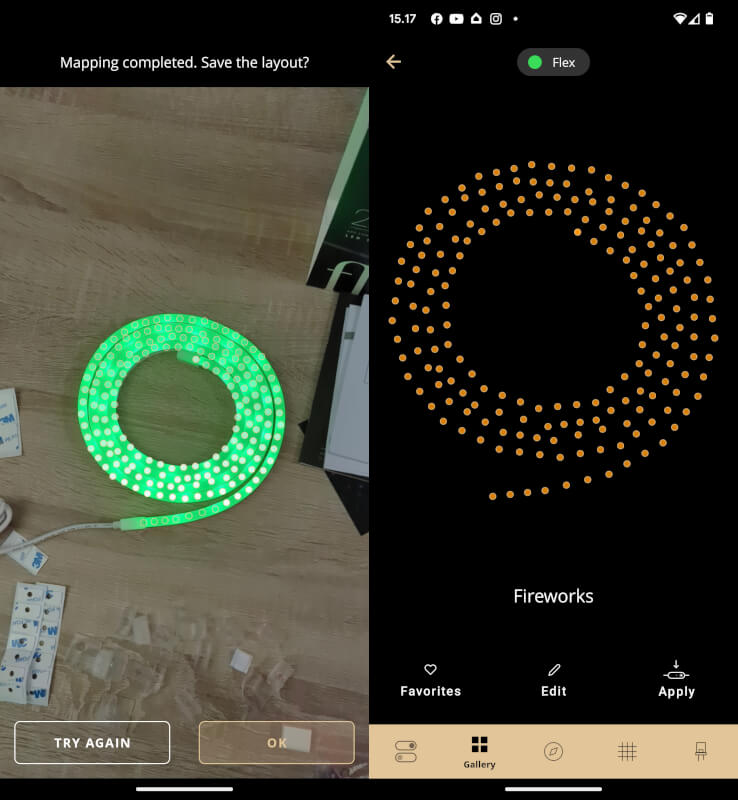
The mapping takes place via your camera on the phone, which registers the light. During the mapping, the light flashes in a specific way that the app can detect. The result is a fairly precise mapping of the individual LED lights.
The mapping is, for example, particularly relevant at Squares, as the LED panels can be assembled in many different ways. By mapping the lights, you tell the app how they are assembled and lights and effects can then be placed with the greatest effect.
![]()
With Squares, for example, it is possible to have pixel art running on the panels and this naturally requires mapping so that things will look right.
Physical setup
The setup of the Twinkly light will obviously mean a lot to the final look. In relation to Squares, you have to decide where in the house they should be located, but also how you want to assemble the panels.
They can be easily mounted on the wall via mounting holes on the back. A practical template is included in the box to get the screws in the wall positioned correctly.
In my case, I chose to gather them into a square first, to see the possibilities of Pixel Art. You get a good idea of the effect, but if you really want to use that part, more panels will probably make the effect better.
In the end, I chose to assemble the panels in a slightly more artistic "inverted V shape" and stick to a selection of different color effects.
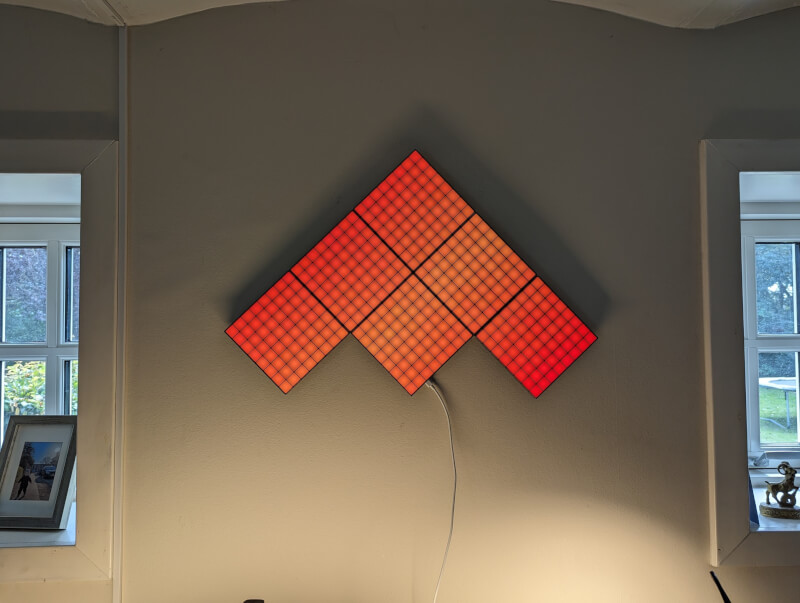
Setting up the Flex is perhaps a little more straightforward. However, the flexible LED strip also allows it to be mounted in different ways. You can, for example, use it to "draw" a pattern on the wall.
The included mounting brackets make it quite easy to mount it. They can either be attached with double-sided tape or screwed on.
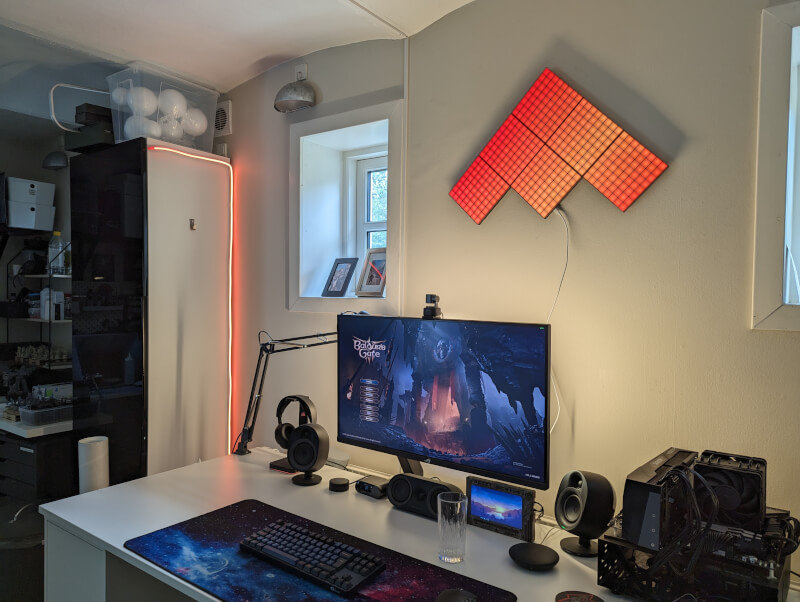
In my case, I mounted it on a cabinet immediately next to my PC, so that it could be placed on the wall in conjunction with Squares to create some mood lighting around the PC.
Interaction with other software
If you want to integrate the Twinkly light with your other software, then there is an option for that too. Twinkly can talk with most Smart Home solutions such as Google Home, Apple Homekit and Amazon Alexa.
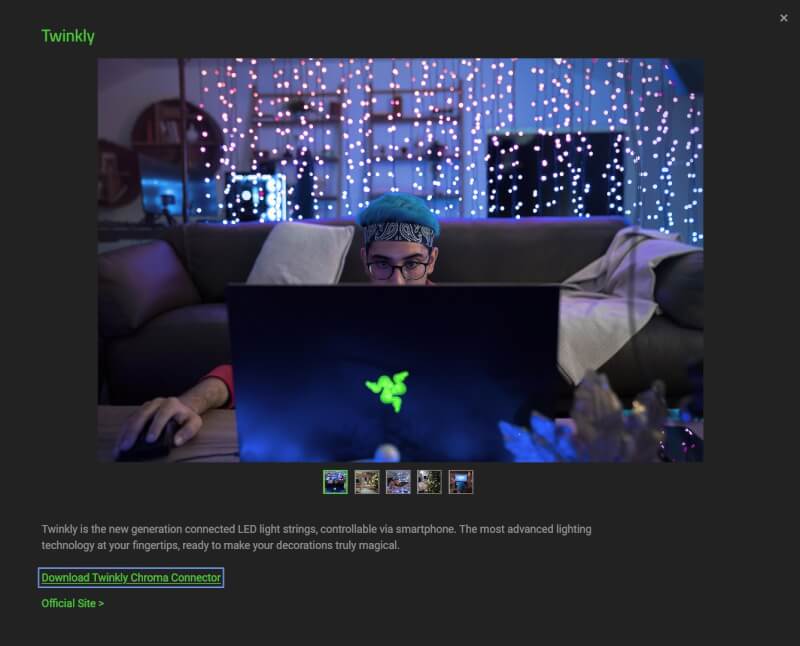
If you already have Razer devices such as a mouse or keyboard and use their software to control RGB lights on your PC, Twinkly can also be connected here.
This means that you can connect your Twinkly light together and get even more options for coordinating and controlling the light.
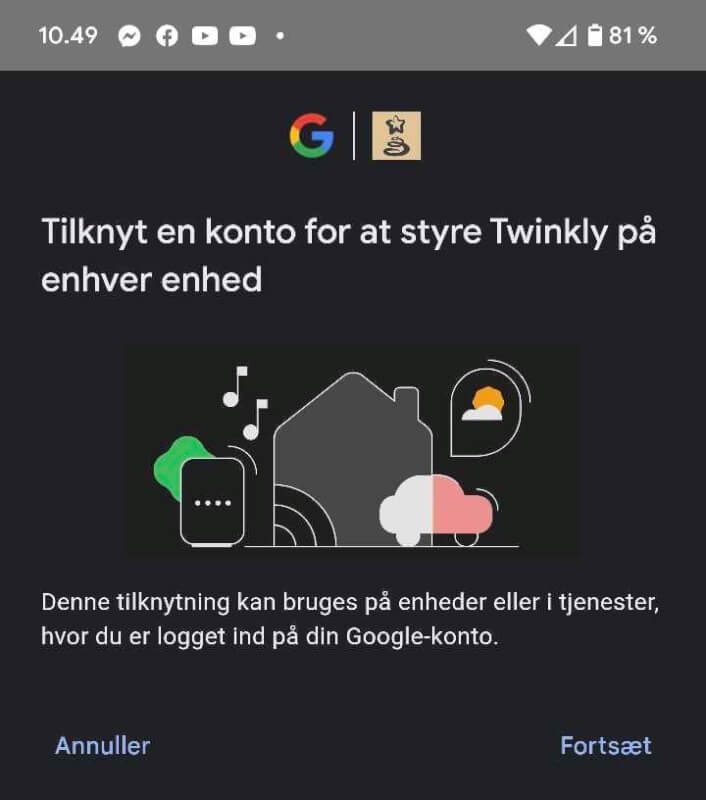
In my case, I have, for example, connected it to my Google Home system. So now I can control the light via voice or my Google Home app. It also means that I can include the Twinkly light in my automated routines through Google Home.
Collection
Overall, it has been an easy and straightforward process to get the Twinkly light set up, and to play nicely with the rest of the lights in the house. Especially the possibility to connect it to Google Home means that the Twinkly light quickly became part of my other lights and routines.
We have only looked at two products in this guide, but it is easy to include other Twinkly products. It could be the ones we have looked at in our Outdoor guide , as they can also easily be used indoors. However, there are also other products from Twinkly that can easily be included.
The Squares 5+1 set that we have seen here starts at a price of 200$ and you can buy additional LED panels, in sets of three, for around 80$.
Twinkly Flex in the 2 meter version that I have visited here can be bought for around 60$, while the 3 meter version can be had for around 100$.
Latest smart home
-
04 Octsmart home
-
12 Sepsmart home
Dreame is working on the complete Smart Home
-
13 Junsmart home
Roborock launches Q7 and Q10
-
26 Marsmart home
Roborock launches the F25 series
-
19 Marsmart home
Roborock Saros 10 is now launched
-
17 Marnetwork
Netgear Nighthawk M3
-
13 Marsmart home
iOS 19: Apple's biggest iPhone update this year
-
25 Febsmart home
Philips Hue Secure looks after your home
Most read smart home
Latest smart home
-
04 Octsmart home
Lack of cleaning can make us sick
-
12 Sepsmart home
Dreame is working on the complete Smart Home
-
13 Junsmart home
Roborock launches Q7 and Q10
-
26 Marsmart home
Roborock launches the F25 series
-
19 Marsmart home
Roborock Saros 10 is now launched
-
17 Marnetwork
Netgear Nighthawk M3
-
13 Marsmart home
iOS 19: Apple's biggest iPhone update this year
-
25 Febsmart home
Philips Hue Secure looks after your home


