05 Dec
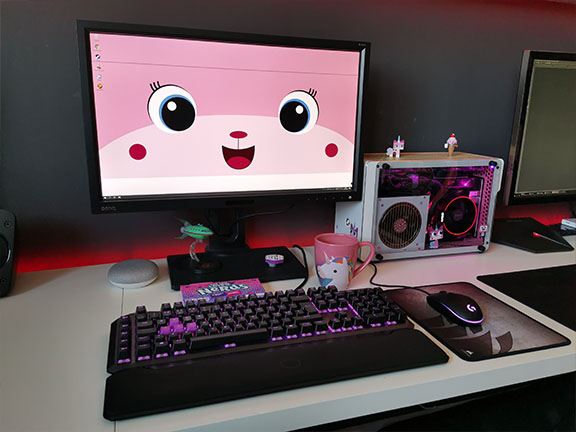
complete system


There is no doubt about the fact that the the PC gaming community sees the male sex outnumbering the female one. This is further reflected in the design and style of a lot of gaming equipment.
However, if you look at gaming from a broader perspective, and add to the equation areas such as mobile, console and generally handheld gaming, then several studies have shown that there actually is a female majority of gamers worldwide.
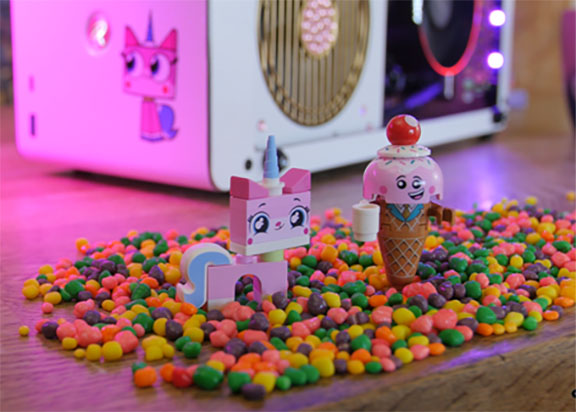
Fortunately, I’m lucky to share a household with a woman that enjoys gaming, in various formats, but whom undeniably has an inclination towards a more pink design choice.
This is, in part, the reason behind today’s Unikitty Gaming PC Build, where we seek to challenge the aggressive and dark look that governs the majority of design choices of PC hardware on the market.
Watch the video below, from our YouTube channel, in which we take you through the entire process.
The theme that was chosen for this build was Unikitty, which many may recognize from the Lego movies and the spin-off cartoon series that came out of it.
The goal was to create a PC that can handle everything that we might throw at it, but at the same time keep it within a small form factor rather than a large brutal
and masculine gaming machine in a full tower.
As such, our new Unikitty build is not intended for hardcore gaming, but rather casual gaming in 1080p or 1440p.
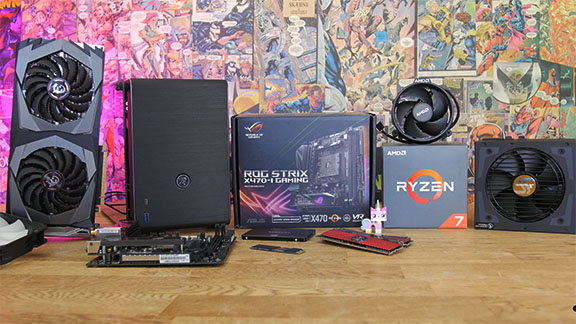
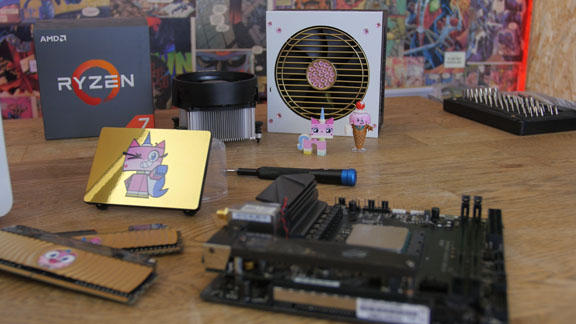
The Unikitty system consists of:
AMD Ryzen 7 1700X
ASUS ROG Strix X470-I Gaming
16 GB ADATA XPG Spectrix D80
MSI RTX 2070 Gaming Z
240 GB Apacer Z280 M.2 NVMe PCIe SSD
500 GB Samsung 860 EVO SATA SSD
SeaSonic Focus Plus 650 Gold
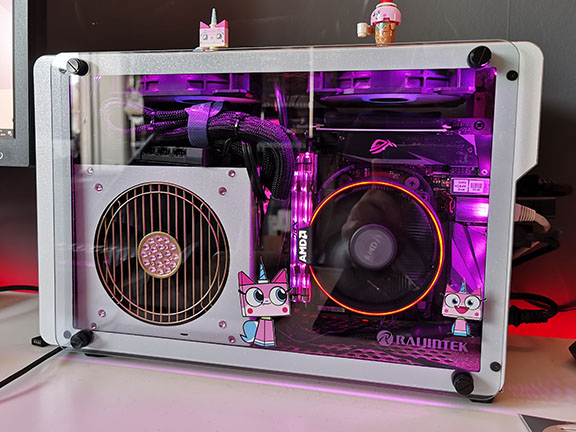
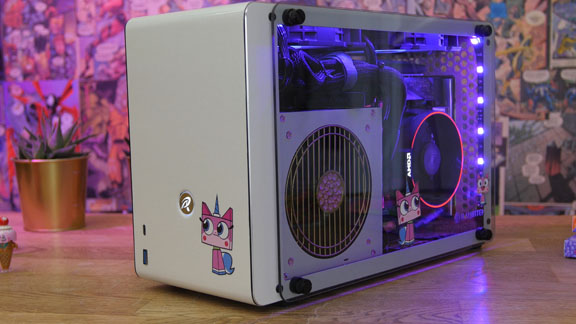
Raijintek Ophion
As can be seen, most of the chosen hardware for this system is, by default, quite dark, which of course in no way suits the theme that we’ve decided to go with.
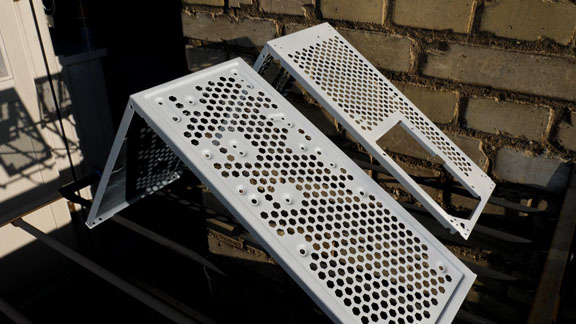
Fortunately, the case from Raijintek is easy to disassemble into smaller parts since nothing is riveted. So, it simply comes down to screwing the pieces from each other. From this point on, it was pretty straightforward, and basically down to repainting some of the parts into a more fitting color for our Unikitty build.
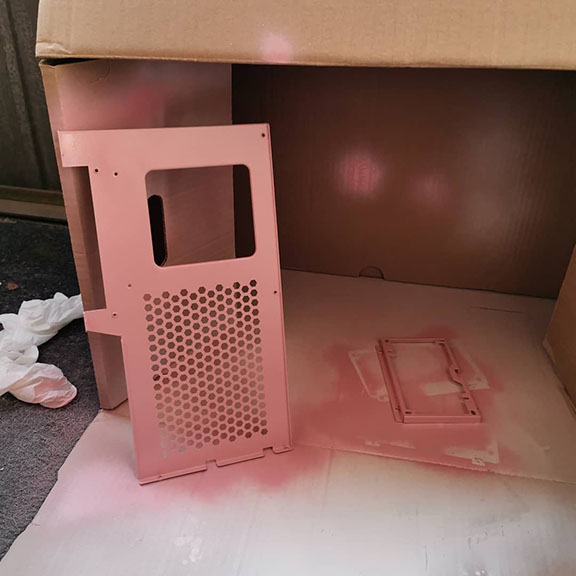
From day one, the plan was to go in the direction of a rather light pink color on the interior metal parts, so we decided to go with a white primer first, in order to provide a better surface for the upcoming pink color to grab on to.
Then the pink color was applied, and all of the parts were left to dry overnight.

In order to go all in on the theme, some amount of glitter was needed. All of the painted parts got a bit of spray adhesive, followed closely by as much glitter as possible. As soon as everything had dried, and the excess glitter had been brushed off, all of the parts received som clear varnish to seal off the applied paint and glitter so that it won’t find its way into the vital areas of the machine.
The side panels and front of the case were easier to approach since they were simply lined with white vinyl with a bit of silver glitter added to it. The same applied to the front of the case, so this was relatively quickly finished.
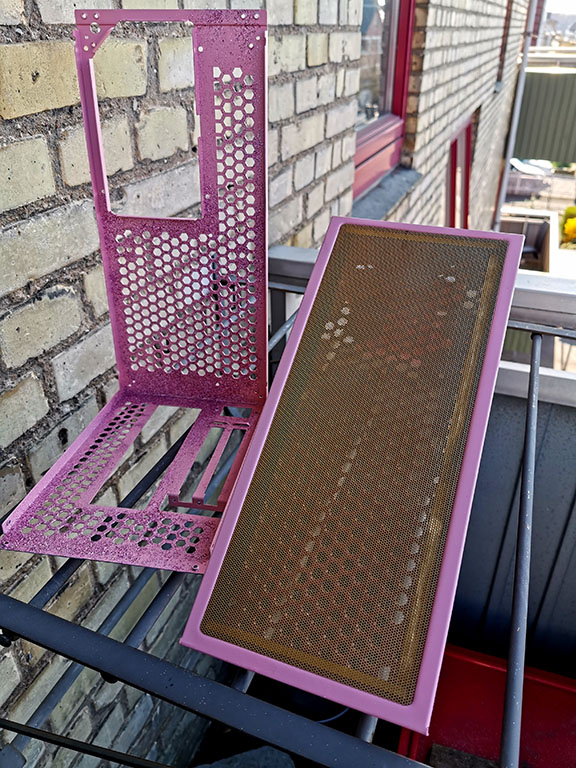
The final detail of the case that was done was the dust filters at the top and bottom. They were painted in gold, since the default black color didn’t fit with the theme we were aiming for.
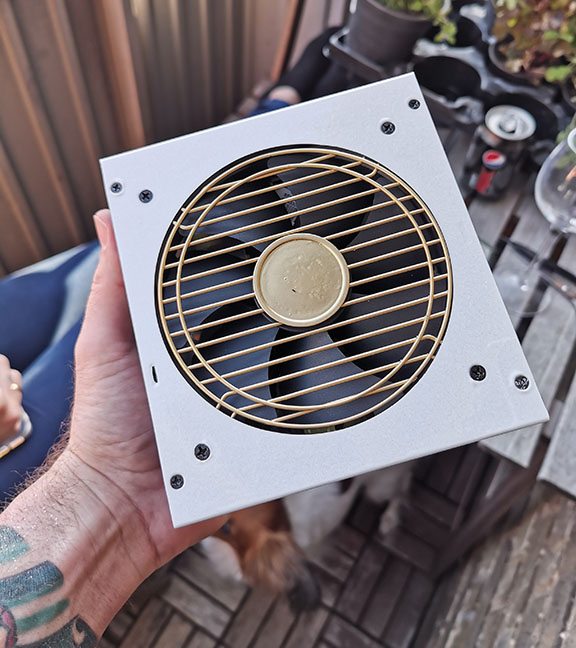
Since the power supply was quite visible through one of the side panels, we decided to subject it to some modifications, as well, in order to align it with the rest of the system.
Here, the visible part was clad in vinyl too, similar to the sides and front of the case, and as an added detail, we painted the grill, in front of the fan, in a gold finish. Once again, in order to go all in on the glitter theme, the middle of the grill, as well as the screws, were decorated with pink rhinestone stickers for the added “wow” effect.
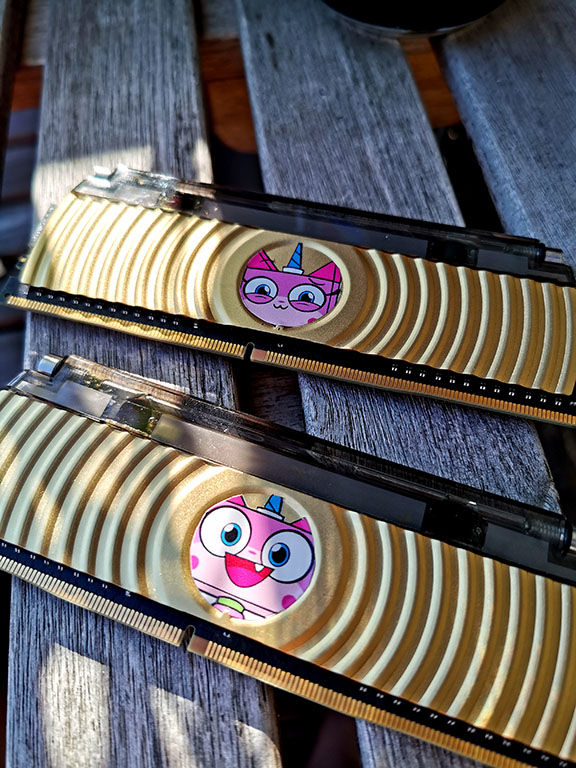
The gold finish was also generously applied to other sections of the system, in order to create a uniform look. The two RAM modules from ADATA were originally red, but this didn’t fit the system at all, and even though they might not be that visible, with the system fully assembled, they were still given a coat of gold. This was a procedure that required that everything was masked carefully so that no paint would find its way to the more delicate electronic parts of the modules.
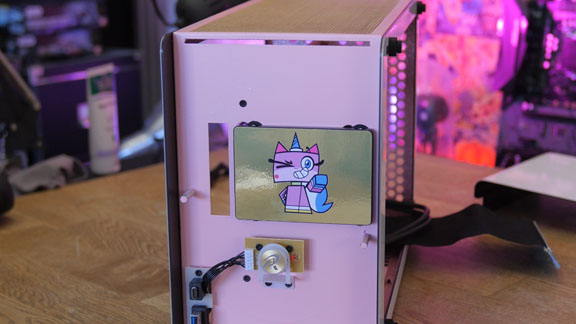
Another detail that we decided to include, even though it’s not even visible on the fully assembled system, as it is covered by the front panel, is the Samsung SSD. This component was lined with gold vinyl and a Unikitty sticker to give it a completed look.
It might be the case that smaller details such as these are not all that visible on the complete and assembled system, but we want to make every effort to not make any compromises with this build. It’s the icing on the cake that makes things feel all the more nicer in the end.
With all of the pieces customized, all that was really left to do was to assemble the case again, and then install the operating system, and so on. It doesn’t come without its challenges to work within a small case, and the Raijintek Ophion surely is no exception to this rule. Fortunately, it’s a quite open case, so it wasn’t that hard getting everything in there.
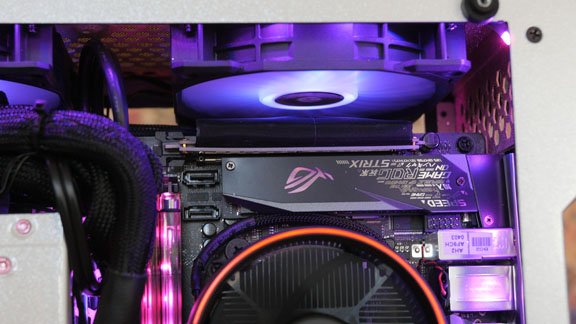
The Unikitty build was given two Corsair 120 mm RGB fans at the top of the case in order to provide better airflow, which would, otherwise, have been nonexistent. It fits just exactly, but it of course did nothing to make the space less cramped, and it required some extra care to make sure that nothing would block the fans.

Overall, it was pretty smooth to build the system within the Raijintek Ophion case, and the final result was pretty nice. It subsequently took a bit of time to manage and tie the cables etc. since there are not many ways to hide these within the Ophion case.
We did wonder why it takes normal ATX power supplies and not the smaller SFX form factor. If that had been the case, there would’ve been much more room for the cables and such.
Another challenge that we had to face during the build was that we probably had been a bit too optimistic when opting for the RTX 2070. Even though the physical space is there, it ended up so close to the glass side that it struggled to breath, and during gaming, the temperature climbed to above 90 °C, which of course, in turn, provided us with poor boost speeds.
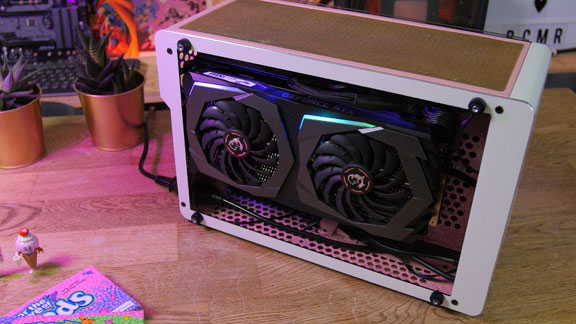
So, one definitely needs to consider picking a card with a cooler that isn’t as massive as the one on the MSI card that we had at our disposal. This way, it will be able to breath more easily, given the space between the card and the glass side panel. In reality, a GTX 1660 Ti, or similar, would have been more appropriate for a system of this size, with its limited space.
Alternatively, one could, as seen here, position the system in a way that would allow for the side panel, next to the GPU, to be removed completely. This way, the card can breath freely and the temperatures wouldn’t be a problem anymore. Of course, this is probably not a viable solution for everyone.
In general, this was a really fun project. It’s been a very different system to plan and execute, and it’s actually been quite awesome to take a step in a different direction, in terms of the thought process we typically go through when planning and building a new system.
The result is, in our eyes, really cool, and it certainly provides a different look compared to many of our recent systems that we’ve built. On top of that, this system actually performs very satisfyingly and it has, with ease, handled all the games that we’ve subjected it to so far.
To conclude, we’d love to hear from you all, if you have ideas for future projects here on Tweak.dk.