23 May
gadgets


Specifications
I have cut a bit in the very long list of specifications from DJI's website. If you have previously looked at our review of the Mini 3 Pro version, the biggest difference here is that the little brother drone comes with fewer sensors than the Pro version. However, the flight time is slightly longer, as there is room for a slightly larger battery.
However, one of the most important details in relation to the legislation is that the weight remains below 250 grams. So we are in the category of drones with the least restrictions.
A tour around the DJI Mini 3
If you have seen the DJI Mini 3 Pro, you will easily be able to confuse the Pro version with it. The style is the same folding design in light gray plastic.
It is a very compact design, which in the folded version does not take up more than you can easily have it in your bag or even a large pocket.
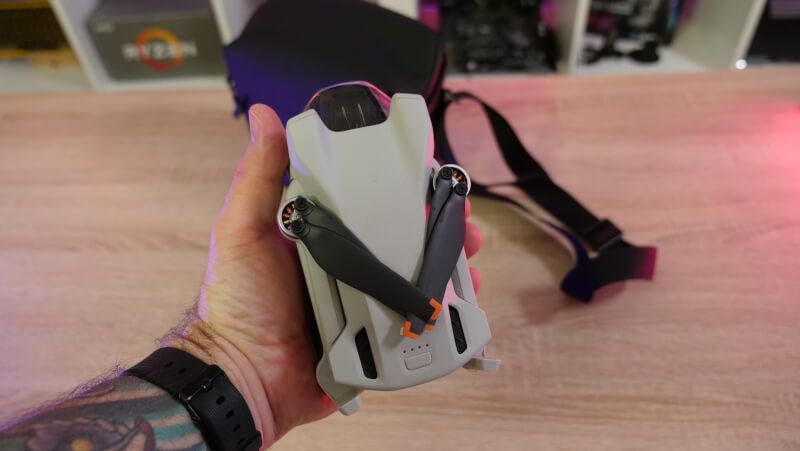
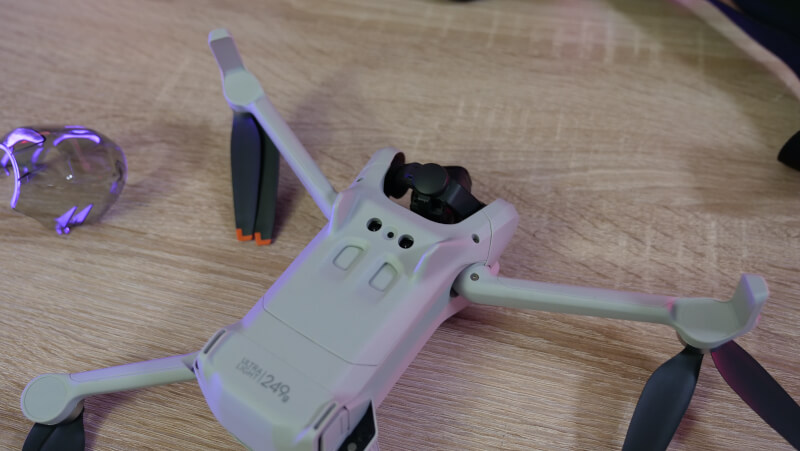
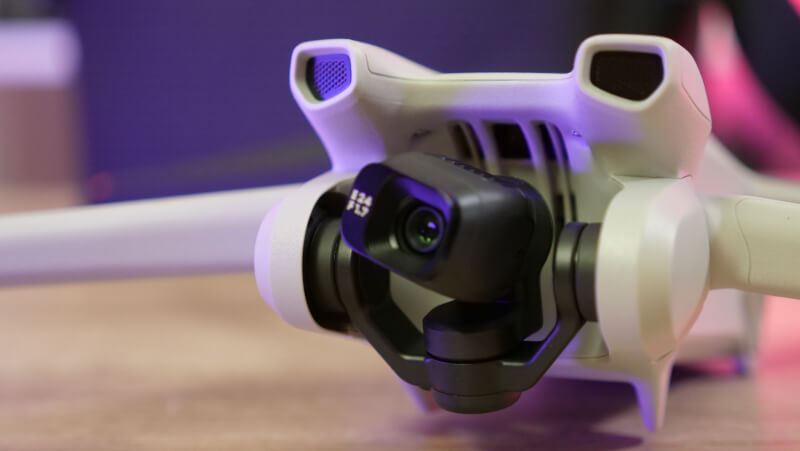
The four rotor sets sit on arms that are easily folded in or out. The camera is located in the front of the drone and is controlled by a 3-axis gimbal. The gimbal mounting provides good options for steering with tilt from -90° to 60° and roll from -90° to 0°. There is also a built-in function so that you can quickly switch between landscape or portrait recording with a single press.
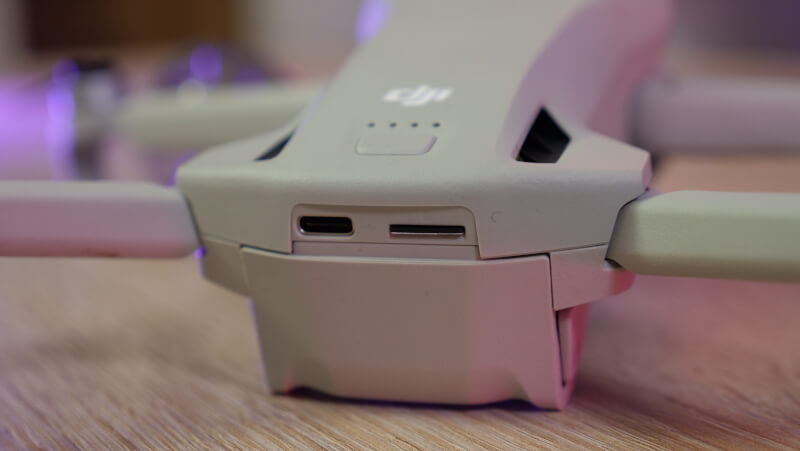
At the back of the DJI Mini 3 is the battery, which is easy to remove and replace. There is also a USB C port for charging the battery directly in the drone, and then the space for the MicroSD card.
One of the things that separates the Mini 3 from the Pro version is that it does not come with the many sensors that were part of the Pro version. This means that the Mini 3 does not allow the drone to automatically detect and fly around obstacles.
So it is important to be aware yourself, as no security has been built in on that front. The DJI Mini 3 still has a downward-facing sensor, which is used in connection with take off and landing.
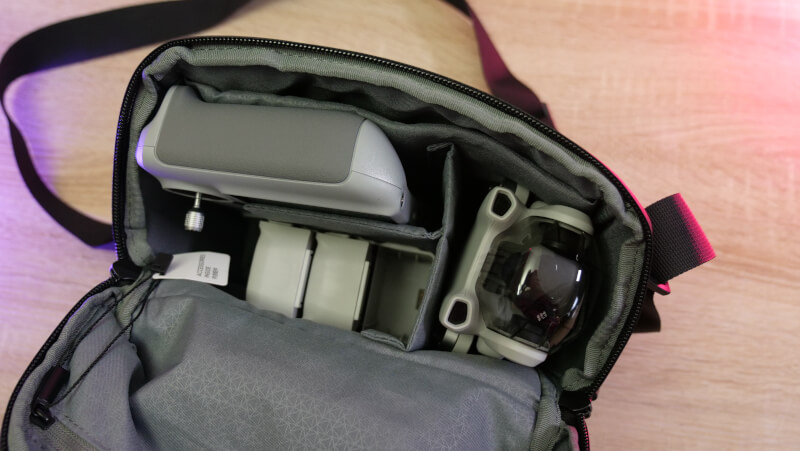
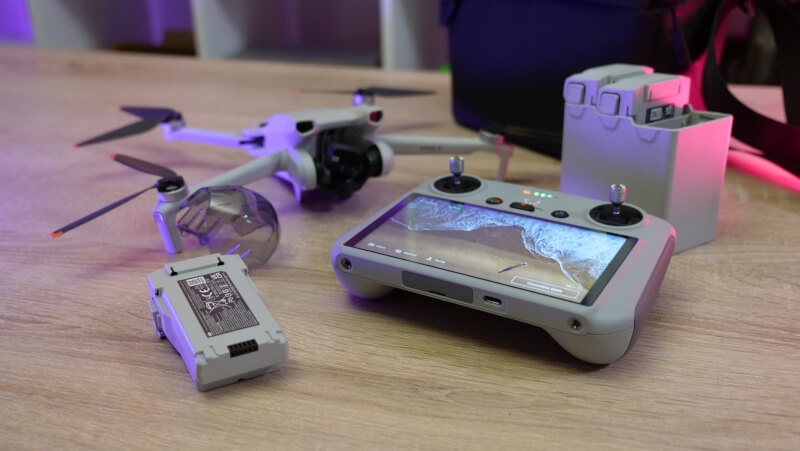
The DJI Mini 3 can be purchased in several different versions. The drone itself is the same, but the accessories vary. We have received a Fly More Combo (DJI RC). In addition to the drone itself, this means that there are two extra batteries, charger box for all three batteries, extra rotor set and DJI RC Remote Controller, which comes with a 5.5" touch screen. Everything is collected in a transport bag.
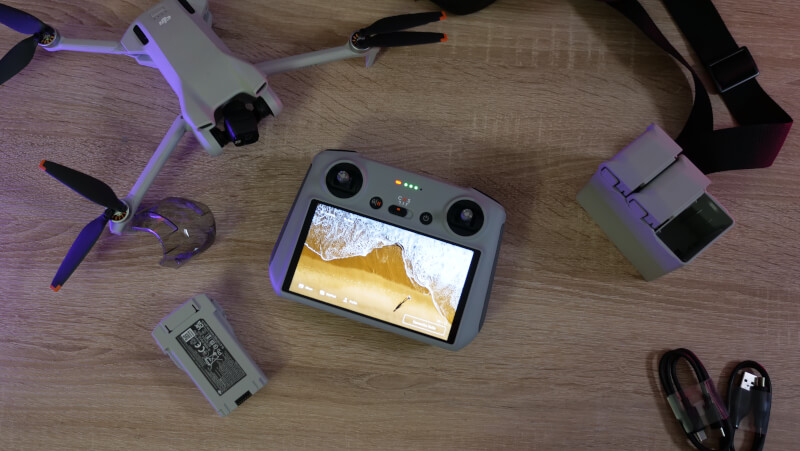
If we look at the supplied DJI RC remote, it is a complete unit with screen. It is the same device that comes with the Pro version of the DJI Mini 3
The front is of course characterized by the steering. You have the two joysticks at the top of each side and between them, there are a series of diodes that indicate the remaining battery in the device.
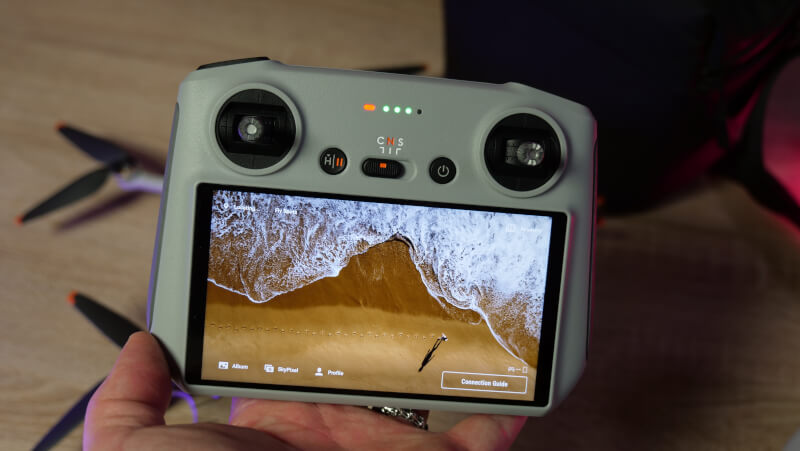
The two control sticks can be unscrewed and can be stored on the underside of the unit to facilitate transport.
There is also a power button together with a mode switch that can switch between Cine, Normal and Sport, which are the three modes your Drone can be set to.
What takes up the most space on the device is the 5.5" Full HD touch display, which is used for the DJI Fly app that is integrated on the DJI RC device.
At the top of the device there are two buttons, the left one is used to stop or start video recording and the right one is used for still images.
Below the two buttons are two rotary knobs. The left one is used to control the tilt of the camera and the right one is used for zoom.
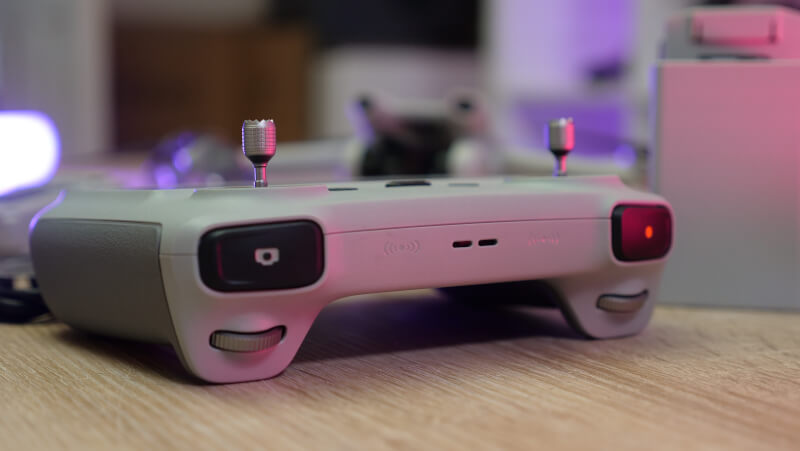
At the bottom we find a USB C port, which is used to connect the DJI RC device to your computer, or to charge the device. It is also here that, under a small silicone cover, you find space for a MicroSD card and another USB C port. The USB C port can be used to connect a DJI Cellular Dongle.
If we finish with the underside of the DJI RC unit, we can see the two places for joysticks during transport and then there are two buttons that can be programmed for special functions via the DJI Fly software.
The entire DJI RC unit feels nice and solid and, despite the many features, is ready with a weight of only 390 grams, so it is comfortable to carry.
DJI states the battery life of the DJI RC unit for around four hours of use. Built into the unit are of course also the solid transmitters that create the connection to your drone.
The DJI RC unit can be used for all drones that use O3+ transmission and DJI states that the maximum distance can reach up to 15 km. It is of course under super optimal conditions that this kind of thing can be achieved.
Software
The software on which a large part of the interaction with your DJI Mini 3 drone will take place is the DJI Fly app, which can be found on its smartphone, or as in our case on the DJI RC device.
It is from here that you can control a large part of the functions that are built into the DJI Mini 3. The control itself is of course done with the two joysticks. However, all adaptations of settings and setup of which parameters you want to fly take place through the DJI Fly software.
The drone has a range and options that go beyond the current legislation in Denmark and the EU. So it is up to you to check yourself that the settings for, for example, height, etc., are set so that they comply with the rules.
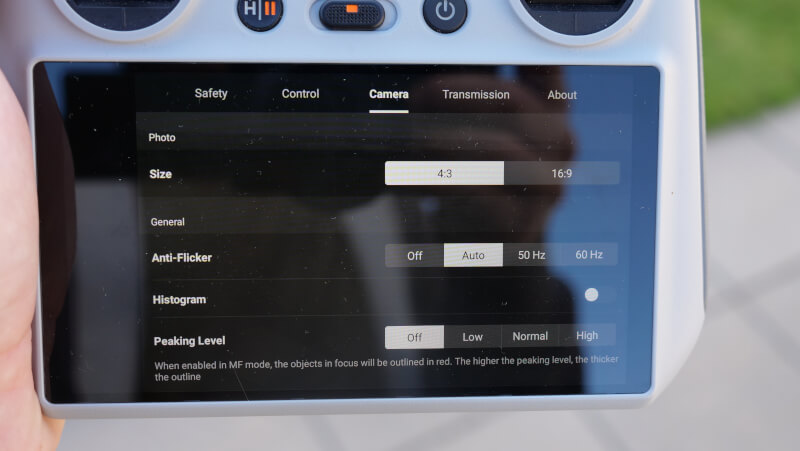
You can also set a lot of different things around the camera and the gimbal which keeps it all stable.
During flight, there are a number of different status indicators that tell you things like how far the drone is from you and how much battery time is left.
Although we lack the ability to automatically avoid obstacles, there are still a number of automatic functions. This includes automatic take off and landing.
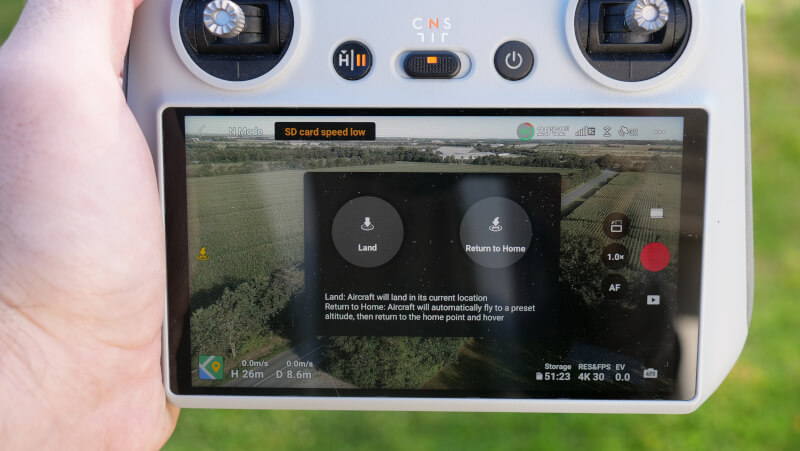
Every time the DJI Mini 3 takes off, it saves its GPS position. So if the drone loses connection to you and the controller, or is about to run out of battery, it will automatically return home and land. In the same way, you can at any time ask it to return home to the starting point.
The DJI Fly software seems super robust and with a lot of functions that can appeal to both the beginner and the more trained drone operator.
I experienced no problems with the software during my testing.
A little about Danish/EU legislation
I will not go into great depth with the law here, but just take the time to mention it. There are a number of rules in the area and in the worst case you can be punished if you end up violating the rules for drone flying, whether it is consciously or unconsciously.
A drone like the DJI Mini 3 Pro falls into the category of drones with the fewest regulations. This is primarily due to the very low weight. The dividing line is 250 grams, and the Mini 3 Pro stays exactly below that.
With a drone like the Mini 3 Pro, you can fly "most" places without having to have a special permit. "Most" places are in quotes here, because there are MANY exceptions to the general rule. There are websites and apps, such as the Drone Airspace app, that can help show where you can fly and where you definitely shouldn't.
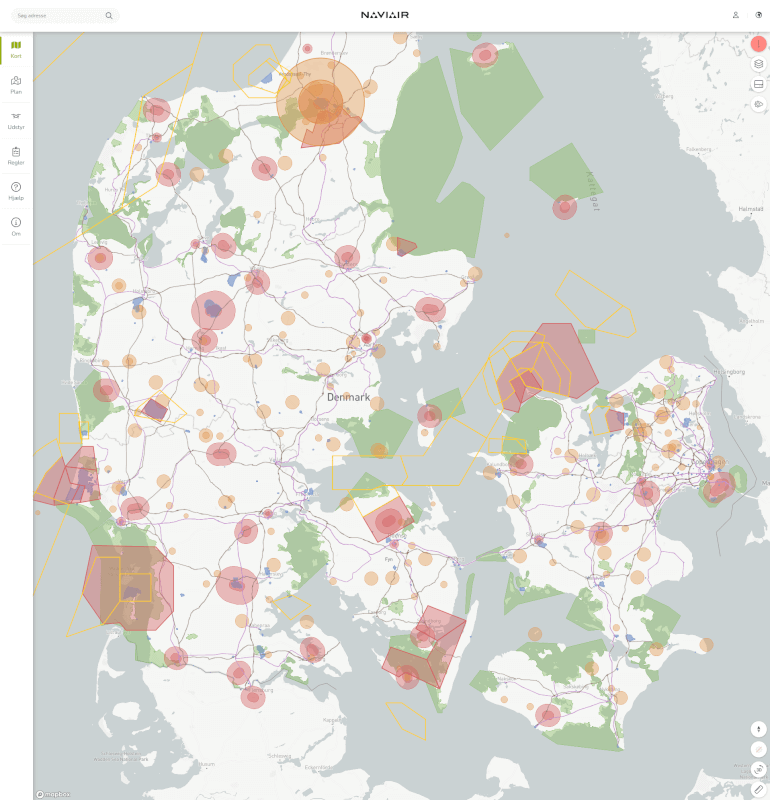
It is things like military areas, state and government buildings, embassies, etc. that you need to be aware of, in addition to airports and airfields of course. However, you must also be aware that some natural areas are protected and therefore also off limits.
This means that, for example, areas such as Copenhagen are very limited due to the many state and government buildings. It is 100% you as the drone operator who is responsible for keeping track of whether you are allowed to fly in an area.
It is also important to remember that there may be situations where the consent of unauthorized persons may be required. This can be the case, for example, if you fly in areas where you can enter people's private land, such as gardens or the like.
You should also be aware that even though the DJI Mini 3 Pro is one of the drones with the fewest restrictions, you must still be a registered drone operator in order to fly it. This applies to all drones that have a camera.
Fortunately, you can be registered quite easily, but it requires a little theoretical knowledge and you have to pass an online test. It can be found on the Swedish Transport Agency's website www.droneregler.dk
It pays to spend a little time familiarizing yourself with the rules for drone flight. It is not exactly an easy web of rules to sift through. Through other work, I am used to reading statutory texts and finding my way around public notices, and it took me a while to make sense of things. So if you want to be on the safe side, you should set aside some time for legal research.
The drone regulations are basically common European and apply throughout the EU. However, there may be additional rules in certain countries, so look out. Outside the EU, there may also be special rules that you must be aware of.
The test
Unlike my last drone test, this time I was not a complete beginner. After all, I managed to get quite a few flight hours in with the DJI Mini 3 Pro before it had to be returned again.
So this time I had flown a drone before, and on top of that I knew the control system for DJI drones. That part is exactly the same as on the Pro version.
It still takes place through the DJI Fly app on the DJI RC controller. The advantage of DJI Fly is the automatic processes around take-off and landing. This means that with just a few clicks on the screen, you can get the DJI Mini 3 in the air and fly on from there.
There are not so many sensors in this version, but of course there is still GPS. This means that the GPS position is saved when you start your flight. So if during the flight you experience losing connection to the drone, or are about to run out of battery, the drone itself returns home to the starting point and lands.
That function works perfectly and I tested it several times during my testing.
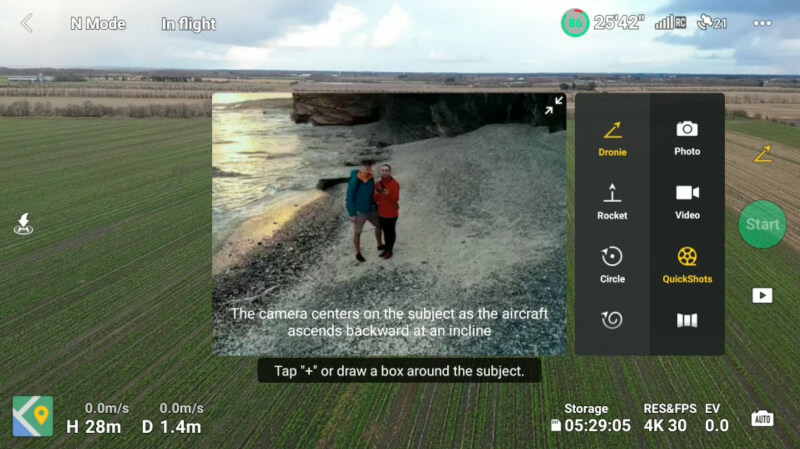
There is also still the possibility of the Quick Shot functions in the DJI Mini 3, which can set the drone to automatically make a number of different shots, focusing on an object/person. This is, for example, a Dronie, spiral, rocket and circle shots. These are good features that can quickly give you some cool shots without having to work particularly hard for it.

However, the options are more limited compared to the Pro version when it comes to general tracking of objects or people. Here, the many sensors are simply lacking in relation to having these kinds of functions.
However, the DJI Mini 3 is still a relatively easy drone to fly. If you are used to playing PC or console games with a controller, you will quickly feel at home controlling the DJI Mini 3.
There are three settings on the controller, so if you are a complete beginner you can start on Cine settings, where the speeds are lower. From there, you can work your way up when you become more comfortable with the drone.
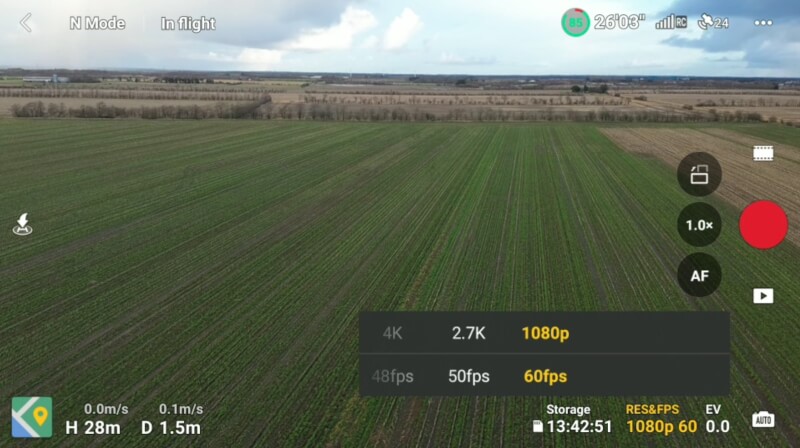
The camera on the DJI MIni 3 has been slightly downgraded compared to the one on the Pro version. However, there is still the possibility of recording video up to 4K at 30 FPS. If you switch to 2.7K or 1080p, those resolutions can be handled up to 60FPS
There is no possibility of recording in Cinelike, but DJI still manages a fantastic color profile, as standard on the recordings. The recordings are really good in the auto setting and will no doubt be useful for the majority.
However, there is also the possibility of manual control of the settings on the camera. So if you are looking for control or a special look, you have the options through DJI Fly.
DJI has also made sure that their color profiles match well between their different devices. So if you have a DJI Action camera, the style of the footage will match well across devices. Nice if you want to combine recordings from several devices.
Even though the season and thus the weather is a bit sadder now than when I tested the DJI Mini 3 Pro this summer, I still managed to capture some good footage with the DJI Mini 3 during my test.
The somewhat windier winter weather has also meant that I have been able to test the DJI Mini 3 in somewhat windier surroundings. Although the small drone is of course not immune to wind, I would say that it is impressive how stable it is even in windy environments.
Price
I can currently find the DJI Mini 3, in the Fly More Combo with the DJI RC controller, which we have had for testing with an online price of just around DKK 7,600. If you buy it without the extra accessories, but still with the RC Controller, it can be done for around DKK 6,000. If you want to save more and get by with your Smartphone together with the N1 controller, it can be done for DKK 4600.
Conclusion
The DJI Mini 3 does not have as much security built in as its big brother the Pro version. Certain areas have also been downgraded, such as camera and tracking, so the DJI Mini 3 is in many ways a more manual experience.
Having said that, there is still a lot of incredibly cool technology and functionality built into the DJI Mini 3. It is still a drone that is incredibly easy to fly and despite not being held quite as much , then I'd still say it's a good place to start.
There is still really good automation built in where it really makes life easier. This is, for example, in connection with take off and landing, and especially safety, which means that the drone itself finds its way back to the starting point if it loses connection or is about to run out of battery.
If you combine it with a camera that gives you some incredibly nice pictures or video recordings, then you have a nice drone experience with a minimum of headaches.
Just remember to be aware of current legislation, which can be a bit complicated. Otherwise, the headache can quickly appear in the form of fines.
Somewhere between 4000 and 7600 kroner is still a lot of money for what will probably be a toy for most people. However, considering the technology and performance, I think the DJI Mini 3 is worth the price.

It's impressive what DJI can squeeze into their little drone.
We end up with a final grade of 9 and a great product award.
Pros:
Cons:


