27 May
gadgets


Central Specifications
We can see that the LaserPecker LP 5 has solid hardware with its dual laser setup, which gives it very versatile options in terms of materials. However, it is a bit limited in its working area. However, there are accessories that can expand those options, which I will also touch on.
A tour around the LaserPecker LP5
The LaserPacker LP5 is available with a selection of different accessories in bundles. We have been visited by LaserPecker in the Ultimate Bundle version. It includes, in addition to the LP5 unit itself, also accessories in the form of the LaserPecker Rotary Extension, Slide Extension and Desktop Air Purifier. On top of that, there is also a selection of material samples.
It all comes securely packed in a large box. All the parts are packed super well in strong foam, so everything is well protected during transport. The different parts require a bit of assembly before they are ready to use, but there are good manuals for all units. At the same time, there is also a small box with all the tools and accessories you need for assembly and adjustment.
All units are made of blue-gray aluminum and appear solid and well-made. All parts give a good impression of quality and attention to detail in the construction.
If we start by looking at the LP5 device itself, it is a fairly compact device, especially compared to the somewhat larger xTool M1, which we have looked at previously.
A large part of this is of course related to the somewhat smaller area you can use it on. The LP5 has a working area of 100x100mm if you are making square elements or up to 120x160 if it is an ellipse. You can get up to 160x300 if you use the Slide Extension option. I will look at that later in the test.
The LP5 is designed to be a fairly portable unit with a handle on the top, making it easy to move the entire unit. At the top we find all the hardware, where the diode and fiber lasers are housed together with the hardware that will drive it all. There is access to a dust filter on one side, but otherwise it is a closed unit.
On the back we find the power connector for the included power adapter. There is also a USB C connector for PC connection, three USB A connectors to be used to connect accessories and an additional one for a USB Stick for files. Finally, there is a Mini USB connector, which is used for a security key. The small connector must be in before you can use the machine, and can be used as security that no one will inadvertently start the machine.
At the top, along with the handle, there are three buttons. A red emergency stop button along with a preview button and a power/pause button.
The entire unit is mounted on a motorized column, which is screwed onto the base. It is possible to move the LP5 laser module up and down to achieve the right focus distance for a variety of materials and when using accessories such as the Rotary or Slider Extension.
It is also possible to tilt the laser module so that you can work on objects at angles other than horizontal.
Under the laser there is a protective hood with a removable UV shield. It is equipped with an exhaust on the back and can be connected to the LaserPecker Desktop Air Purifier unit via the included flex tube or simply stuck out of the window.
At the bottom of the unit is the actual work area where your workpieces are placed. It is equipped with a grid of screw holes that can be used for the included guides. This can be used when you need to make several of the same workpieces, so you are always sure that they are placed in the same place.
However, if you need to cut items, it is recommended to use the included Cutting Plate. This lifts the items up and creates some air underneath them, while protecting the normal surface.
Moving on to the LaserPecker Desktop Air Purifier unit. It is a square box in the same solid and complete design and material as the LP5 unit itself. It contains a large four-level filter consisting of an initial cotton filter, two separate H13 HEPA filters and an activated carbon filter.
The connection is made on the back, where there is a power connector for the included power adapter and power button. The connection to the LP5 unit is made via the flex tube, which is attached to the protective cap. On the back of the Desktop Air Purifier unit there is then a flex connection for in and one for out.
Here you simply connect the second flexible pipe to the outlet and connect it to the exhaust or, as in my case, stick it out of the window so that the filtered air is sent outside.
On the front of the Desktop Air Purifier unit there are two buttons to regulate the strength of the extraction, which can be seen on the small LED light bar between the two buttons.
The Rotary Extension accessory allows you to laser engrave on round objects, such as glasses, thermoses, etc.
It connects to the LP5 device via a USB cable, which both supplies power and controls the device via the software, so things are coordinated.
There are various mounting accessories included, which can be adjusted depending on the size of the item you want to engrave. Everything can be assembled and adjusted using the included accessories in the small toolbox.
The Slider Extension accessory is a motorized plate that expands the area you can work on with the LP5. Like the Rotary Extension kit, it connects to the LP5 via a USB cable, which also provides power and control.
In short, it acts like a small conveyor belt that continuously feeds in more material.
LaserPecker has a range of other accessories that can be used with the LP5. These include a Safety Enclosure that can turn the LP5 into a sealed unit, or a Power Pack that, with a 181WH battery, can provide just over two hours of use with the LP5 without being connected to the mains.
Software
To set up and start tasks on the LaserPecker LP5, you need to use the LaserPecker Design Space software. It can be used both on the desktop for Windows or Mac, but also as an app for your smartphone on both Android and iOS.
You can connect to the LP5 device via Bluetooth or WiFi to the app and desktop software or via USB cable to your computer. That part was pretty easy to get going although it required a bit of manual work and there was no automatic connection. To connect via WiFi on PC you need to first connect via USB and set up the WiFi connection here.
The software for a system like the LaserPecker LP5 is important, as this is where the projects are prepared and sent to the LP5, but it is also in this process that the device itself is controlled and you choose which settings it should run with.
For a laser cutting and engraving machine, the settings are especially important, as they are the difference between a good result and one that potentially sets the materials on fire. There are a multitude of settings that can be important for the projects you want to make on a machine like the LP5.
It's the combination of materials, which of the two lasers you use, along with the speed and power of the laser. It can quickly become confusing and therefore it's nice to get as much help as possible from the software, especially for new users.
Unfortunately, there wasn't much help available in LaserPecker Design Space, which I must admit was a frustrating experience. It did get better after a while, but it was a steep learning curve even for someone like me who I think is generally pretty good with software.
The first annoyance I encountered was the lack of the ability to work with the software and projects away from the LP5 device itself. Due to smoke, dust, odors, etc., I did not have the LP5 in my normal office. However, I would have liked to be able to work with my projects at the big screen and in my comfortable office chair, but that was not possible without actually being connected. If you have WiFi connection in your workshop, it is possible to connect that way, but unfortunately I do not.
I would really like to be able to simply tell the software which machine you are using and then have access to all the settings and editing options that machine provides.
However, that was not possible and you had to be connected to the machine to access that kind of thing. Without being connected to the LP5, I only had access to the very basic ability to edit the graphic elements I needed.
Unfortunately, that part of the task was not very intuitive either and there was no clear way to see which parts of the project were to be engraved, which ones needed to be cut, etc.
Similarly, I didn't get much help with which settings could be used for different materials.

We have previously looked at xTool M1 and their xTool Creative Space. Here there was a high level of help as you could choose which material you wanted to work with, along with thickness etc. There was a whole library of materials and tasks to choose from.
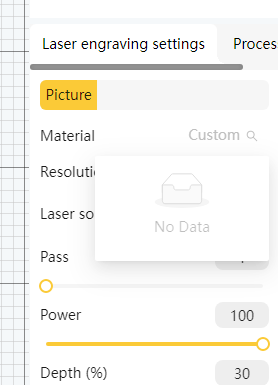
There was none of that in LaserPecker Design Space. Or partially, because there is a menu where you should be able to choose material, but it served no purpose, since the menu was empty. Sometimes, however, the program chose to specify the material itself, for example cardboard, but without me being able to change it.
Similarly, there was no help available in terms of tuning into which settings or even which laser to use for cutting or engraving.
On the LaserPecker website you can find an overview of a selection of materials and their recommended settings for cutting or engraving, respectively. However, it is a rather incomplete list, is arranged in a confusing manner and is certainly not easy to find.
Compared to the two lasers in the LP5, from a hardware point of view it is fantastic to have both a diode and a fiber laser to work with. This gives quite a wide range of possibilities for materials, especially since both are 20W. However, LaserPecker does not help much in choosing which laser should be used for which tasks.
Overall, I think the LaserPecker Design Studio software feels a bit unfinished. I can see that there were good intentions, but they definitely haven't gotten around to it yet.
I had direct contact with the LaserPecker team in connection with the test and they told me that the material list with suggested settings was a priority that they hoped would be in place soon.
However, I can see that this is a problem that other users have been trying to find answers to online for months, on e.g. Reddit, without getting any answers from the LaserPecker team.
After a lot of trial and error and testing back and forth, I found a usable solution with the software, which meant I could start the actual test, but I was, to say the least, disappointed with the software experience, which requires a lot of polishing before it can be called good and helpful.
Fortunately, it is possible to improve and update software in a short time, but as it currently stands in connection with this test, it was a source of frustration.
Test
As I just mentioned, my test was quite frustrating due to the challenges with the LaserPecker Design Space software.
However, after hours of using the software, I got enough control of it that I could start testing the LaserPecker LP5.
Fortunately, the hardware in the device is super solid and an area where I, unlike the software, have been impressed. The dual 20W laser system means that you have quite a wide range of options for projects and materials.
Basic tasks such as engraving and cutting wood have not been a problem for the LP5 and on that front you are only limited by the relatively limited workspace you have to work with.
The fiber laser can handle most metals such as silver, gold, stainless steel, etc. and will therefore be ideal for engraving jewelry and the like. If you want to cut metal, the LP5 can handle things like stainless steel, aluminum or brass of about 1 mm thickness.
The diode laser handles tasks with materials such as wood, acrylic, leather and stone. Engraving is of course possible, but also cutting. Here the LP5 can handle wood up to 20 mm and acrylic up to 15 mm.
However, you should be aware that due to the stationary design of the laser in LP, you will experience that cutting items towards the edge of the work area will result in cutting at a small angle.
The design is also the reason why the LaserPecker LP5 is advertised with an engraving speed of up to 10,000 mm/s. A system like the xTool M1 would not be able to do this, as the Core X/Y design means that the laser head must be physically moved around to reach different parts of the work area.
There are advantages and disadvantages to both approaches to a laser cutter.
In the projects where I have overcome my frustration with LaserPecker's software, I have been very satisfied with the possibilities and the results. The LP5 is an incredibly powerful machine that allows you to work with almost any material.
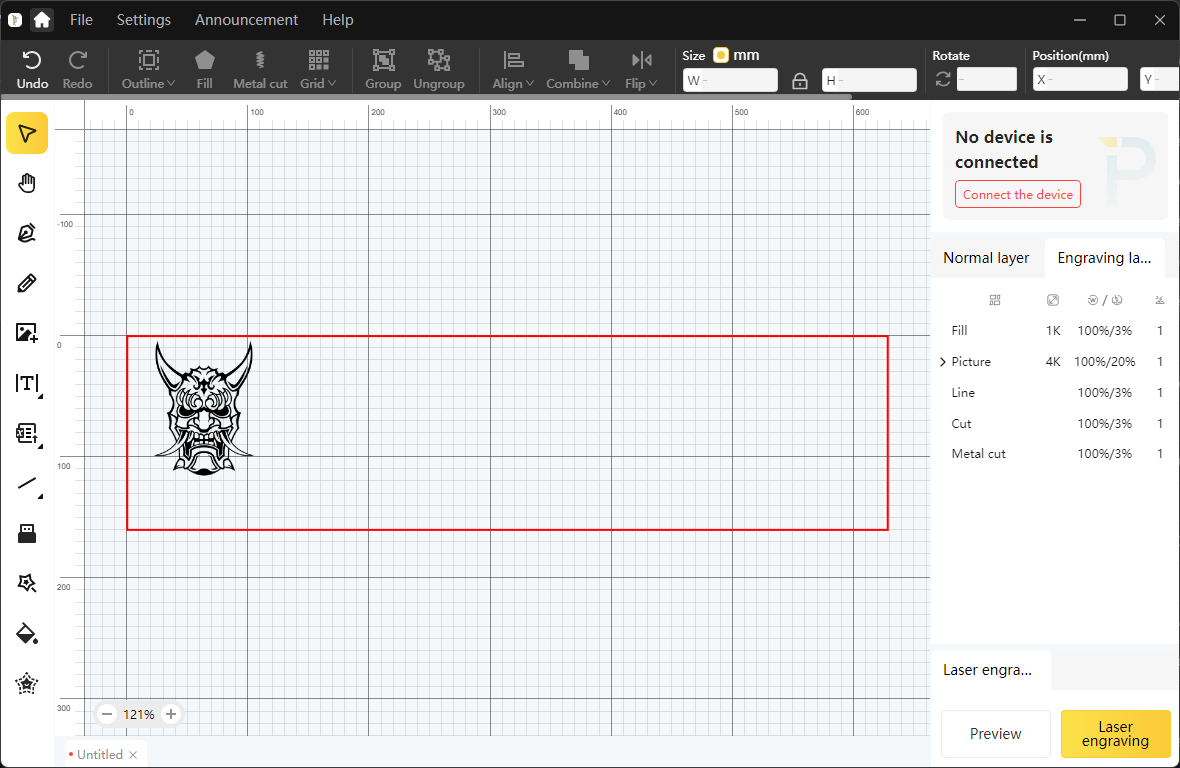
When preparing a project, the software offers the option of sending a preview to LP5 so that you can place the materials correctly.
The laser, at very low power, draws a line of where the graphics will be. With this visual aid, you can easily place your material.
On top of that, you need to make sure that the focus distance is correct. This can be easily done by moving the LP5 laser unit up or down via the motorized stand. There are two red focus points that you can look for. When the two dots meet and become a single dot, you have set your focus correctly. Nice and simple.
One of the most common materials to work with when laser cutting and engraving is wood. This is where I started with a few experiments with the included wood in the box.
Here it was relatively easy to get an engraving made based on our logo. I also tried an Easter file via LaserPecker's website. Here it was a deeper engraving, which was supposed to create a 3D effect.
This kind of thing naturally requires slightly more finely tuned settings, and here you can see from the result that I perhaps ended up with settings that were a little too high, because the result was a little too burnt.
The possibility of deep engraving on a selection of materials, however, offers quite a few possibilities. With the box there was a selection of materials and here the two brass coins attracted my attention.
There was a test file for engraving a wolf motif in the coins, which was supposed to be tested.
A deep engraving of this type takes a long time. The project here with the test file from LaserPecker took close to four hours. However, it also delivered a super nice result. There is a fine degree of detail and the depth gives a really good 3D effect.
It is worth noting, however, that the process creates quite a bit of dust. I had the LaserPecker Desktop Air Purifier plugged in throughout the process and turned up the suction as much as I could. Despite this, there was quite a bit of brass dust on and around the work area and in the exhaust port of the Air Purifier.
The included accessories in our Ultimate Bundle naturally also required me to give them a try.
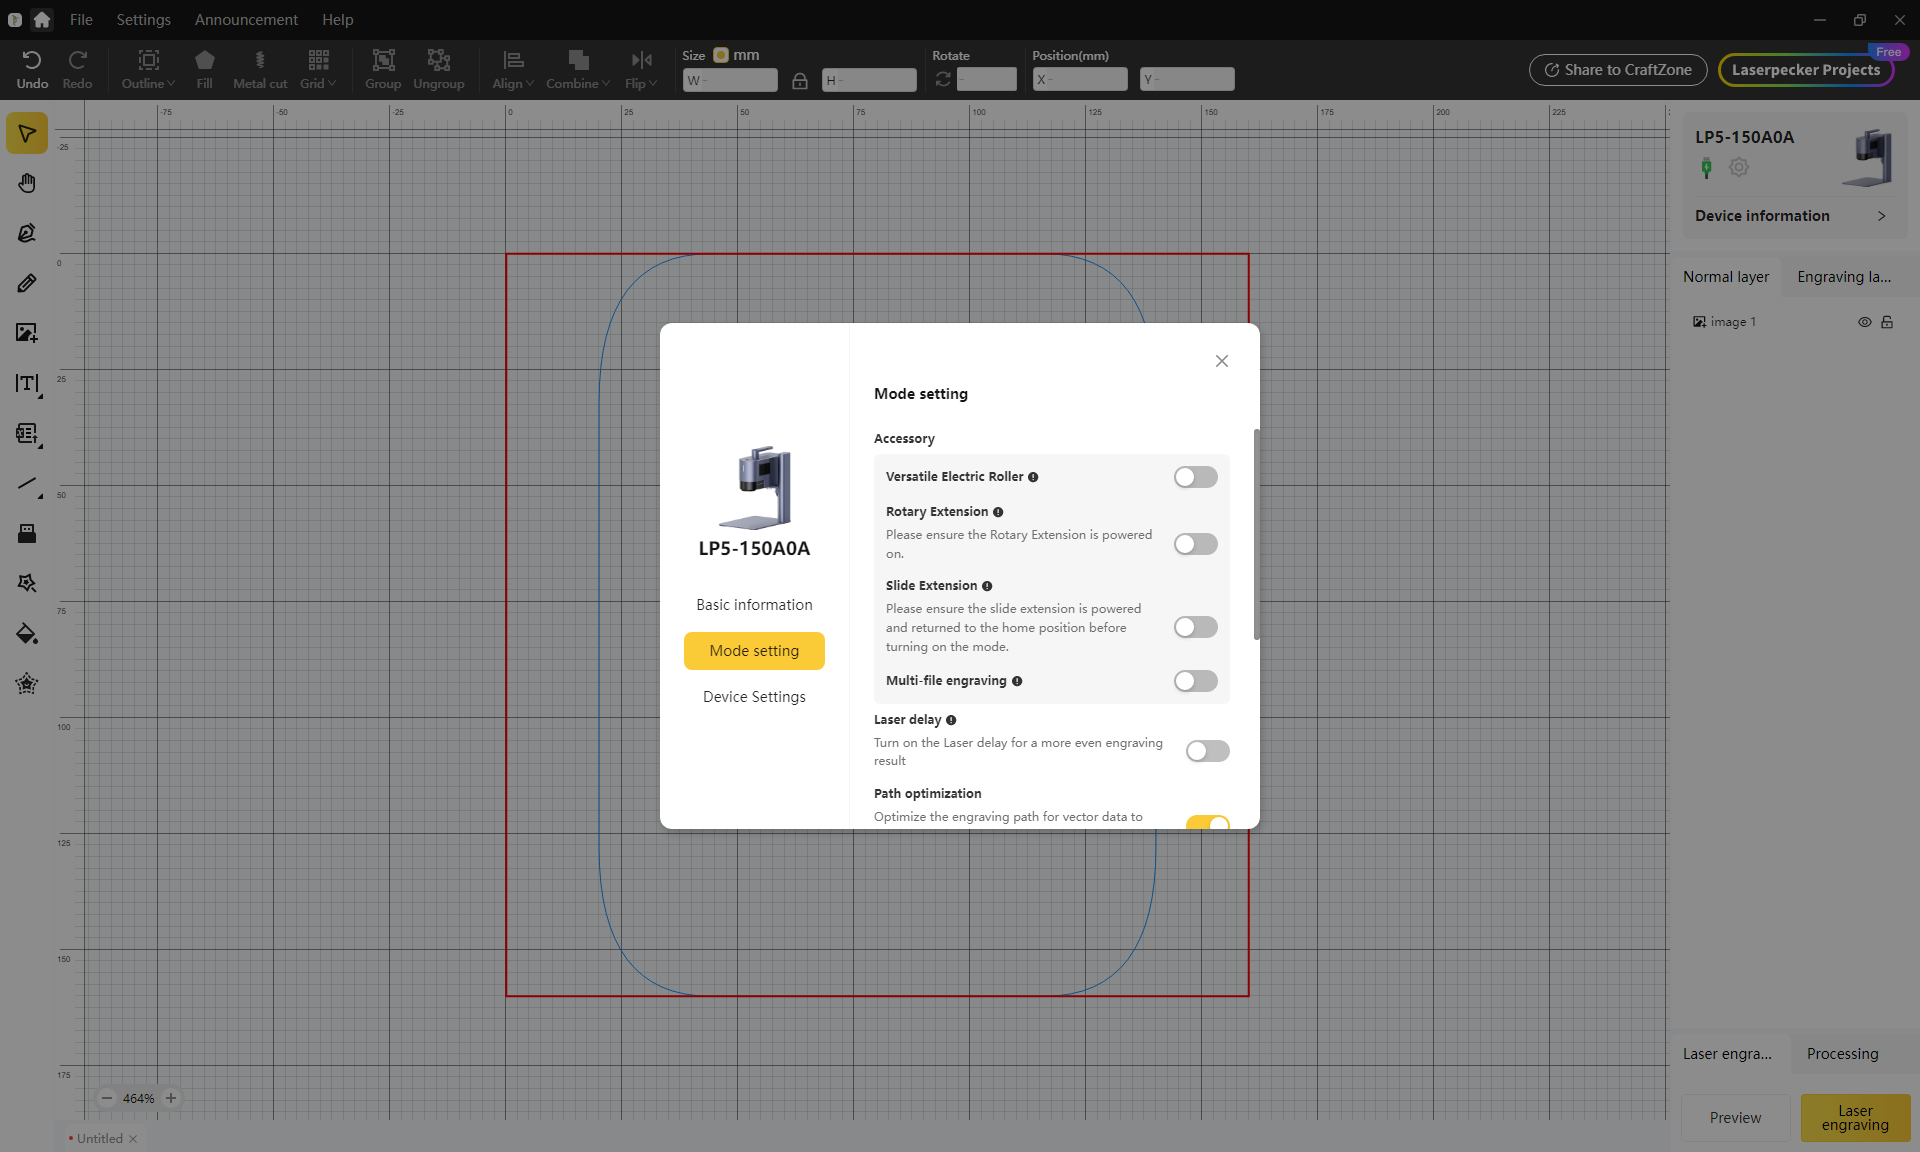
I started with the Slider Extension accessory, which allows you to expand the size of the material you can work with. The accessory connects via a USB connector on the back of the LP5, which provides both power and control of the device.
You must then indicate in the software that you are using Slider Extension, after which the software adjusts the area you can use.
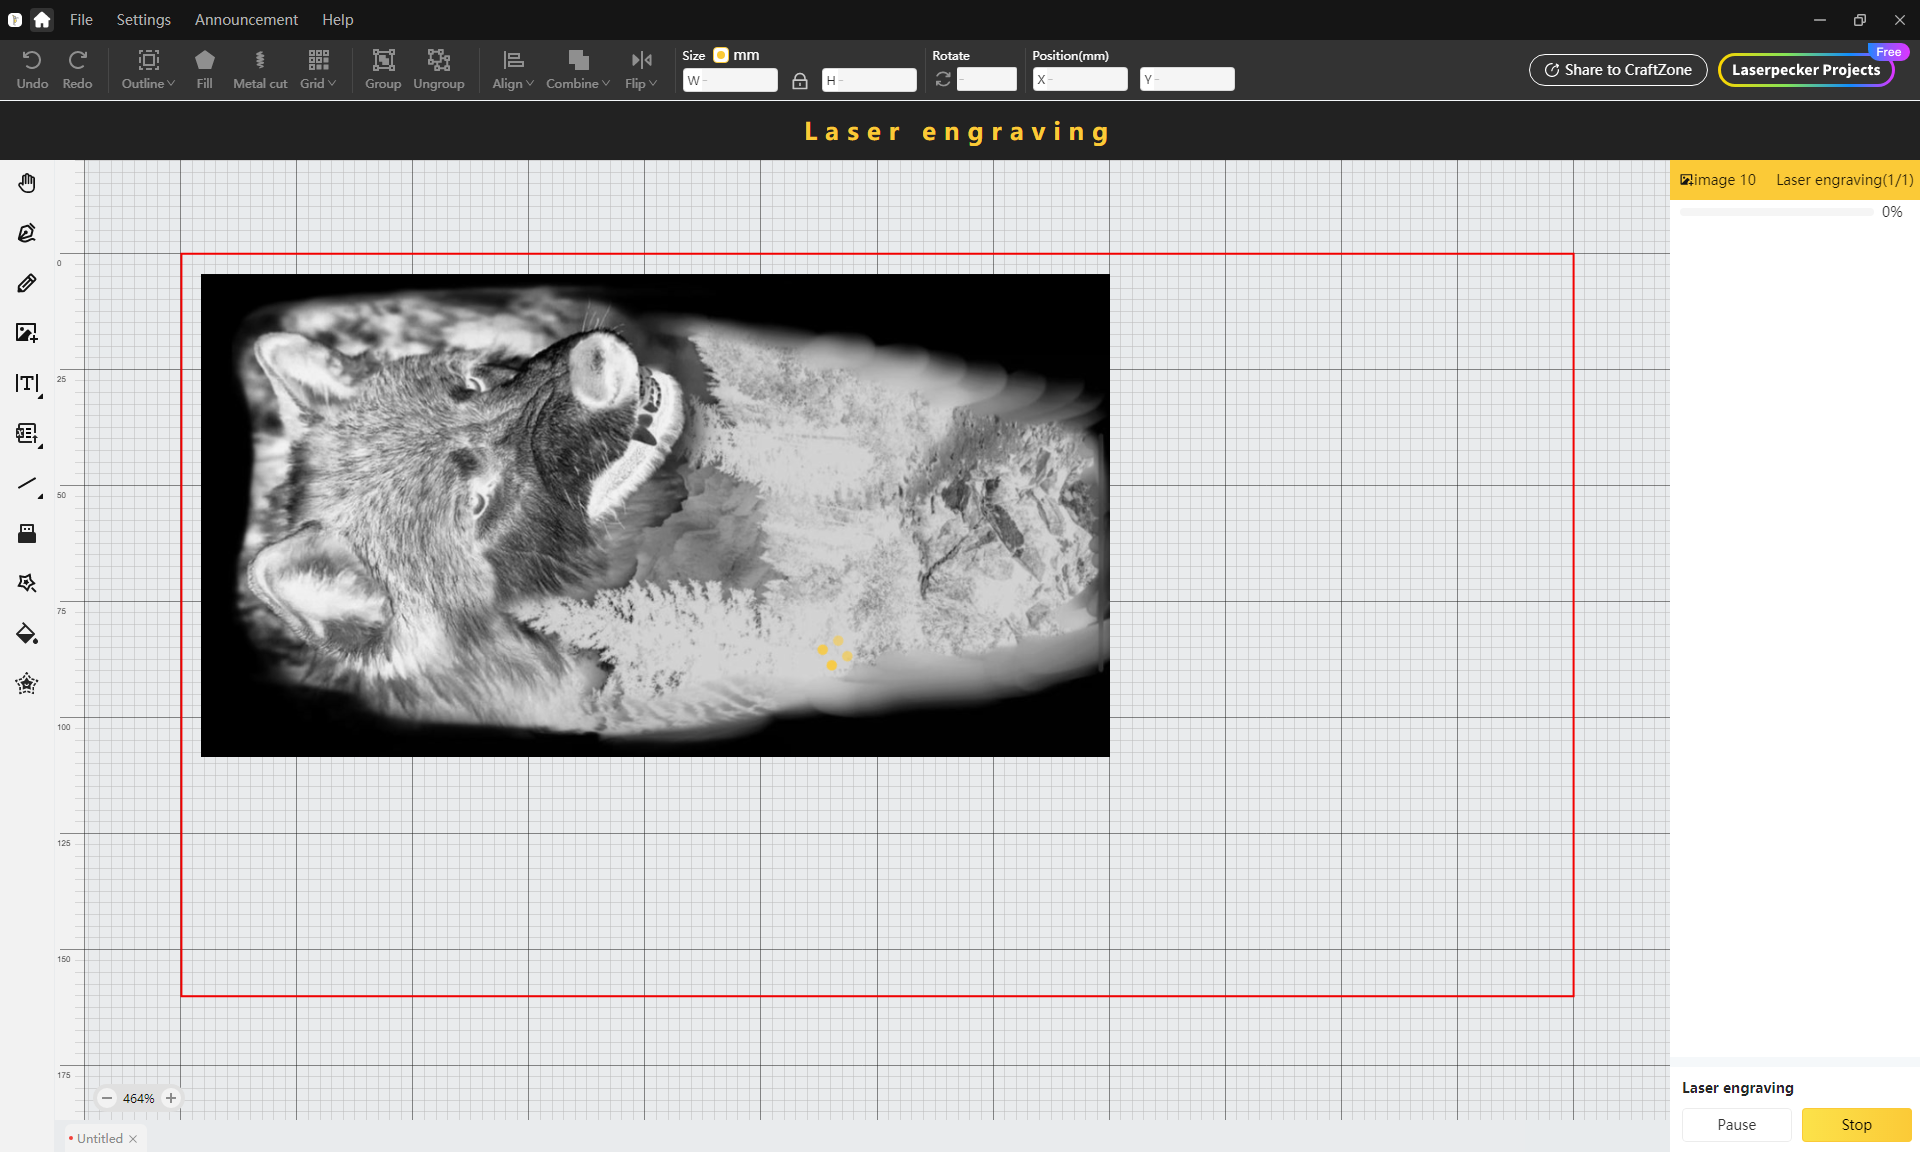
In my case, I wanted to give it a try by engraving another wolf motif on a piece of black anodized aluminum.
The process of preparing the project is exactly the same, but now with a larger area to work with. When you start the project, the system automatically drives the Slider Extension plate forward, so that the material is continuously pushed through the work area.
A pair of clamps are included that can be used to hold the material in place so that it doesn't shift. I quickly discovered that this was a necessity when the aluminum plate started to bend due to the heat. This resulted in the plate ending up stuck against the protective cap.
Of course, it affected the image, but if you ignore the error it caused, I think the rest of the result nicely shows the possibilities with the LP5 and the Slider Extension accessory.
The other accessory included was the Rotary Extension, which allows engraving on round objects, such as drinking bottles, jewelry, glasses, etc. The Rotary Extension part itself can be adjusted so that it can handle objects with different circumferences.
Here the setup requires a bit more work. The setup is the same as before, with a connection via USB and a change in the software so that the program knows that you are using the Rotary Extension part.
However, you must also measure the circumference of the object you want to engrave, as this will influence how the file is prepared.
I tried my hand at a steel water bottle, which was to be decorated with a picture of a Japanese Oni mask.
Here I got a reasonable result, although it wasn't as clear as I would have liked. It could be a combination of my settings and the way the bottle is made.
However, it clearly shows that it is beneficial to test your settings before embarking on large projects. This of course requires that you have extra material of the same type on which you can do a material test. In this case, it would have been an extra drinking bottle.
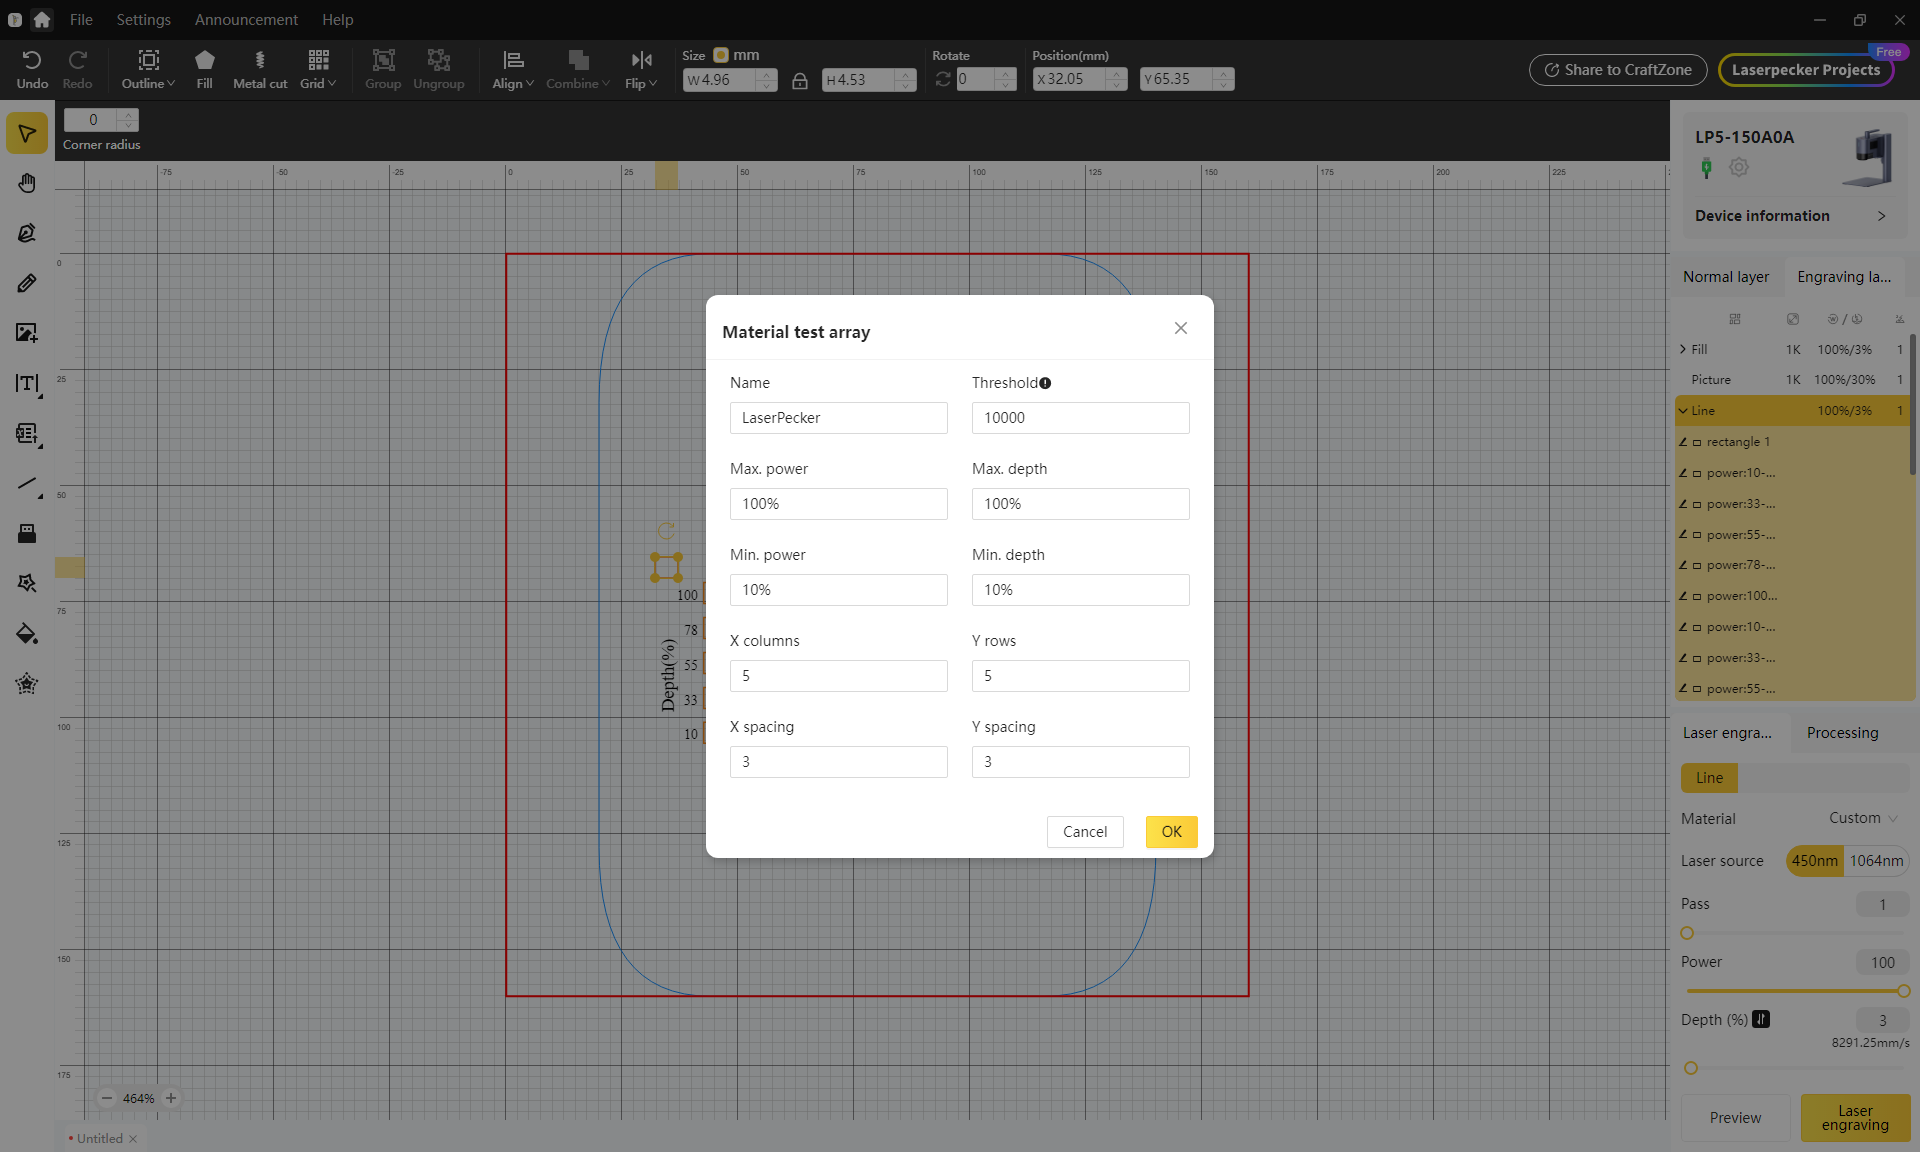
The software has the option to insert a file for testing settings. There you create a diagram with changing speeds and strength. That way, by looking at the result, you can find the combination of speed and strength that gives a result that you are satisfied with.
Price
At the time of writing, I cannot find the LaserPecker LP5 at any retailers. However, it is possible to order it directly from LaserPecker's own website with free shipping.
Here the LP5 in the Ultimate Bundle version that we have tested with a price of just under 3700$.
If you can get by with the LP5 alone, it costs 2899$.
On the surface it is a high price, but if you look at similar products on the market such as xTool F1 Ultra, the LaserPecker LP5 lands at a super good price.
xTool F1 Ultra in a bundle with the same kind of accessories that I have looked at in the test here comes in with a tear-jerking price of 5399$ resulting in a pretty sizeable savings.
Conclusion
It's clear that LaserPecker is aiming to take on competitors like xTool. They're entering the market with super solid hardware in the LP5, which offers really broad application possibilities for a wide range of materials and tasks.
On that front, LaserPecker meets its competitors in style with a product that combines strong hardware with exquisite and complete build quality, and at a price that is significantly below what, for example, xTool charges for a similar machine.
The big weakness for LaserPecker, however, is the software, which seems unfinished to a degree that has undoubtedly given me more gray hairs than I already had.
I'm surprised that there isn't more control over the software, because as the name suggests, LP5 is the fifth product in the LaserPecker family. So it's not a completely new company.
It is possible to work with the software, but it requires that you are prepared to spend a lot of time searching for answers in other users' experiences, or testing materials repeatedly to tune in to settings that work. It is not impossible to achieve the goal with the software, but it is both a difficult and frustrating task.
I am quite confident, as software is a fixable problem, which is not the case with bad hardware. My contact at LaserPecker has stated that the software is a priority for the team and that they are working on improving it.
As always in our tests, however, we cannot evaluate products based on promises of future updates and must rely on what we can use in the test situation.
We end up with a final score of 8 for a product that kicks in the door with super strong hardware and a sharp price compared to the competition. Unfortunately, however, due to the LaserPecker Design Space software, the LaserPecker LP5 trips over the threshold, causing scratches in the otherwise nice paint.
I really hope that the software team at LaserPecker gives their software an overhaul because with intuitive and user-friendly software, this would be a truly fantastic product for the serious hobbyist with a makerspace.
Advantages:
Disadvantages: