27 May
gadgets


Central features
Features that are worth looking at here are of course the option of auto leveling, which is a good bonus to have and can make life easier. The fact that the printer comes with Klipper firmware and the possibility of print speeds up to 500 mm/s are also super good bonuses, even if the real speeds naturally never come close to 500 mm/s.
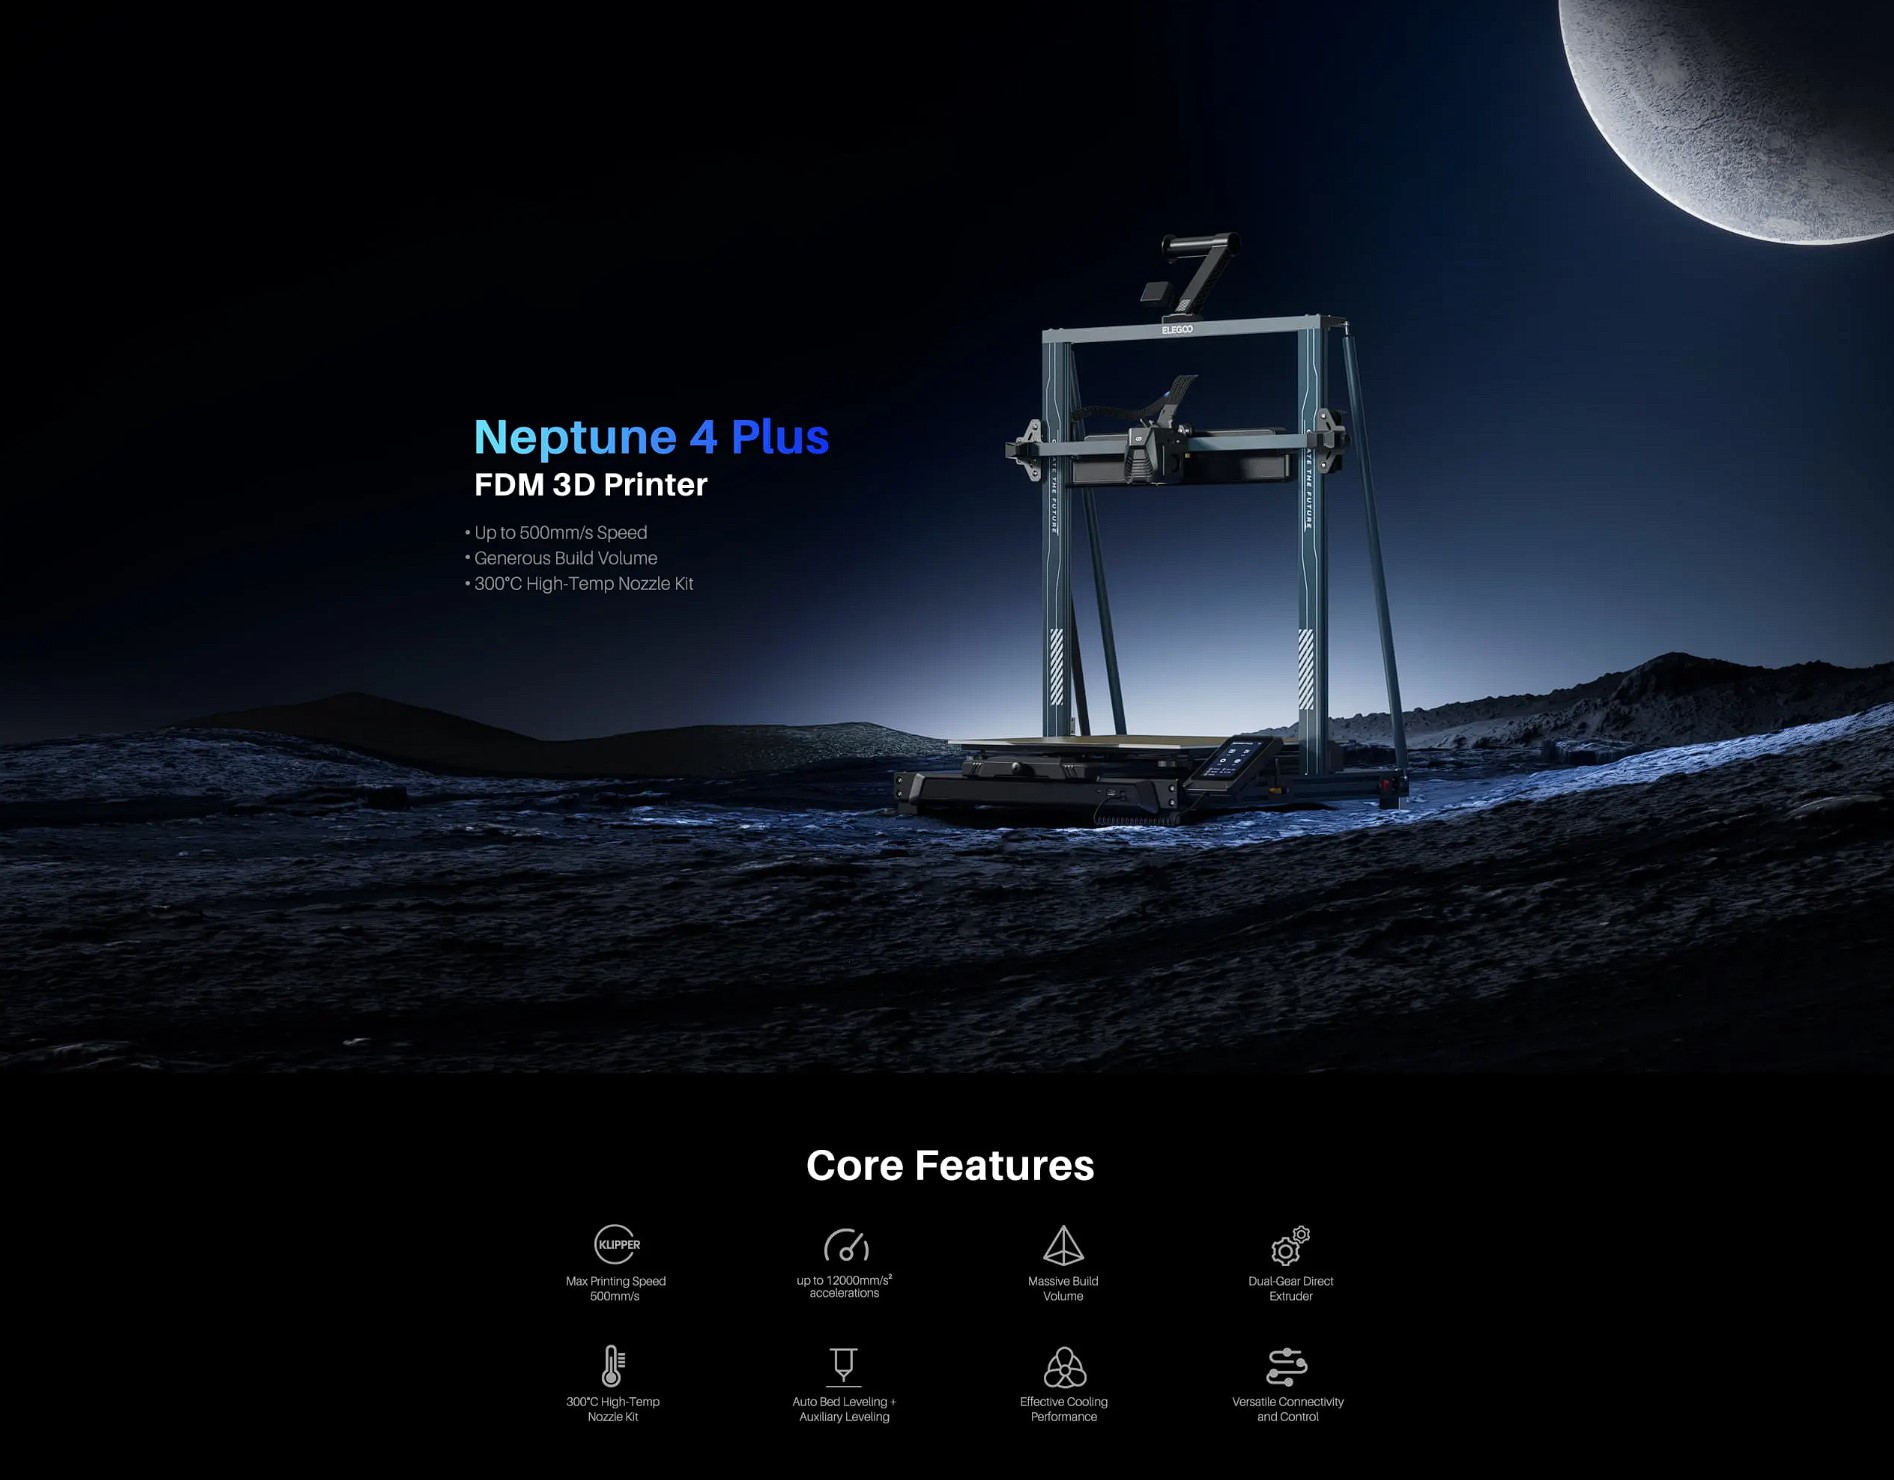
On top of that comes the larger build volume of 320x320x385mm. Despite that, it is actually only the middle size in the Neptune series. The even larger Elegoo Neptune 4 Max comes with a build volume of 420x420x480mm
A tour around the Elegoo Neptune 4 Plus
Elegoo Neptune 4 Plus is basically a larger version of the Neptune 4 Pro, which we have already looked at. This also means that many of the physical features are the same.
Before getting started with the printer, it must be assembled. It comes separately and there are a total of 14 parts in the box, if we don't count the screws.
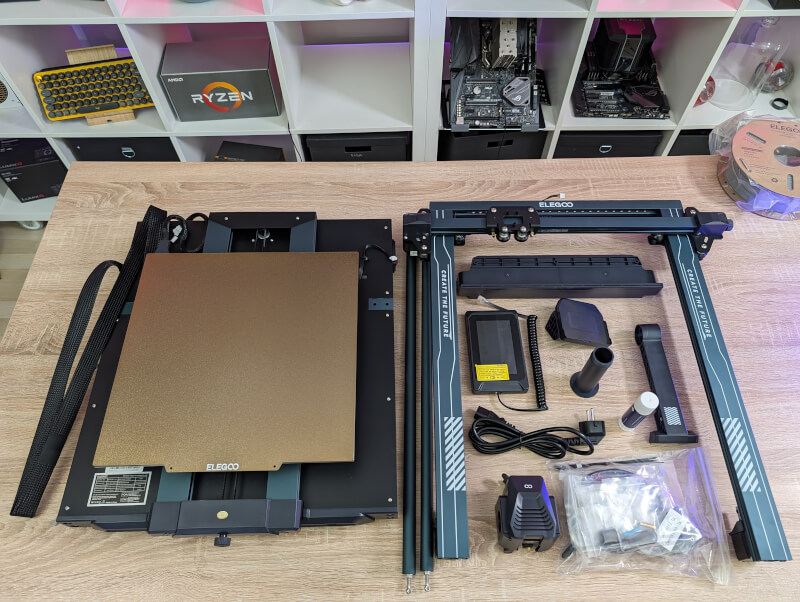
Fortunately, there is a good guide for assembly and set-up. All the screws are clearly marked in bags, so it's easy to go to. The process is pretty straight forward and even though a few of the screws were a little pinched in, it took me about 45 minutes to get it all together and ready to go.

Elegoo Neptune 4 Plus is an FDM printer. This means that it prints with filament in a selection of materials, which are then, in short, melted and stacked on top of each other in super thin layers until you have a finished object.
Elegoo Neptune 4 Plus can work with PLA, TPU, PETG, ABS, ASA and Nylon materials. In that context, PLA is the most normal and easiest to work with. Elegoo has sent us a roll of their PLA filament for our test.
Neptune 4 Plus is a 3D Printer of the "bedslinger" type. This means that the print platform at the bottom moves back and forth on the Y axis, while the print head is responsible for the movements to the sides on the X axis and up and down on the Z axis.
Elegoo Neptune 4 Plus is built from strong but light aluminum parts, which provide a solid and stable construction when things are assembled. To stabilize the slightly larger construction, the Neptune 4 Plus version comes with two braces, which are mounted between the bottom frame and the gantry frame to stabilize the whole thing.
The parts, which are made of plastic, also feel of reasonable and strong quality. Then none of the parts or materials feel cheap. All edges of nicely finished and there are no edges that are not nicely sanded down or finished by a plastic sheath.
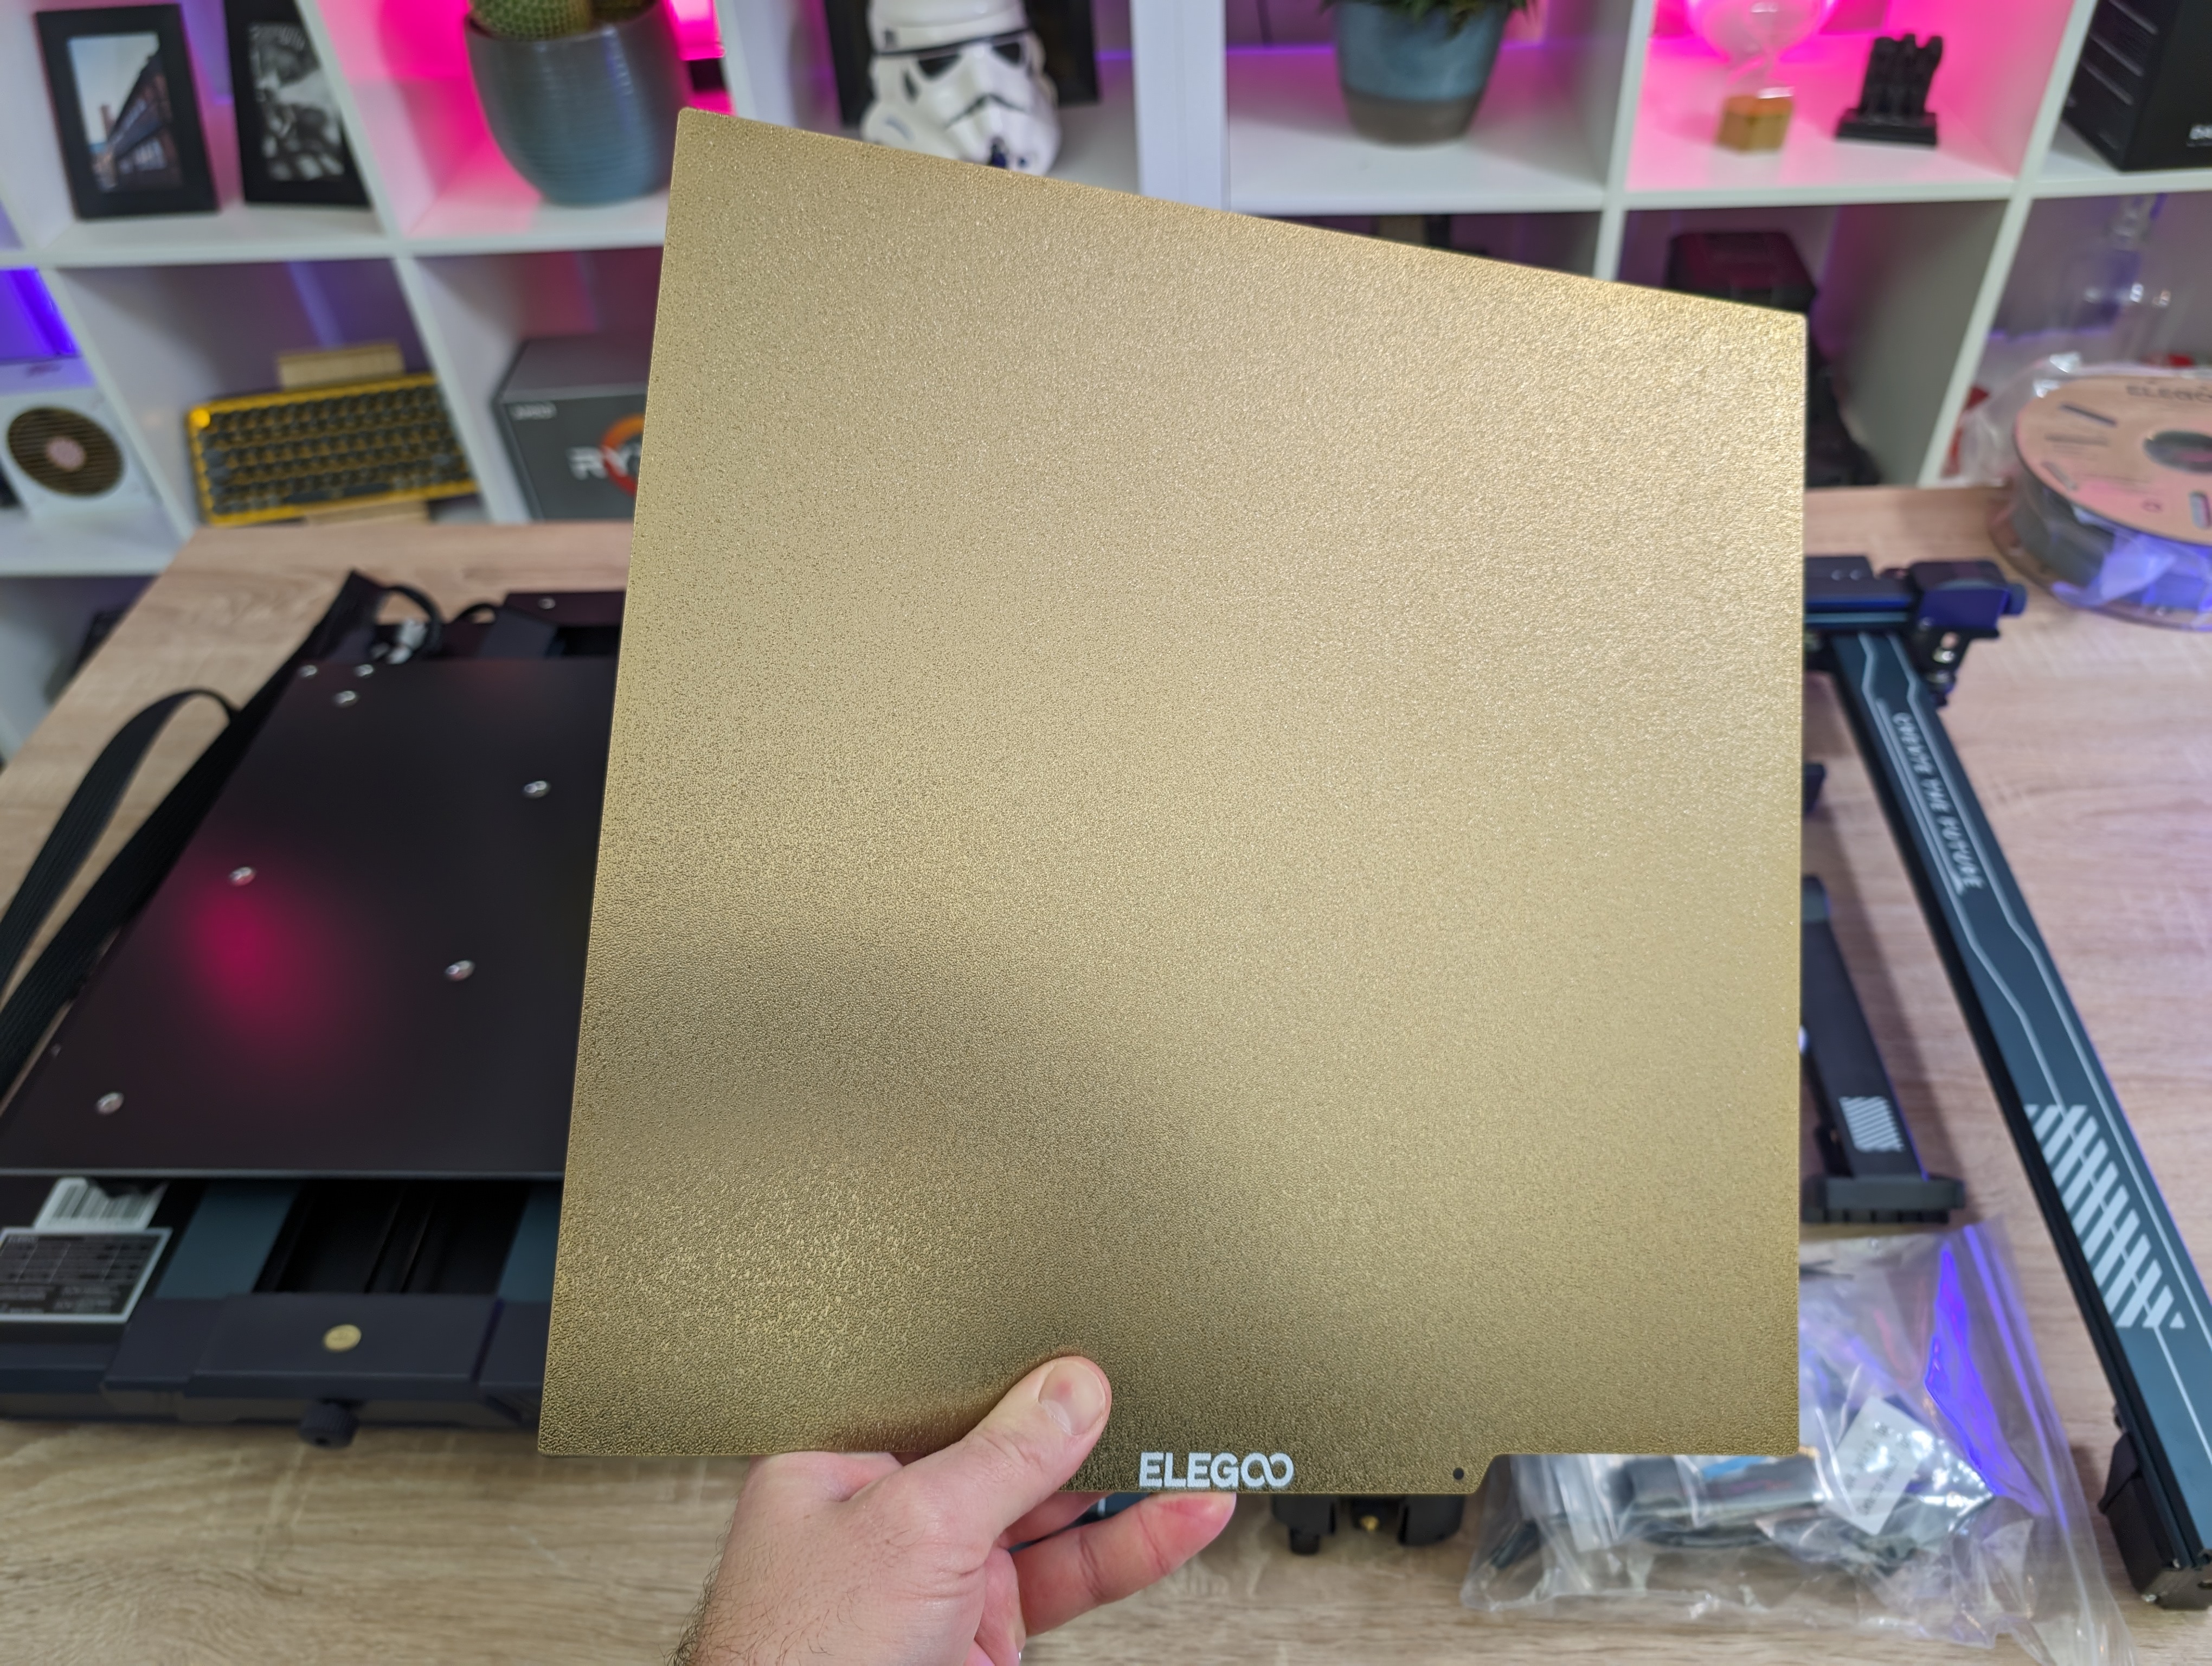
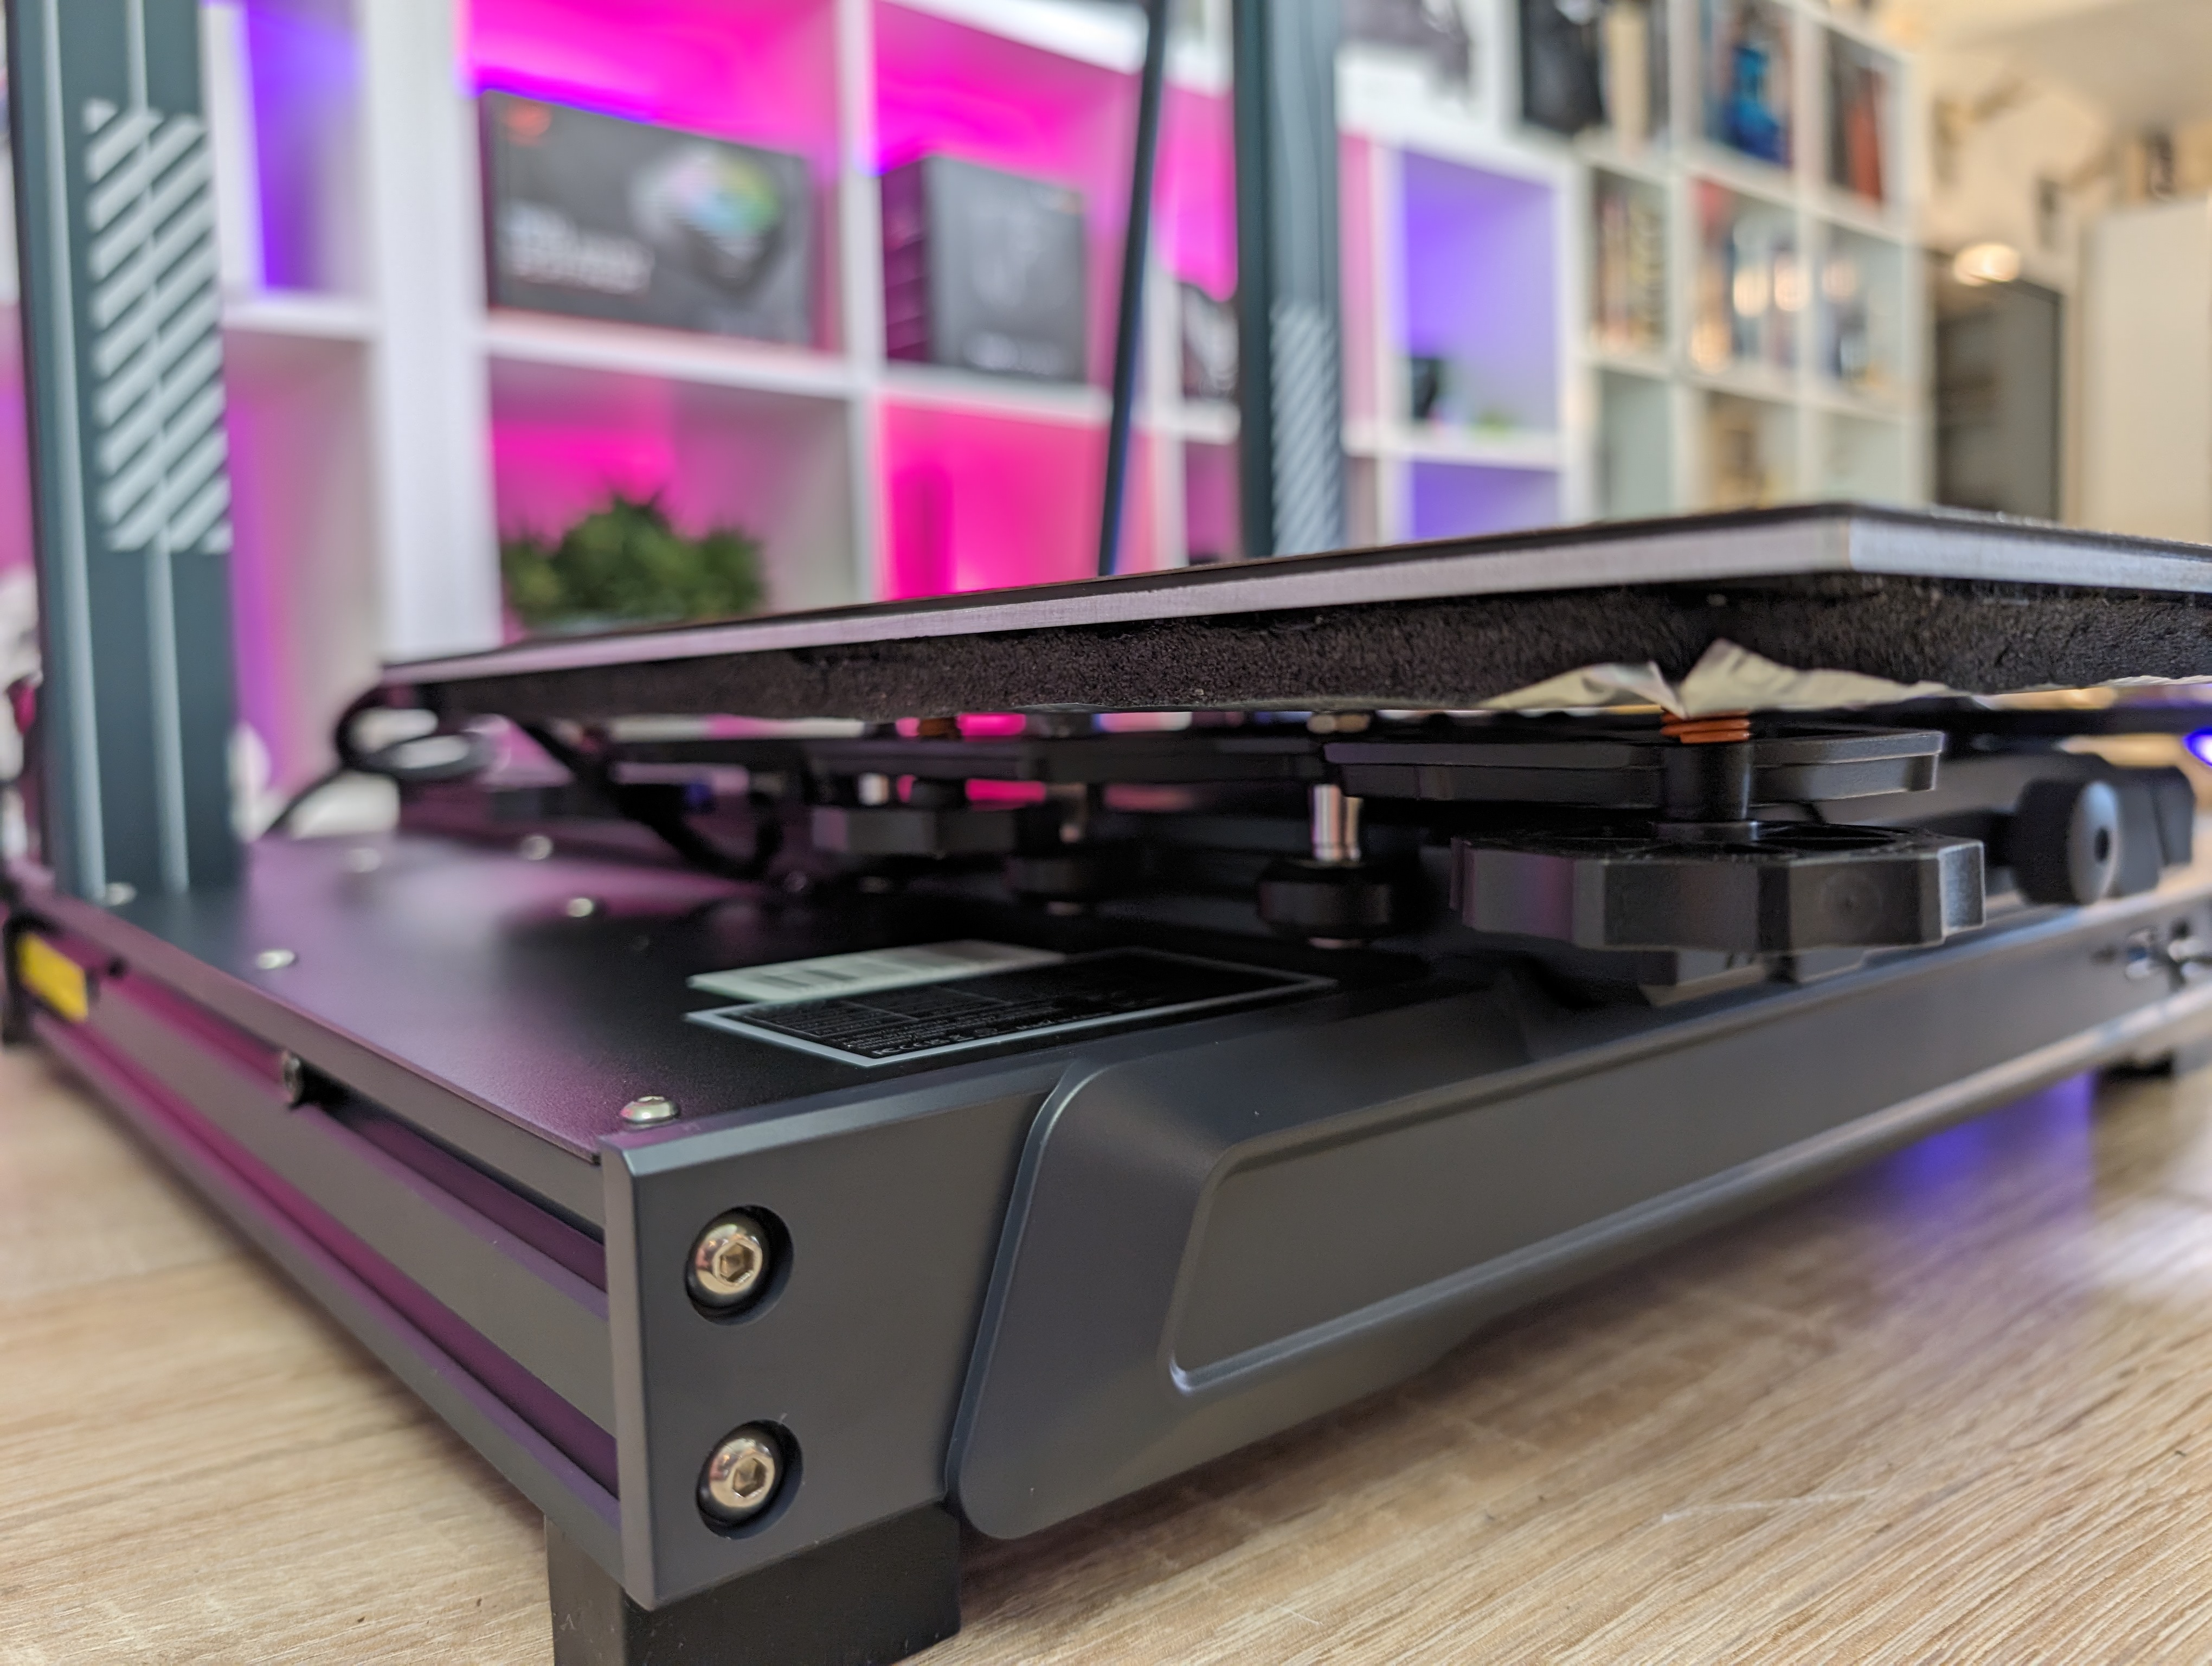
It is a flexible PEI buildplate that mounts magnetically to the Neptune 4 Plus. It has a textured surface that should ensure that the print is firmly attached while printing without the need for additional measures.
The larger buildplate unfortunately means that with the Neptune 4 Plus you don't get the split heat in the print bed that we saw on the Neptune 4 Pro. So here it is the entire plate that heats up, regardless of whether you use it all or not.
Both drive belts have a very practical tensioning mechanism. It is simply a matter of screwing them on until you have the desired tension on the belts. A nice detail that means you can easily adapt things without the need for tools.
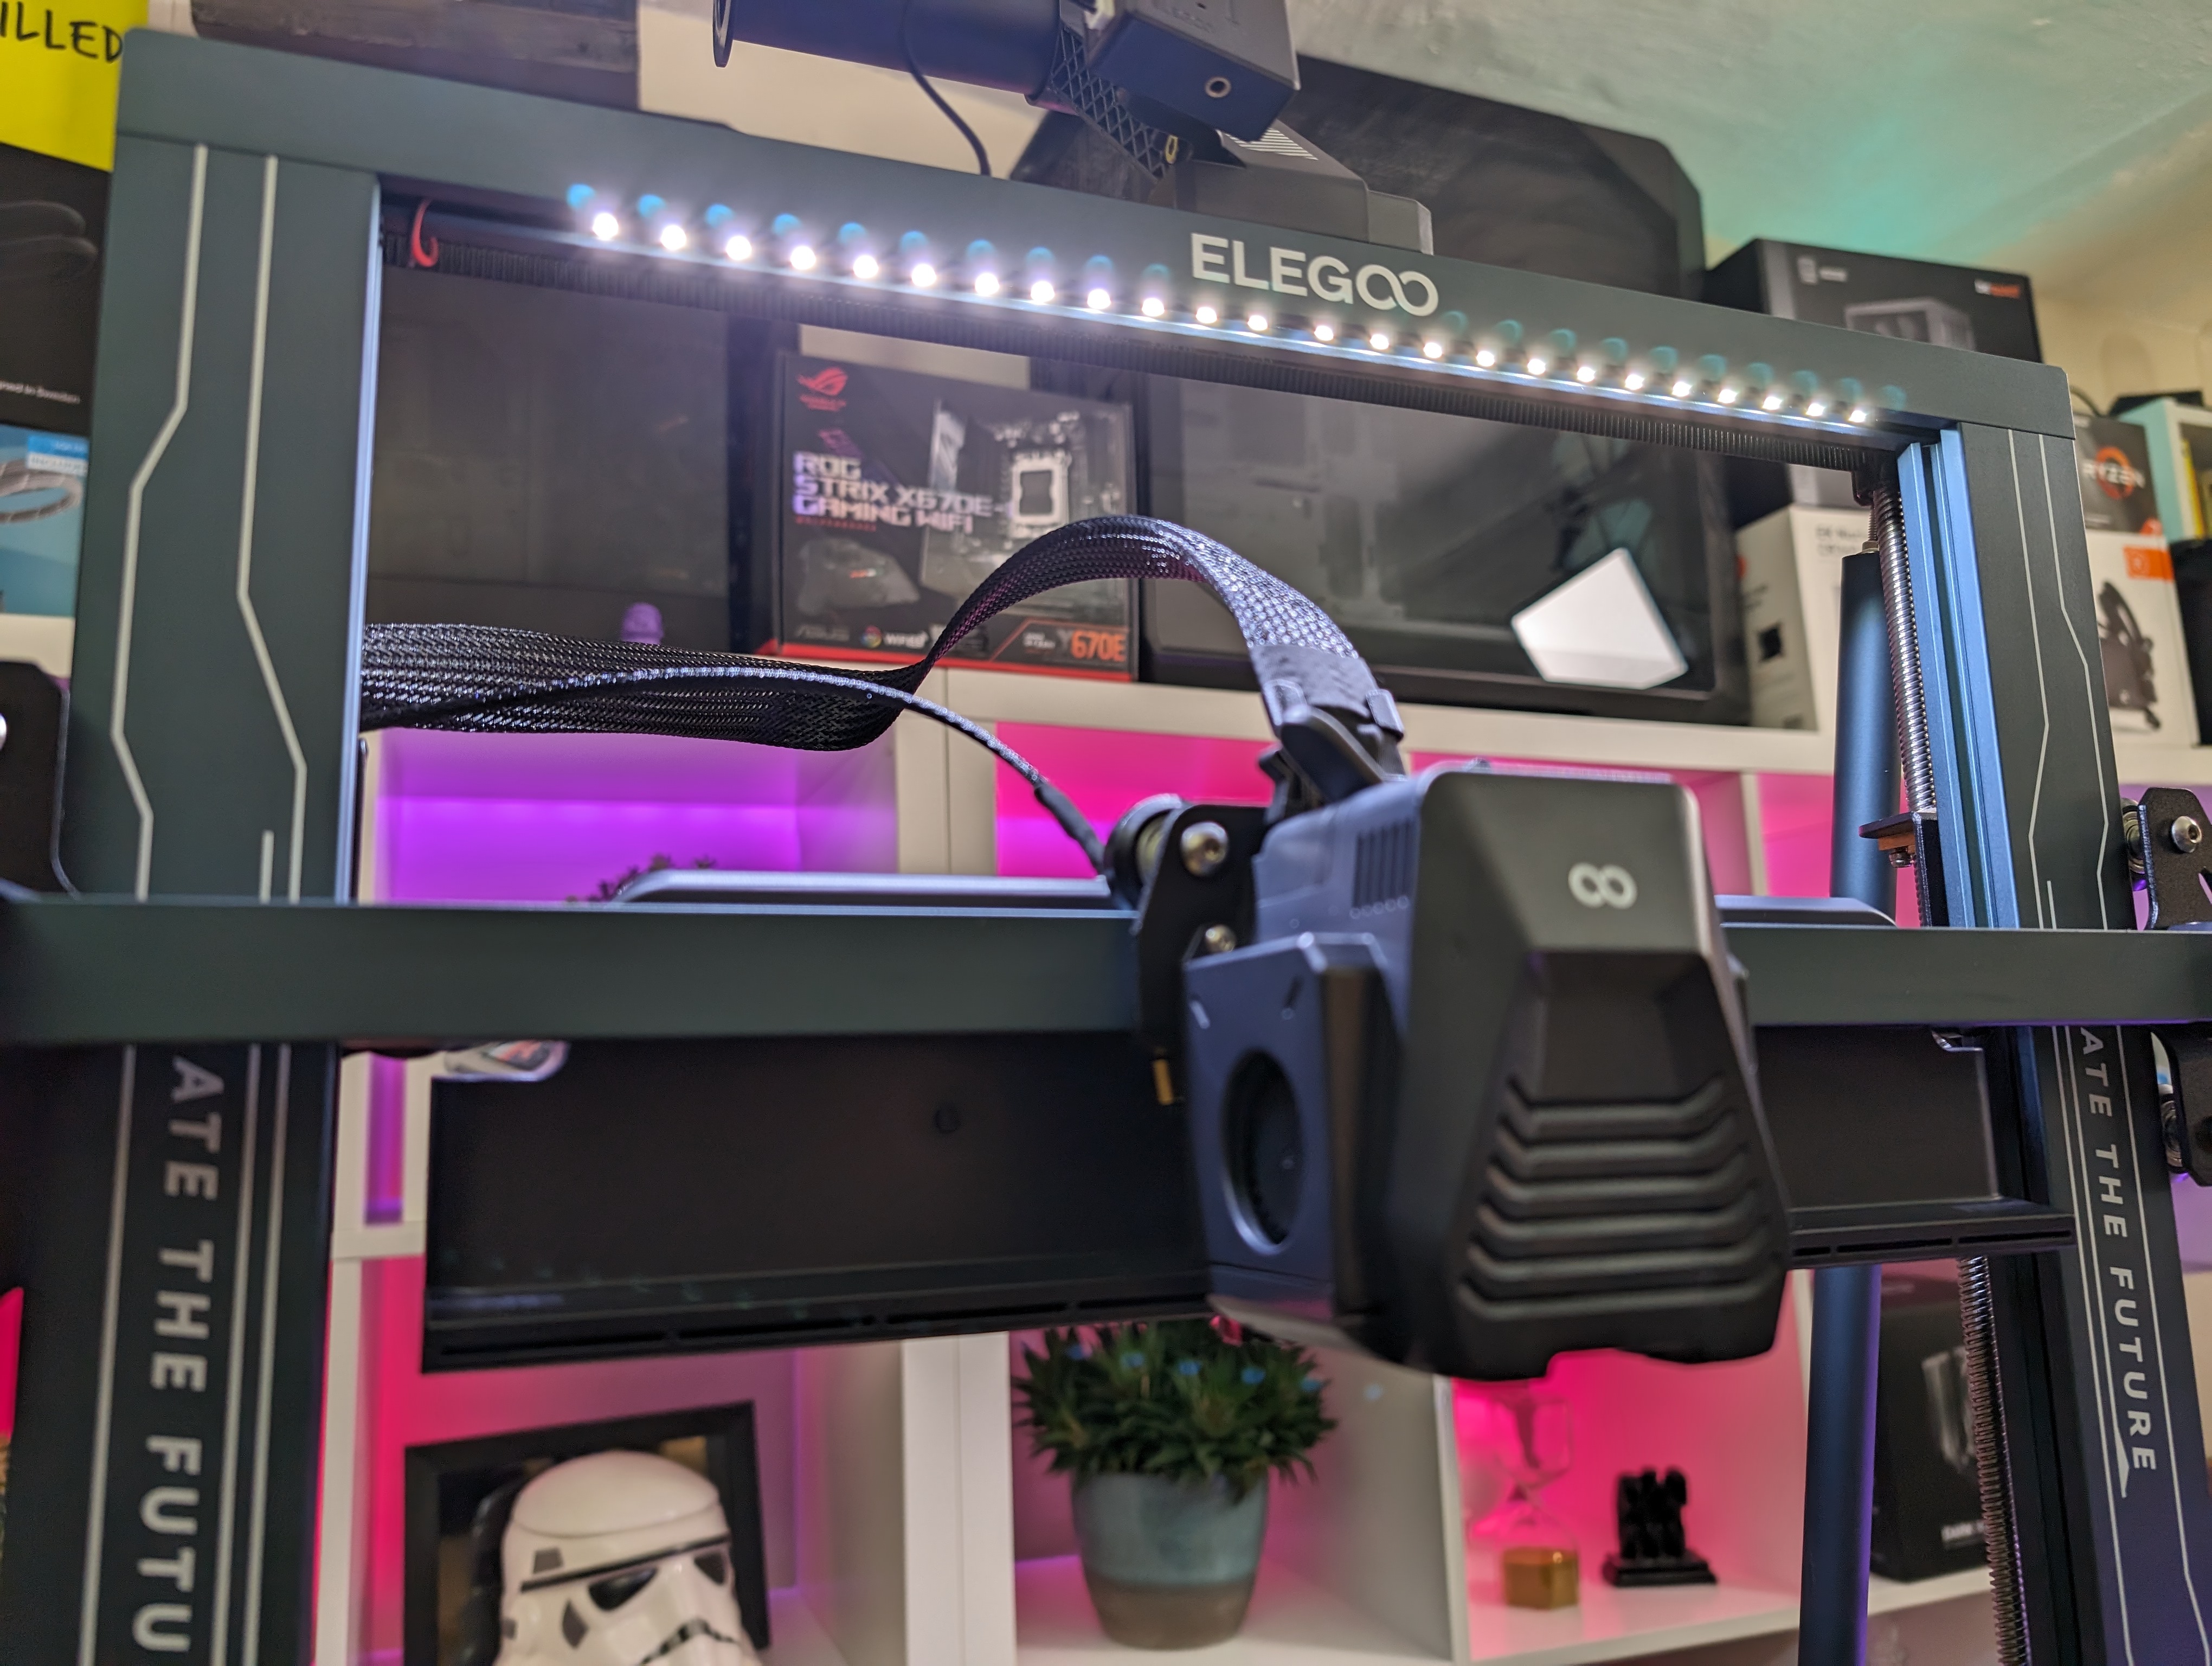
The machine is also equipped with LED lights both at the top of the machine and in the print head itself. In this way, you can get slightly better working light when you are at the machine. However, this also means that it is easier to monitor the machine externally via a camera or similar.
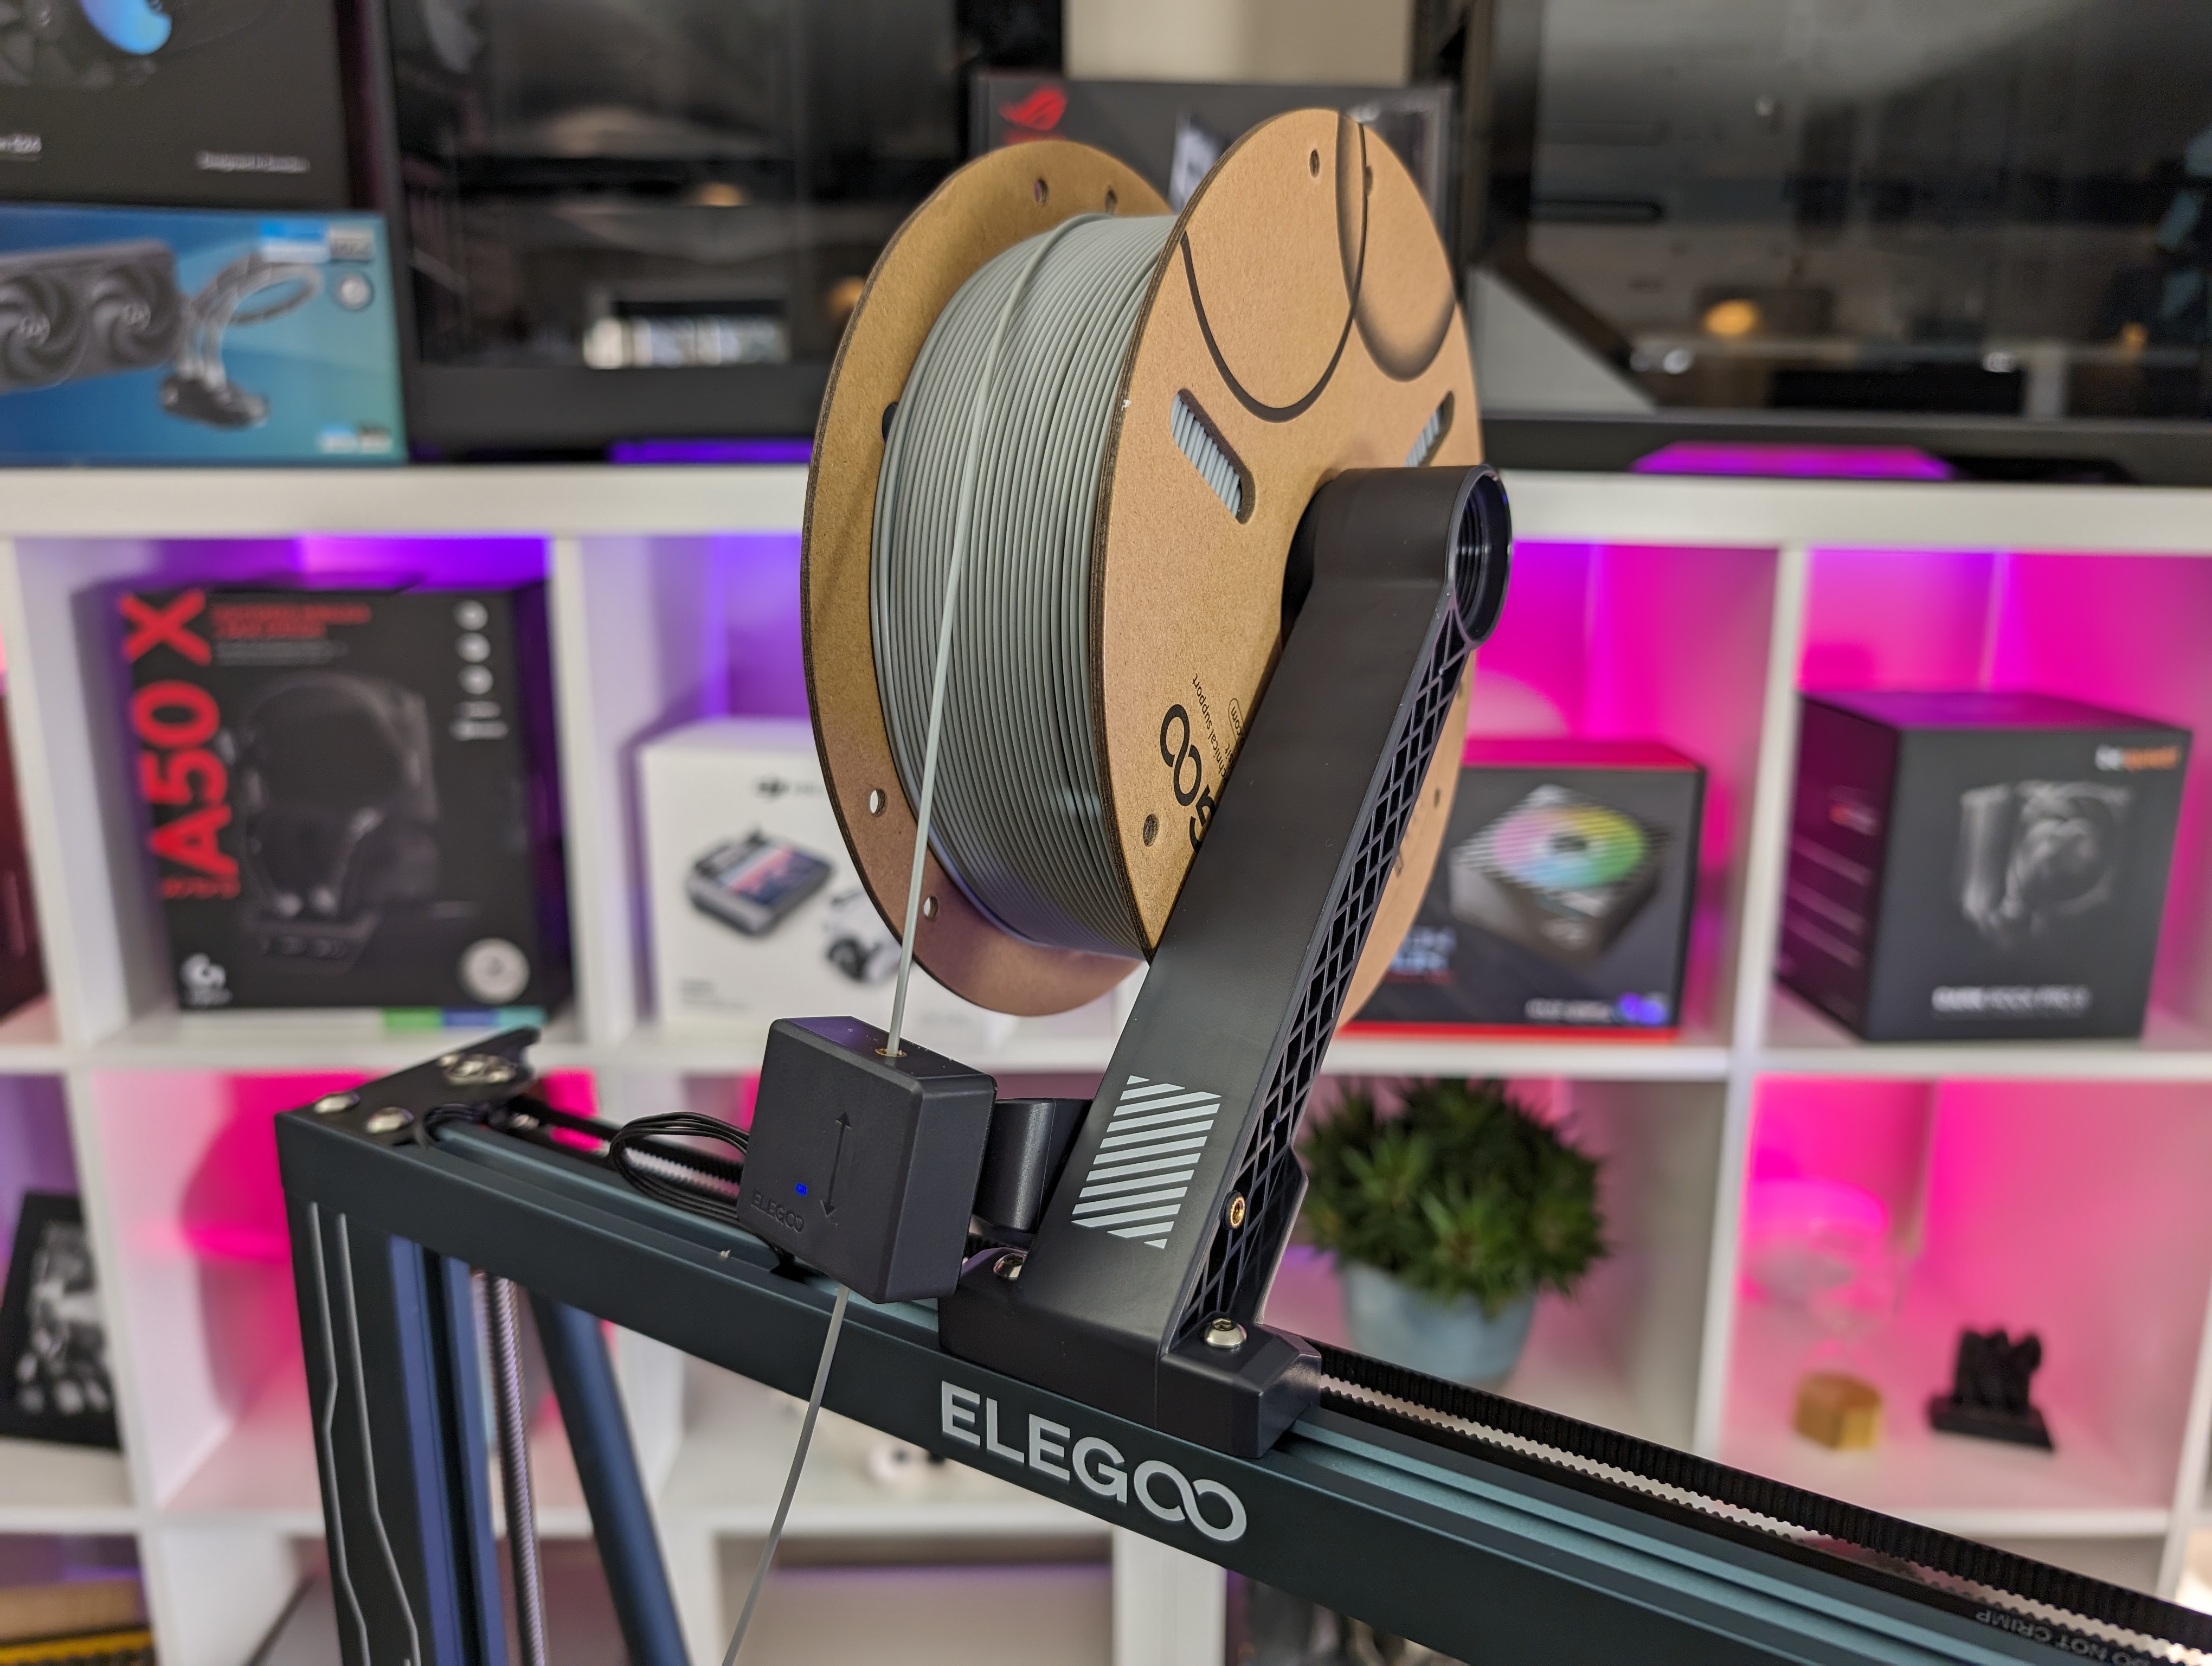
The Neptune 4 Plus also comes with a built-in filament sensor. It pauses your print if you run out of filament along the way. After this, you can simply switch to a new roll and resume printing.
It also has a Smart Resume function, so even if the power should go out during a print, it can resume printing when the power is back. All are delicious options if you print large items.
Overall, it seems that Elegoo has built a solid machine with some sensible materials and design choices. During my assembly and subsequent testing, I have not come across any inappropriate details.
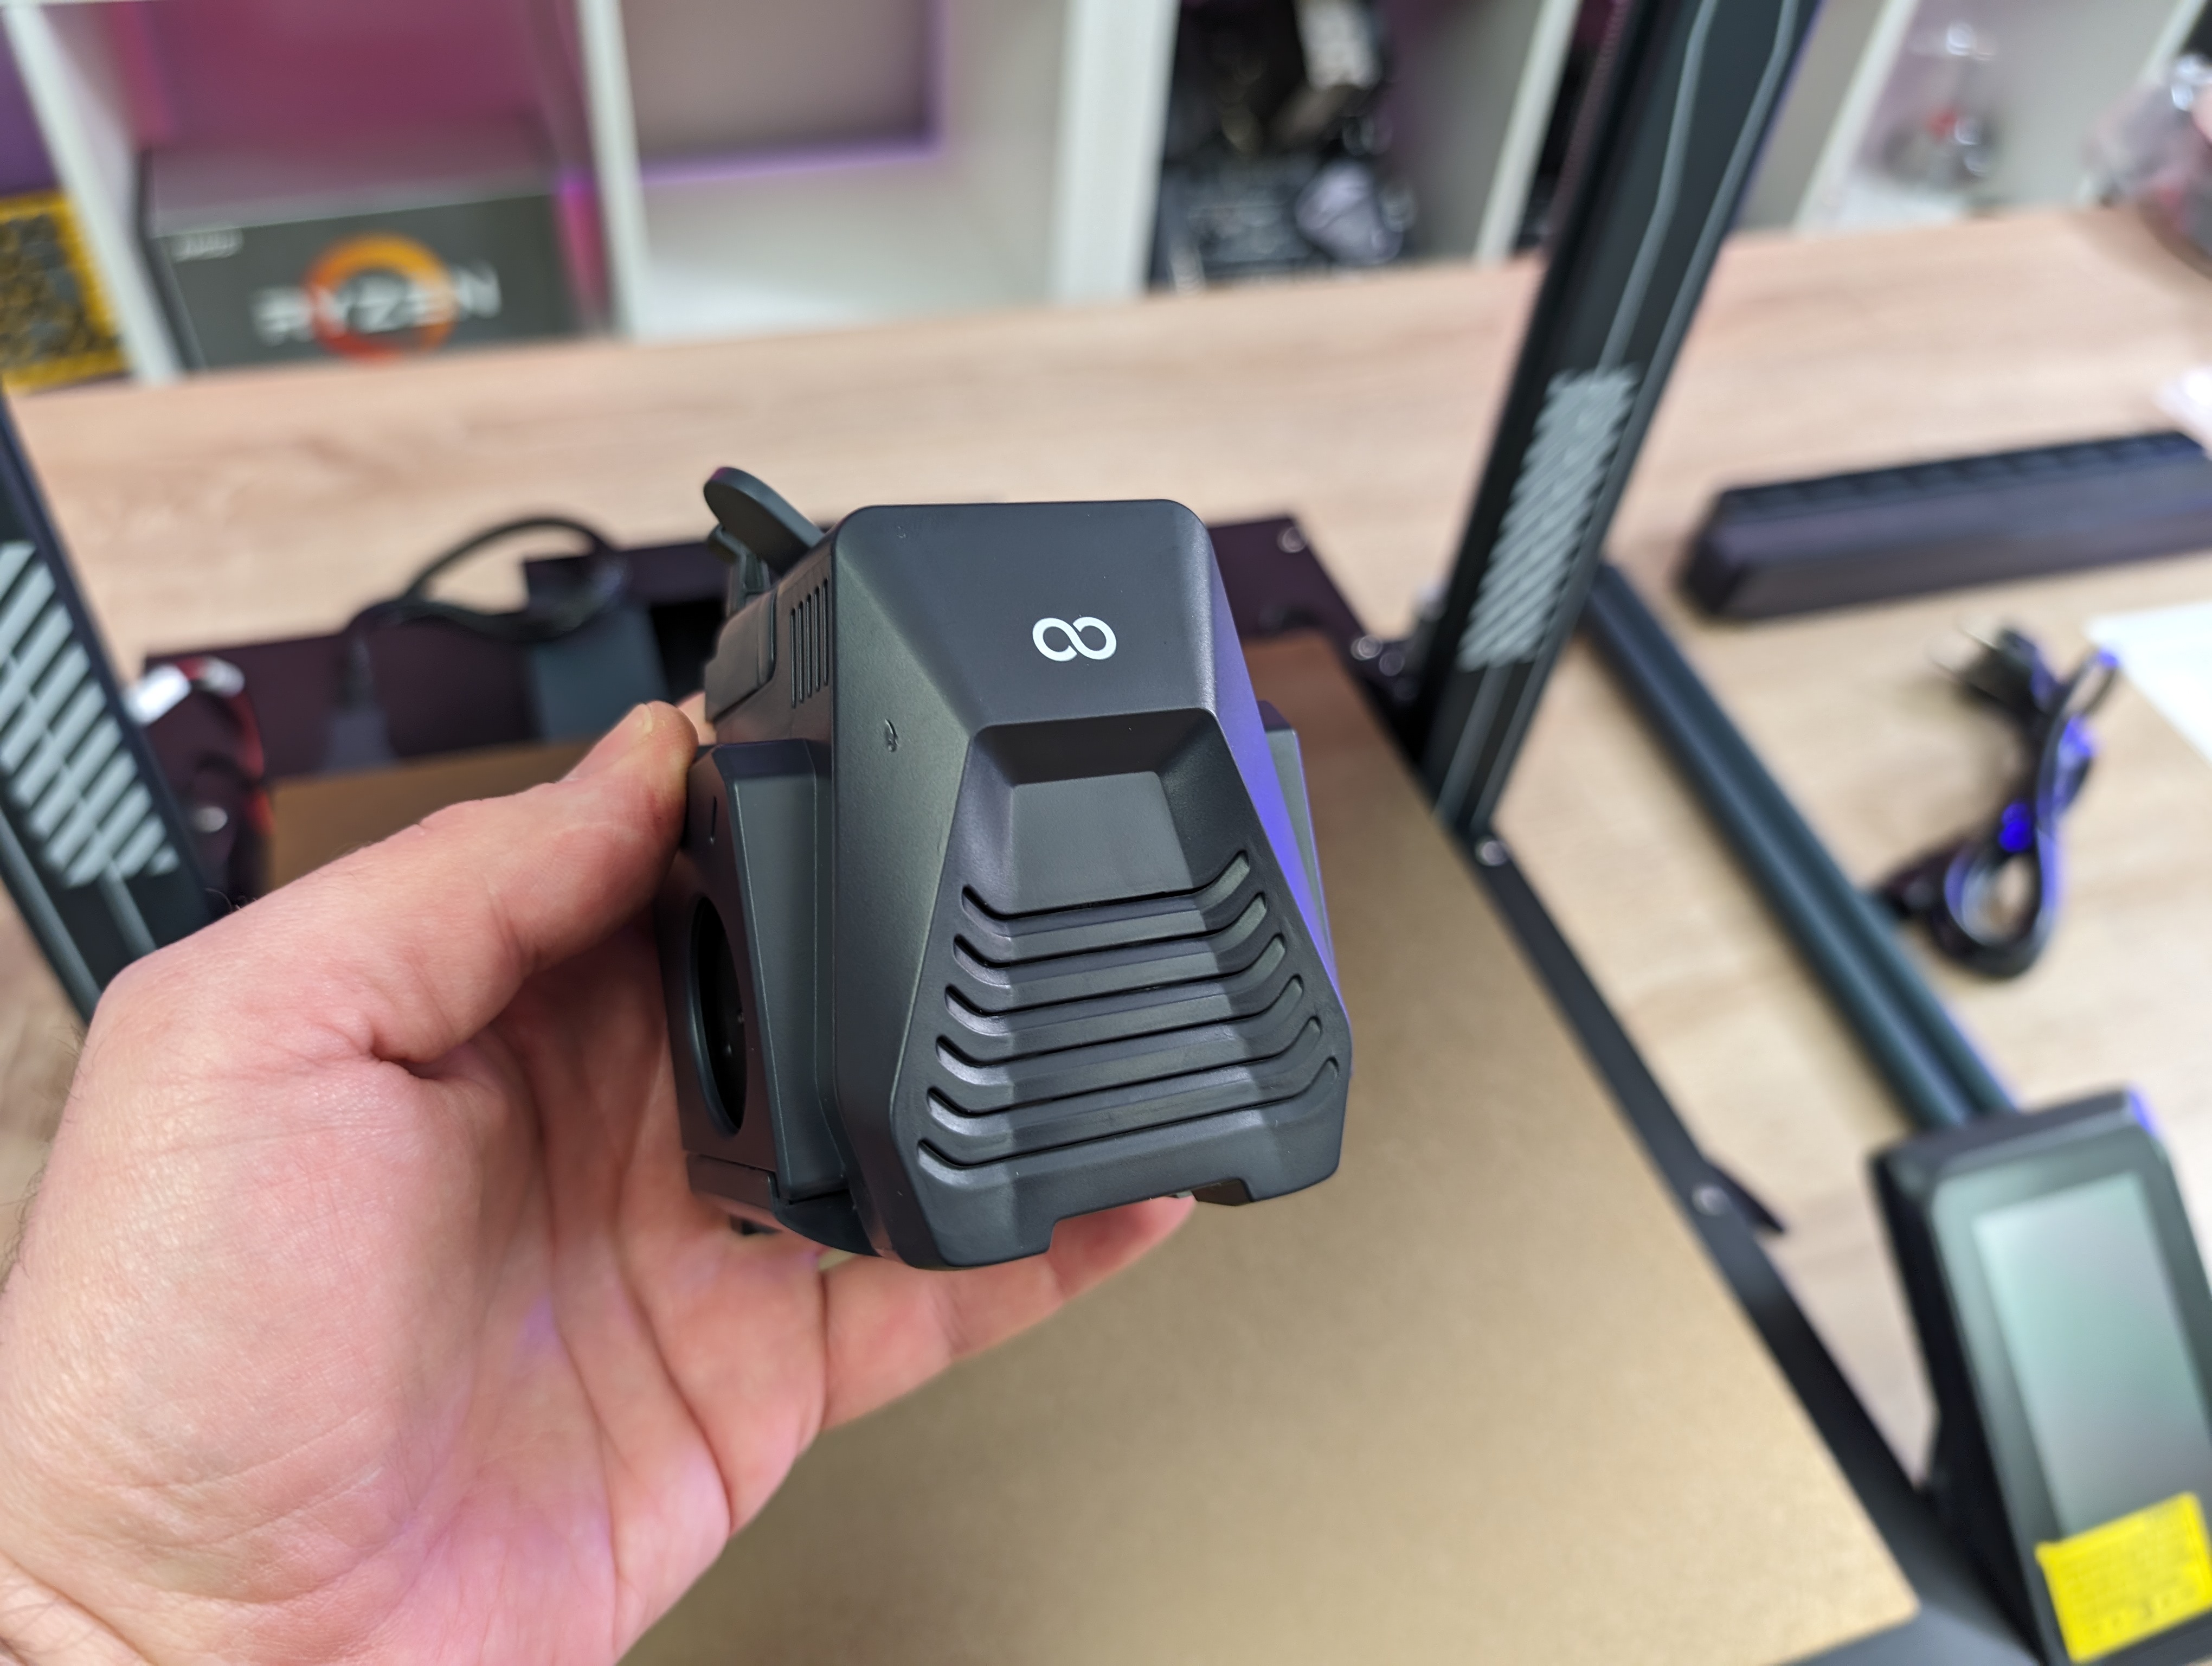
The entire print head is an integrated unit that can be unscrewed relatively easily from the machine, which means that maintenance or possibly replacement is quite easy. It seems at first glance that it is exactly the same setup as the one used on the Neptune 4 Pro.
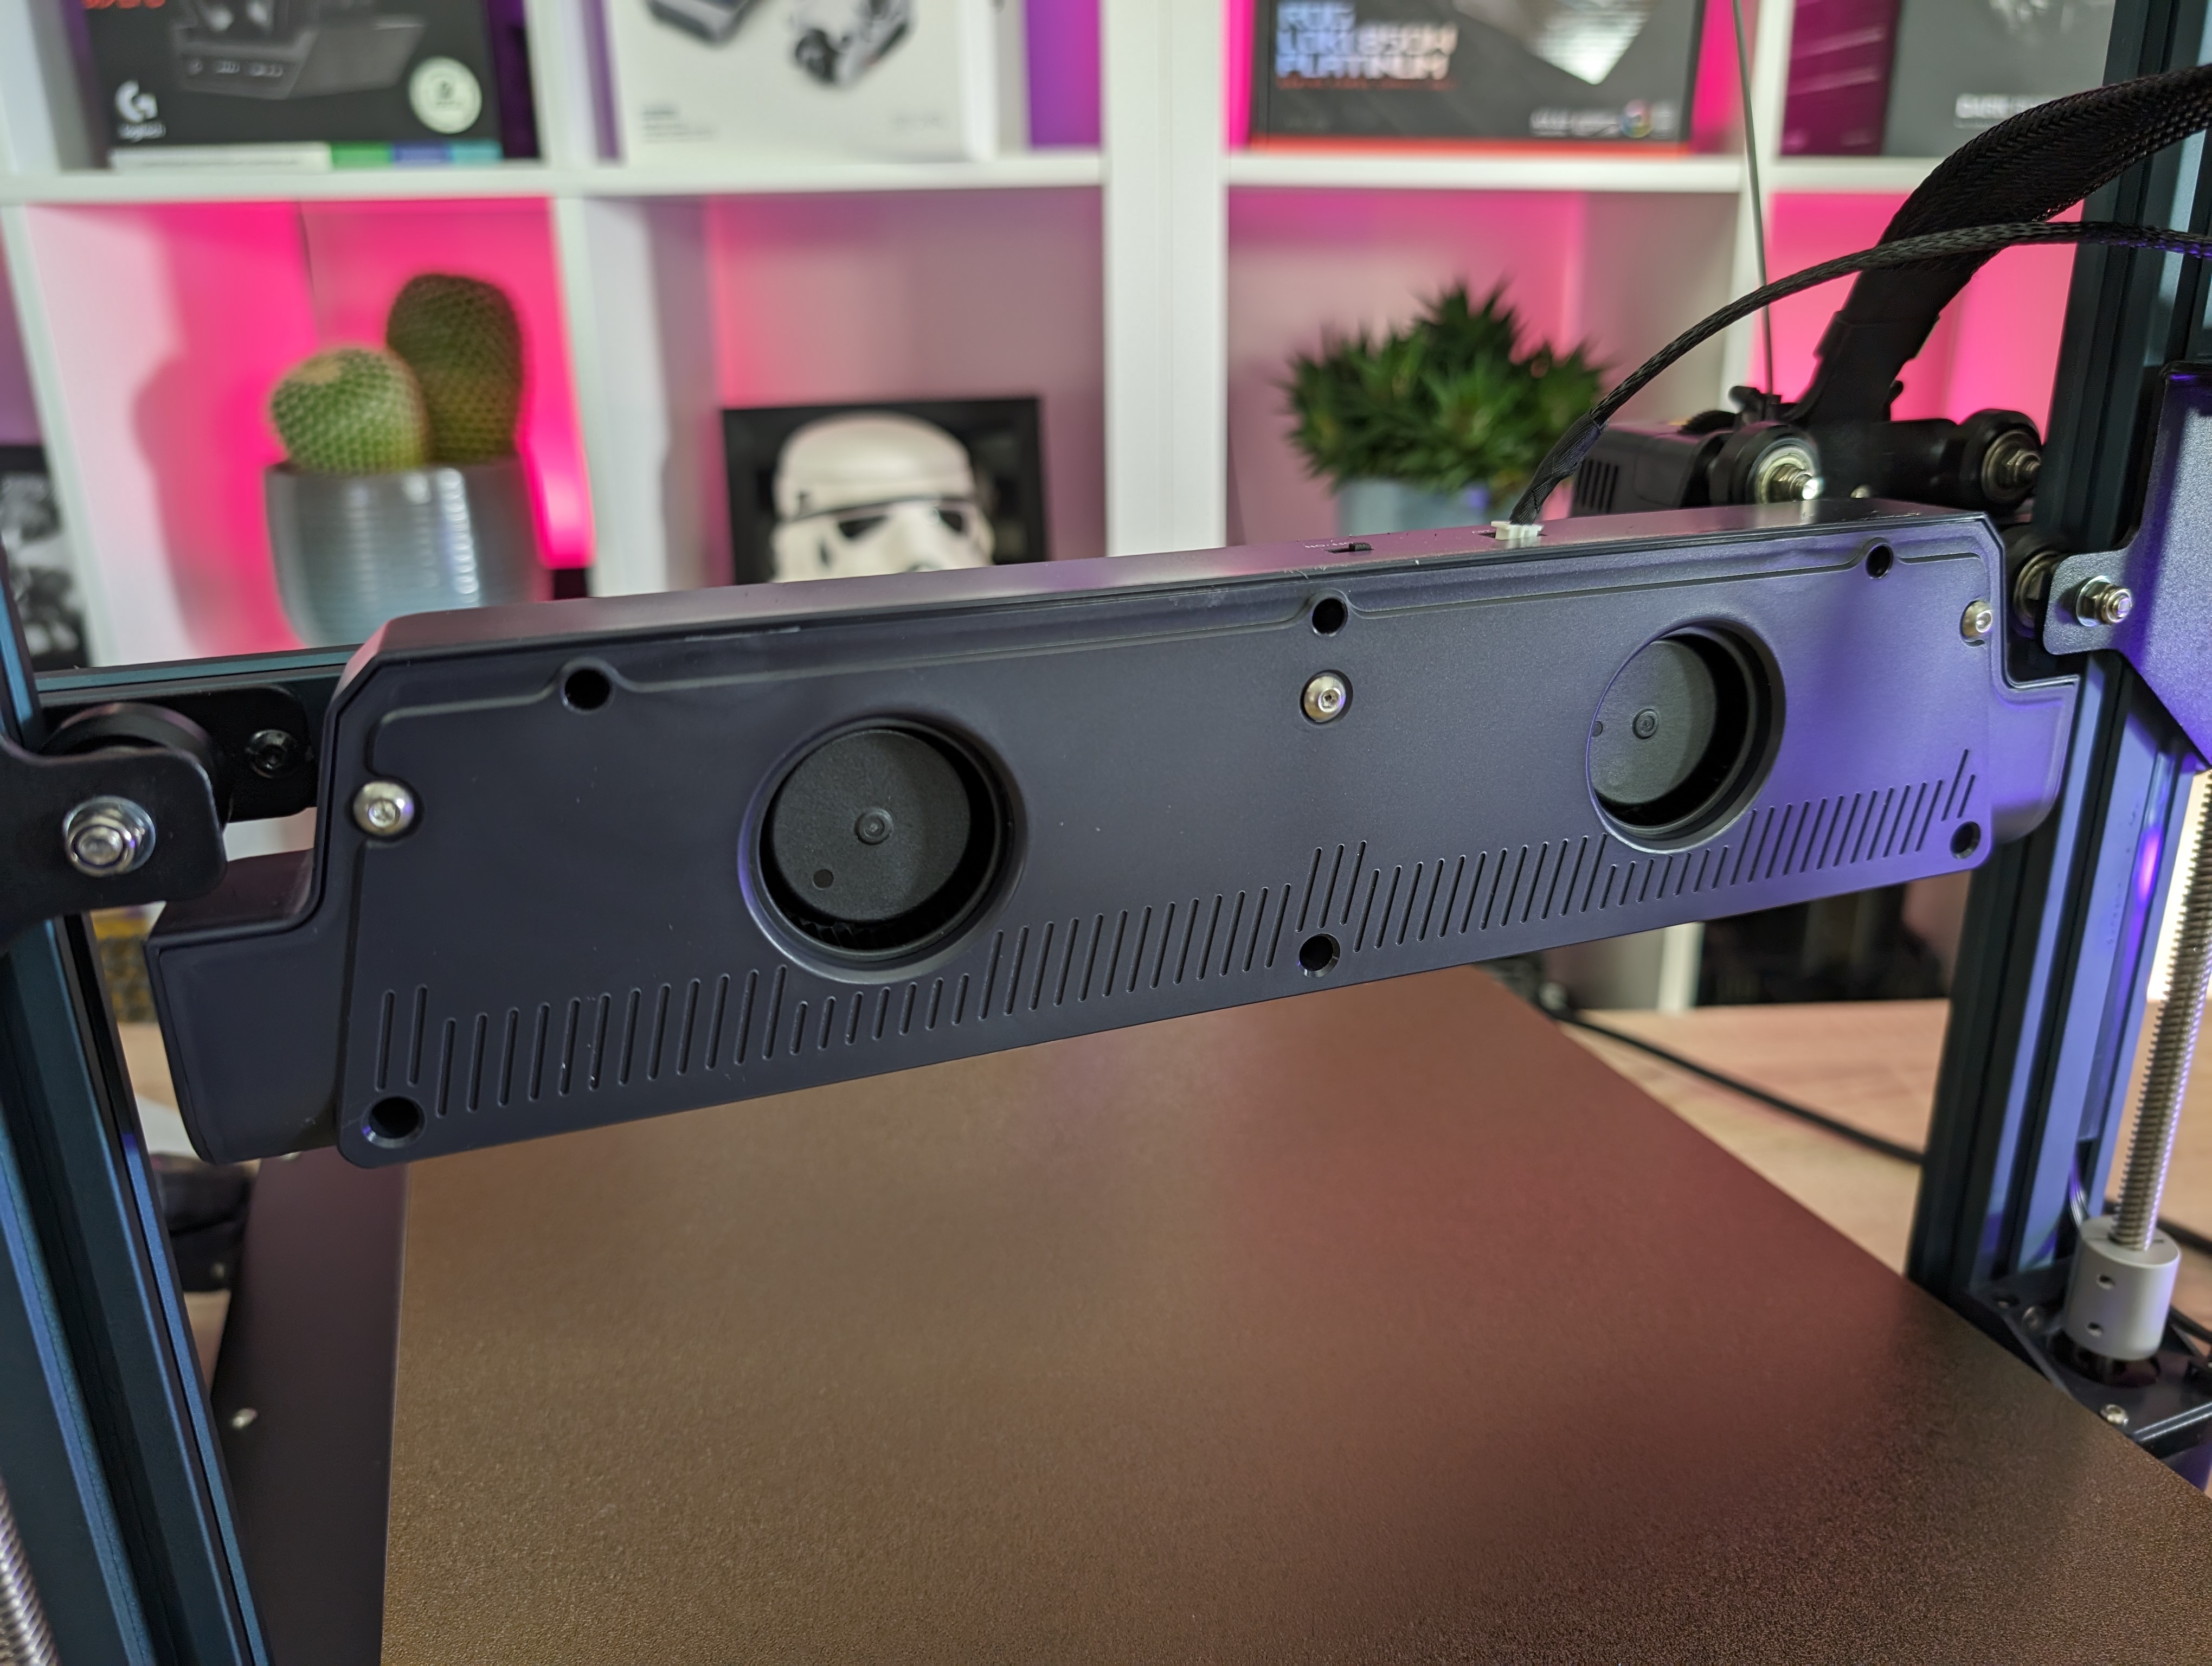
There are three small fans in the print head for normal cooling of your prints. As you can see on the printer, there is also a somewhat larger cooler installed. Four additional fans are installed here, which blow directly on your prints.
They are intended to provide you with extra cooling if you want to try to print at the theoretical top speed of 500 mm/s, which will clearly make great demands on cooling.
All interaction with the printer at the machine itself takes place via a 4.3" touch display, which is connected to the printer via a cable. The screen is therefore not fixed and can be moved if you prefer to have it somewhere else or simply to make operation easier. However, it comes with a magnetic plate where the screen can stay on the side of the printer.
Neptune 4 Plus has the option of connecting to a network via a LAN connector on the side of the machine. It gives you access to monitoring and control of your prints from your computer or smartphone via an internet browser.
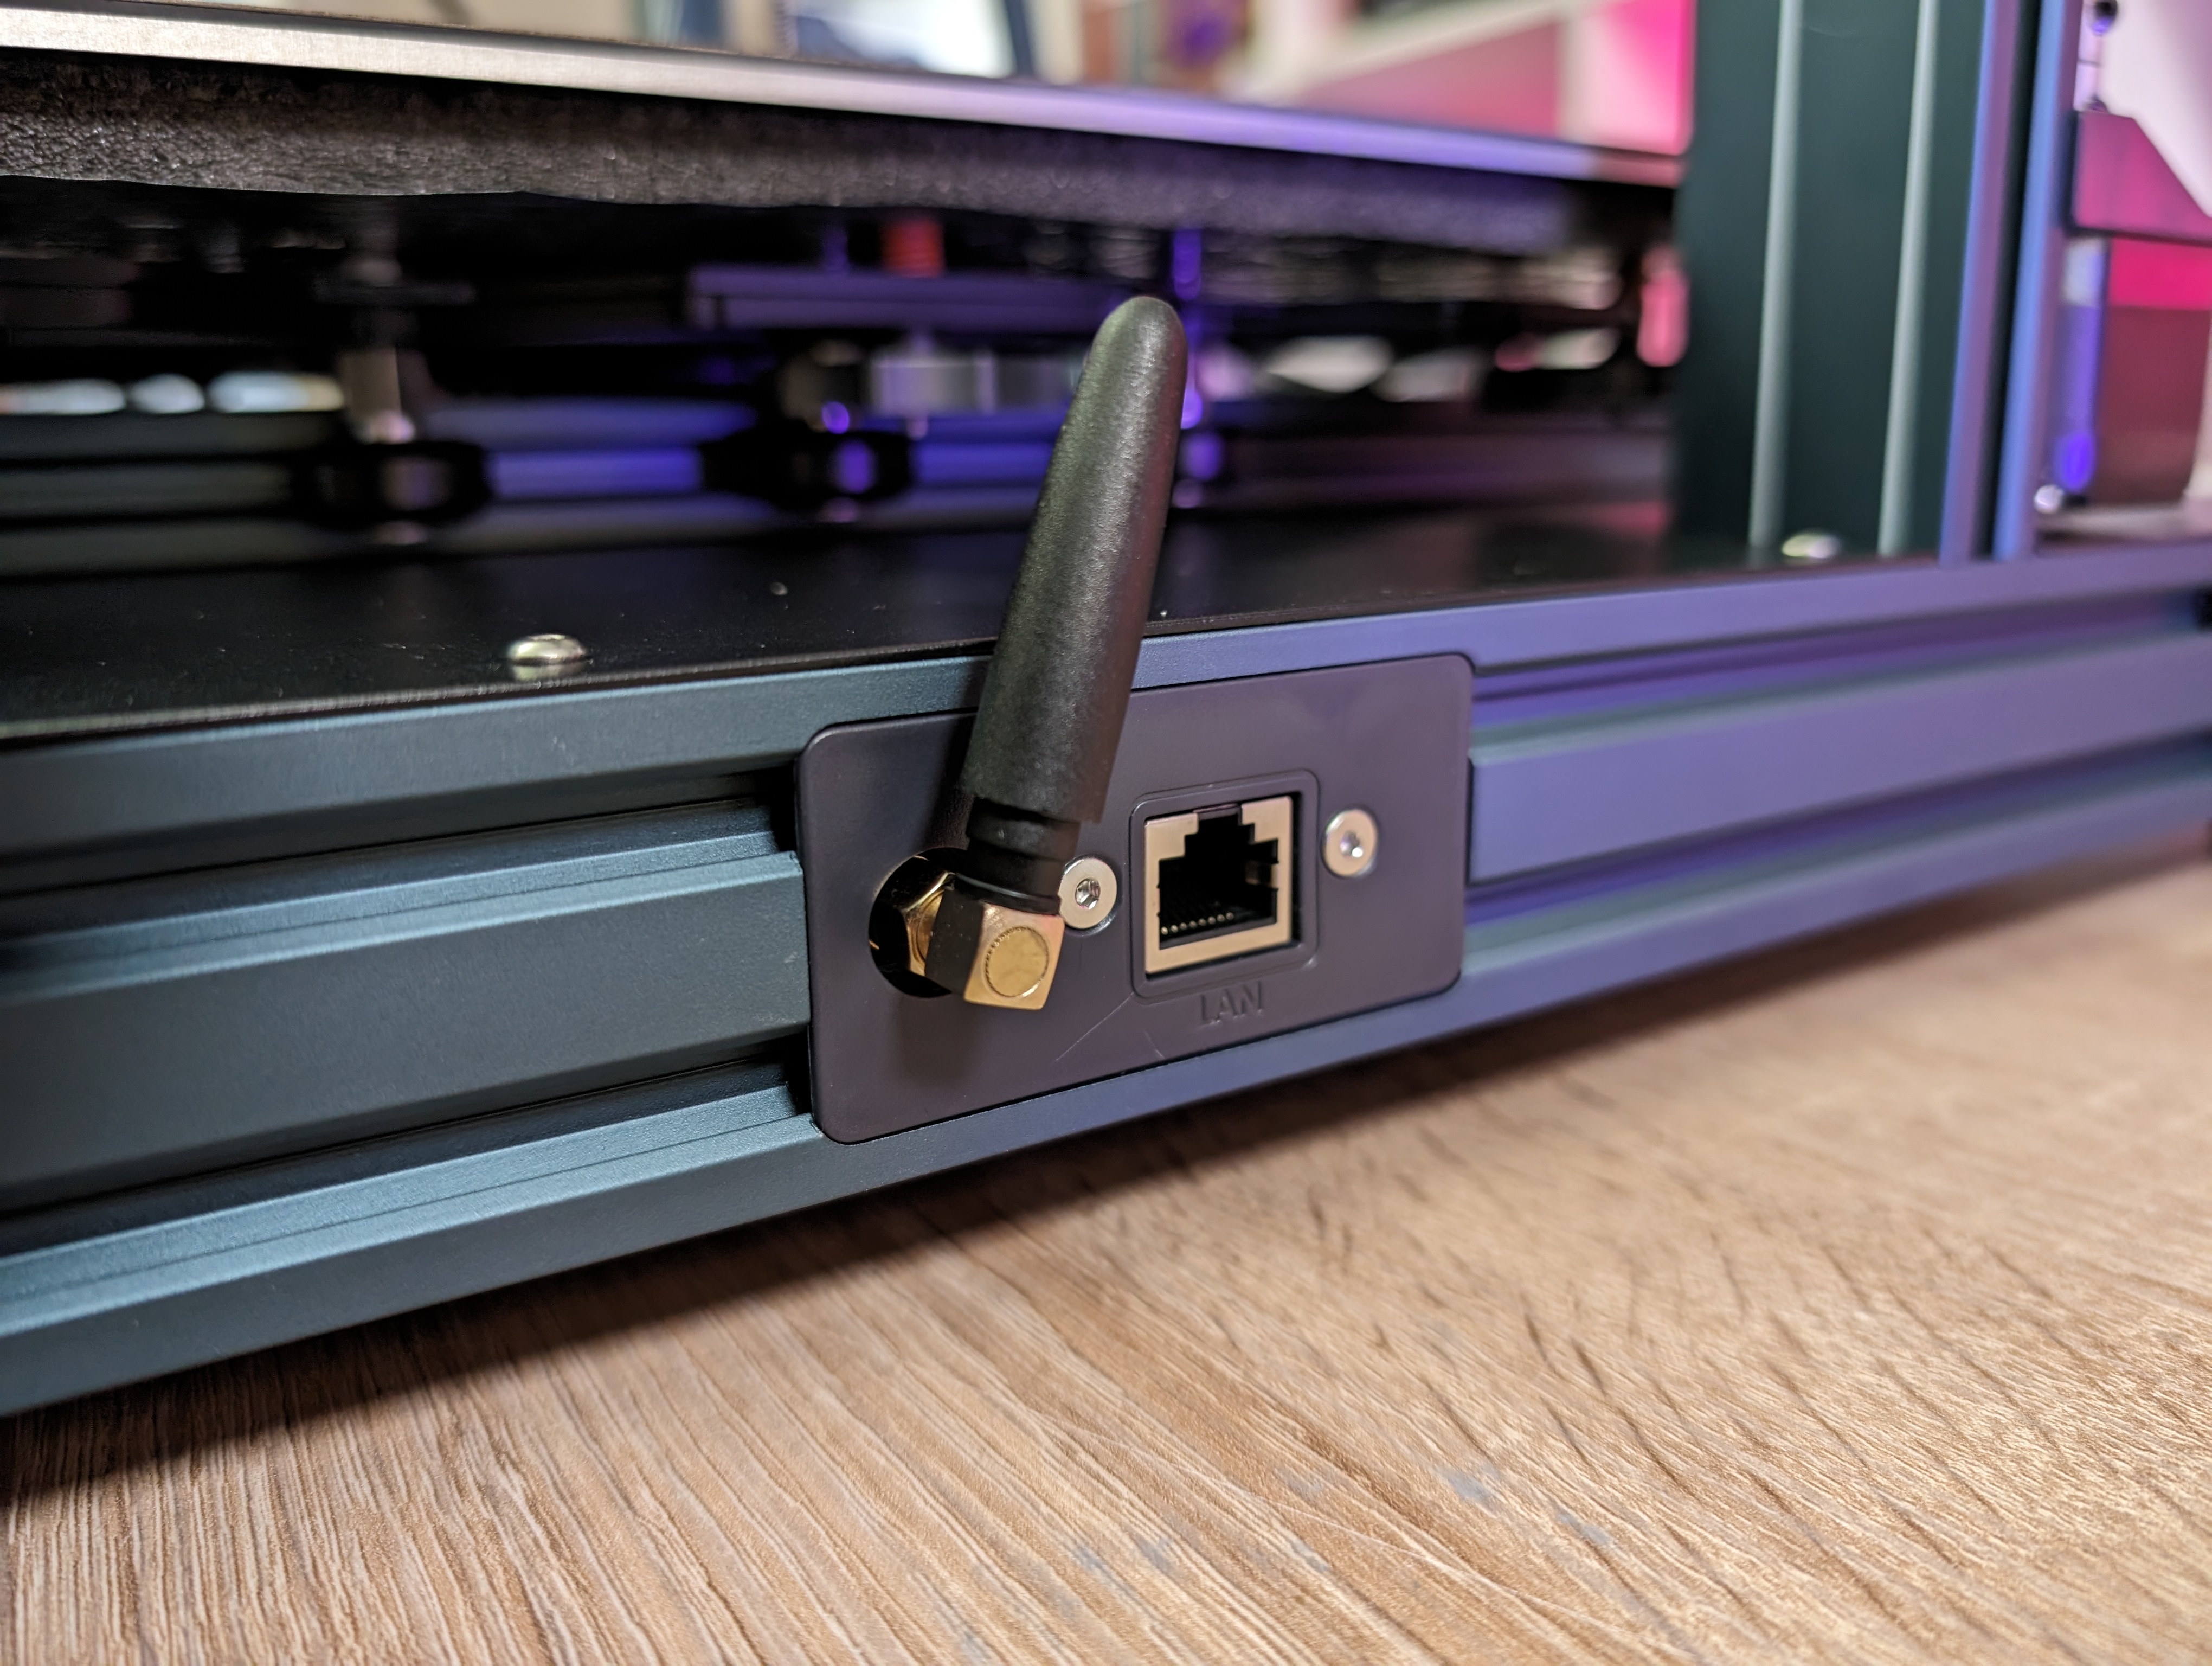
With Neptune 4 Plus, however, there is also the option of connecting via WiFi and the small WiFi antenna can be mounted on the side next to the LAN connector.
On the front there is a USB A connector and a USB C, which can be used to load files for printing. It is great to see that there has been a switch to a USB stick instead of the MicroSD card that has been used on many 3D Printers in the past.
Setup
The setup of an FDM printer is somewhat twofold. First there is the physical setup of the 3D Printer itself. Here it is typically Bed Leveling which is the most important part. That is to ensure that the distance between the printhead and the circuit board is the same, or at least as close as possible across the entire board.
The second part is the part that takes place via software on your PC, where the files you want to print must go through the slicer software.
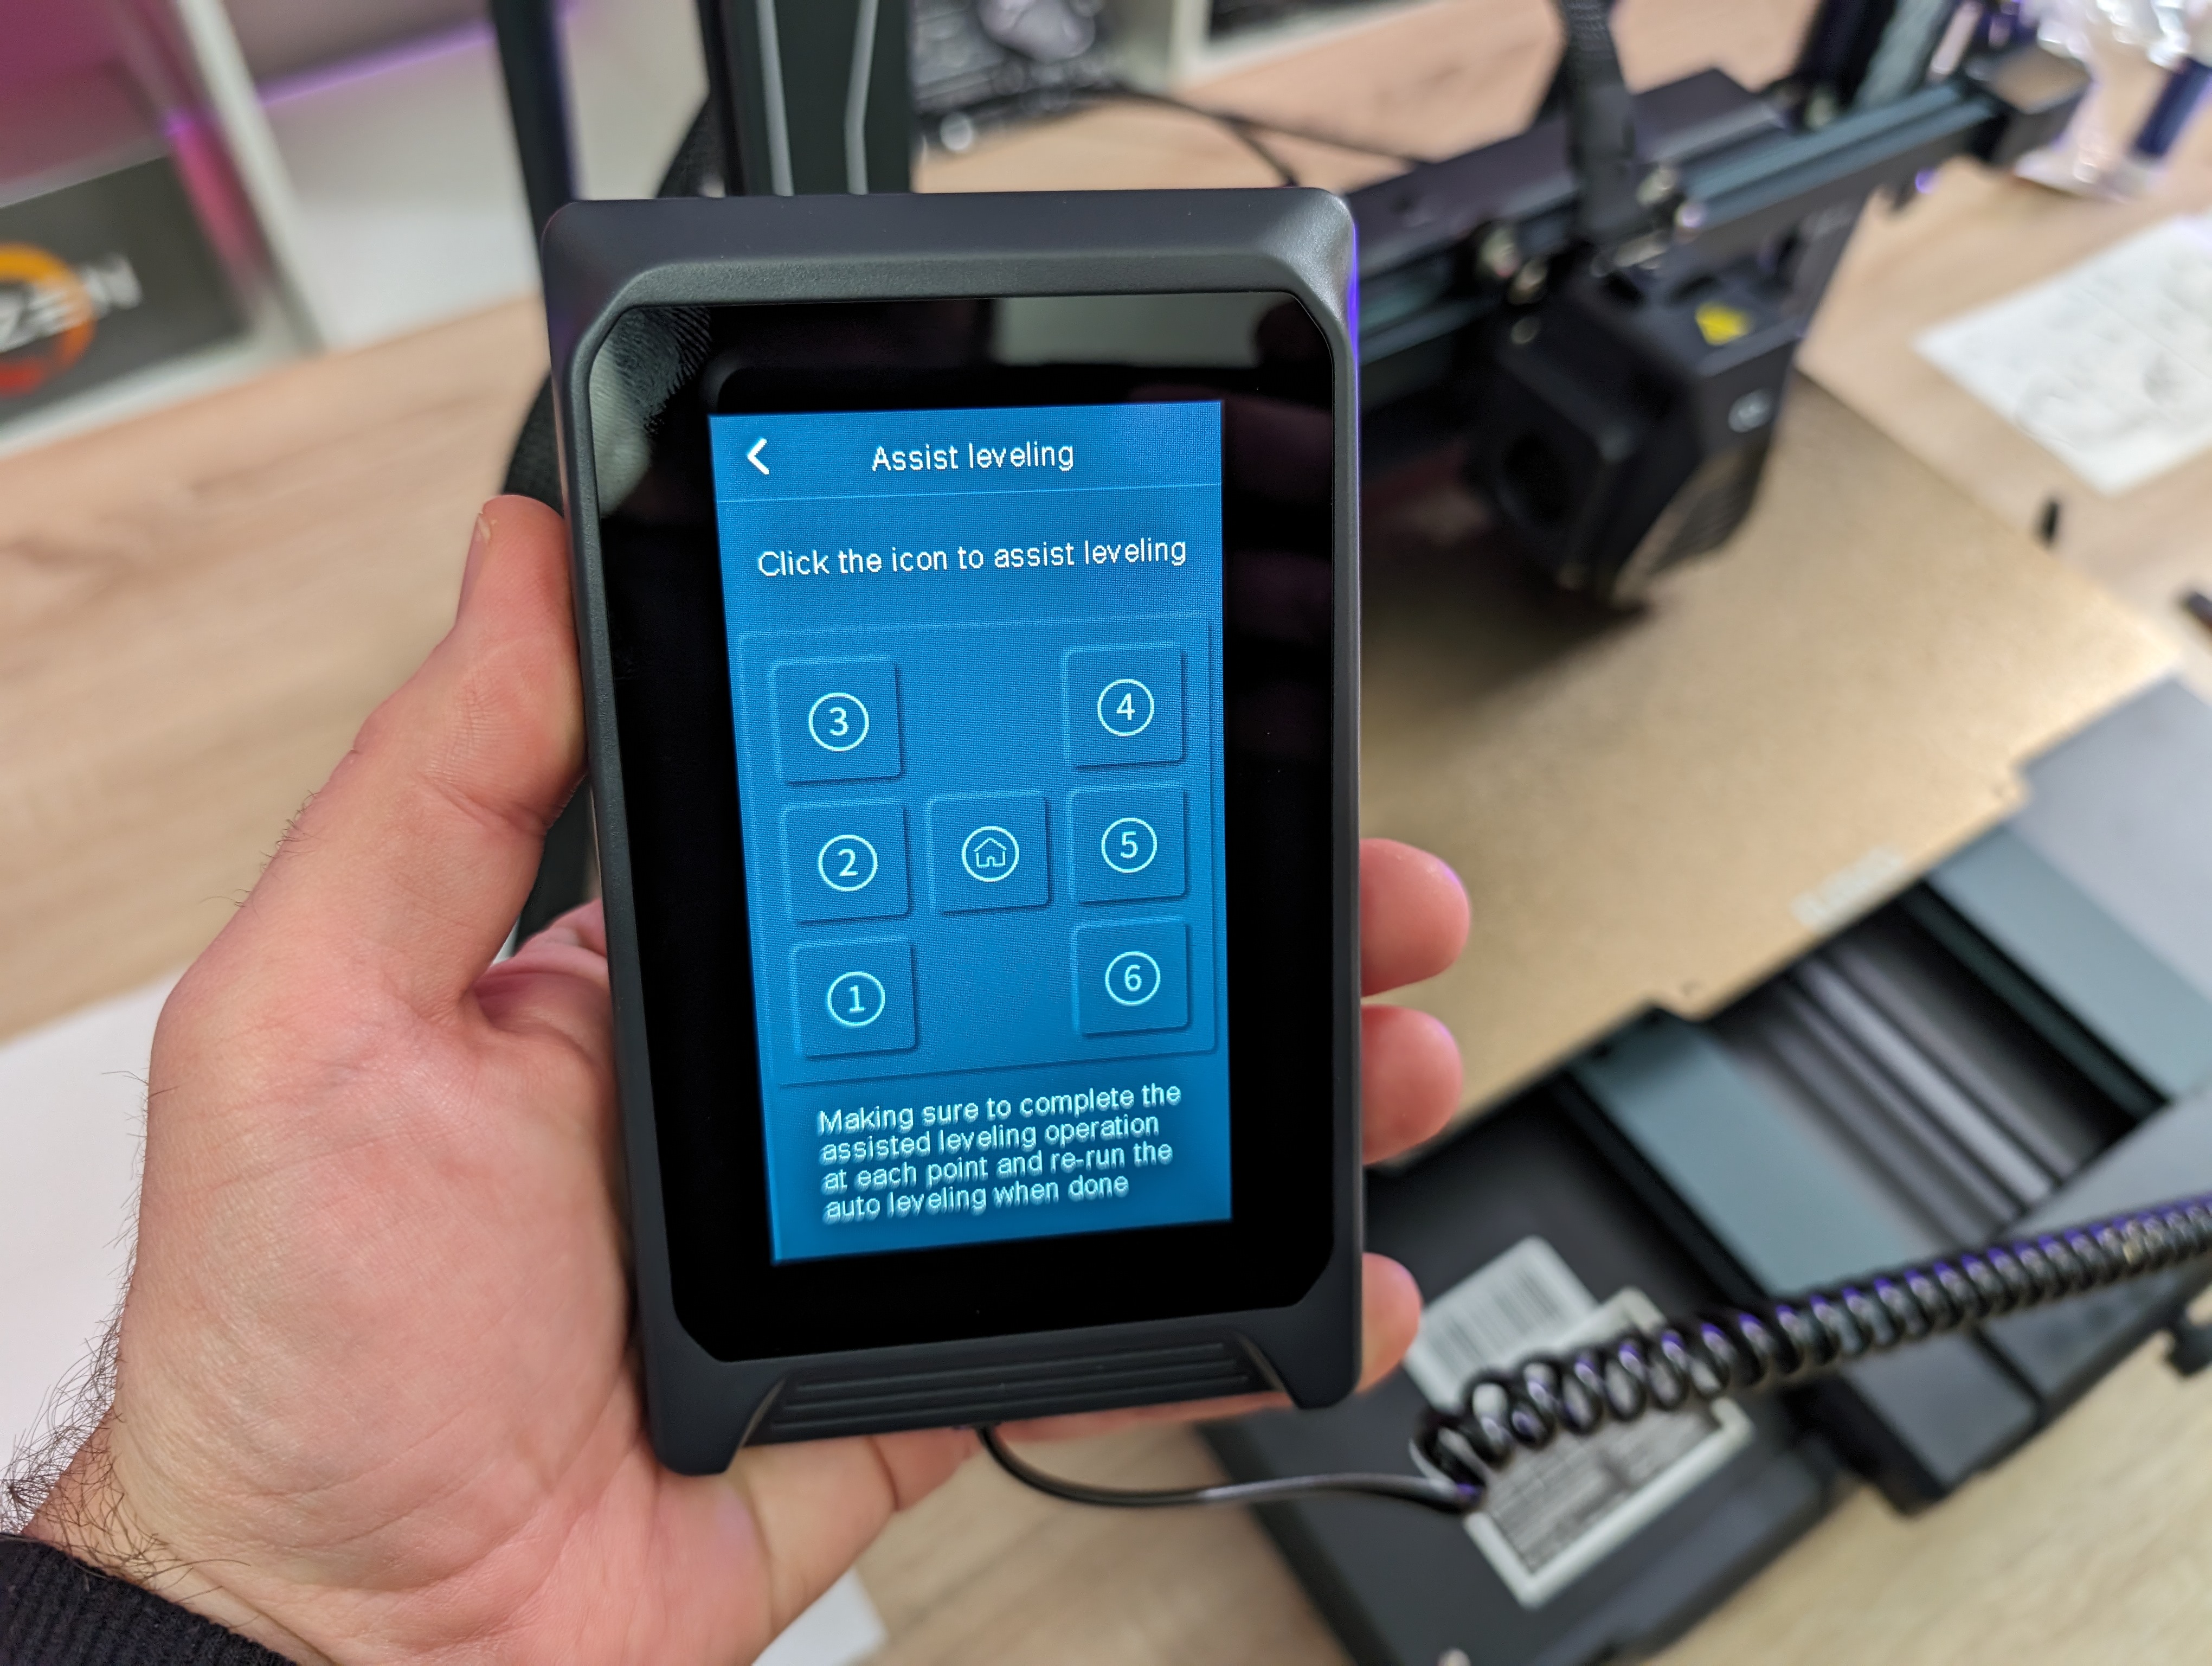
On the Elegoo Neptune 4 Plus, the first part is fortunately quite straightforward, as it comes with an auto leveling function. That makes a large part of the work easier. However, it is supplemented by the option to supplement with manual adjustment. It was an option that, for example, was missing on the Neptune 3 printer from Elegoo, which could cause frustration if things did not match from the factory.
Neptune 4 Plus has six screws for manual adjustment of the circuit board. That's one more on each side compared to the smaller Neptune 4 (Pro), so here's another place we can see adjustments based on the larger build volume.
Elegoo recommends that you start by making a manual adjustment and then let the Auto Level function take over.
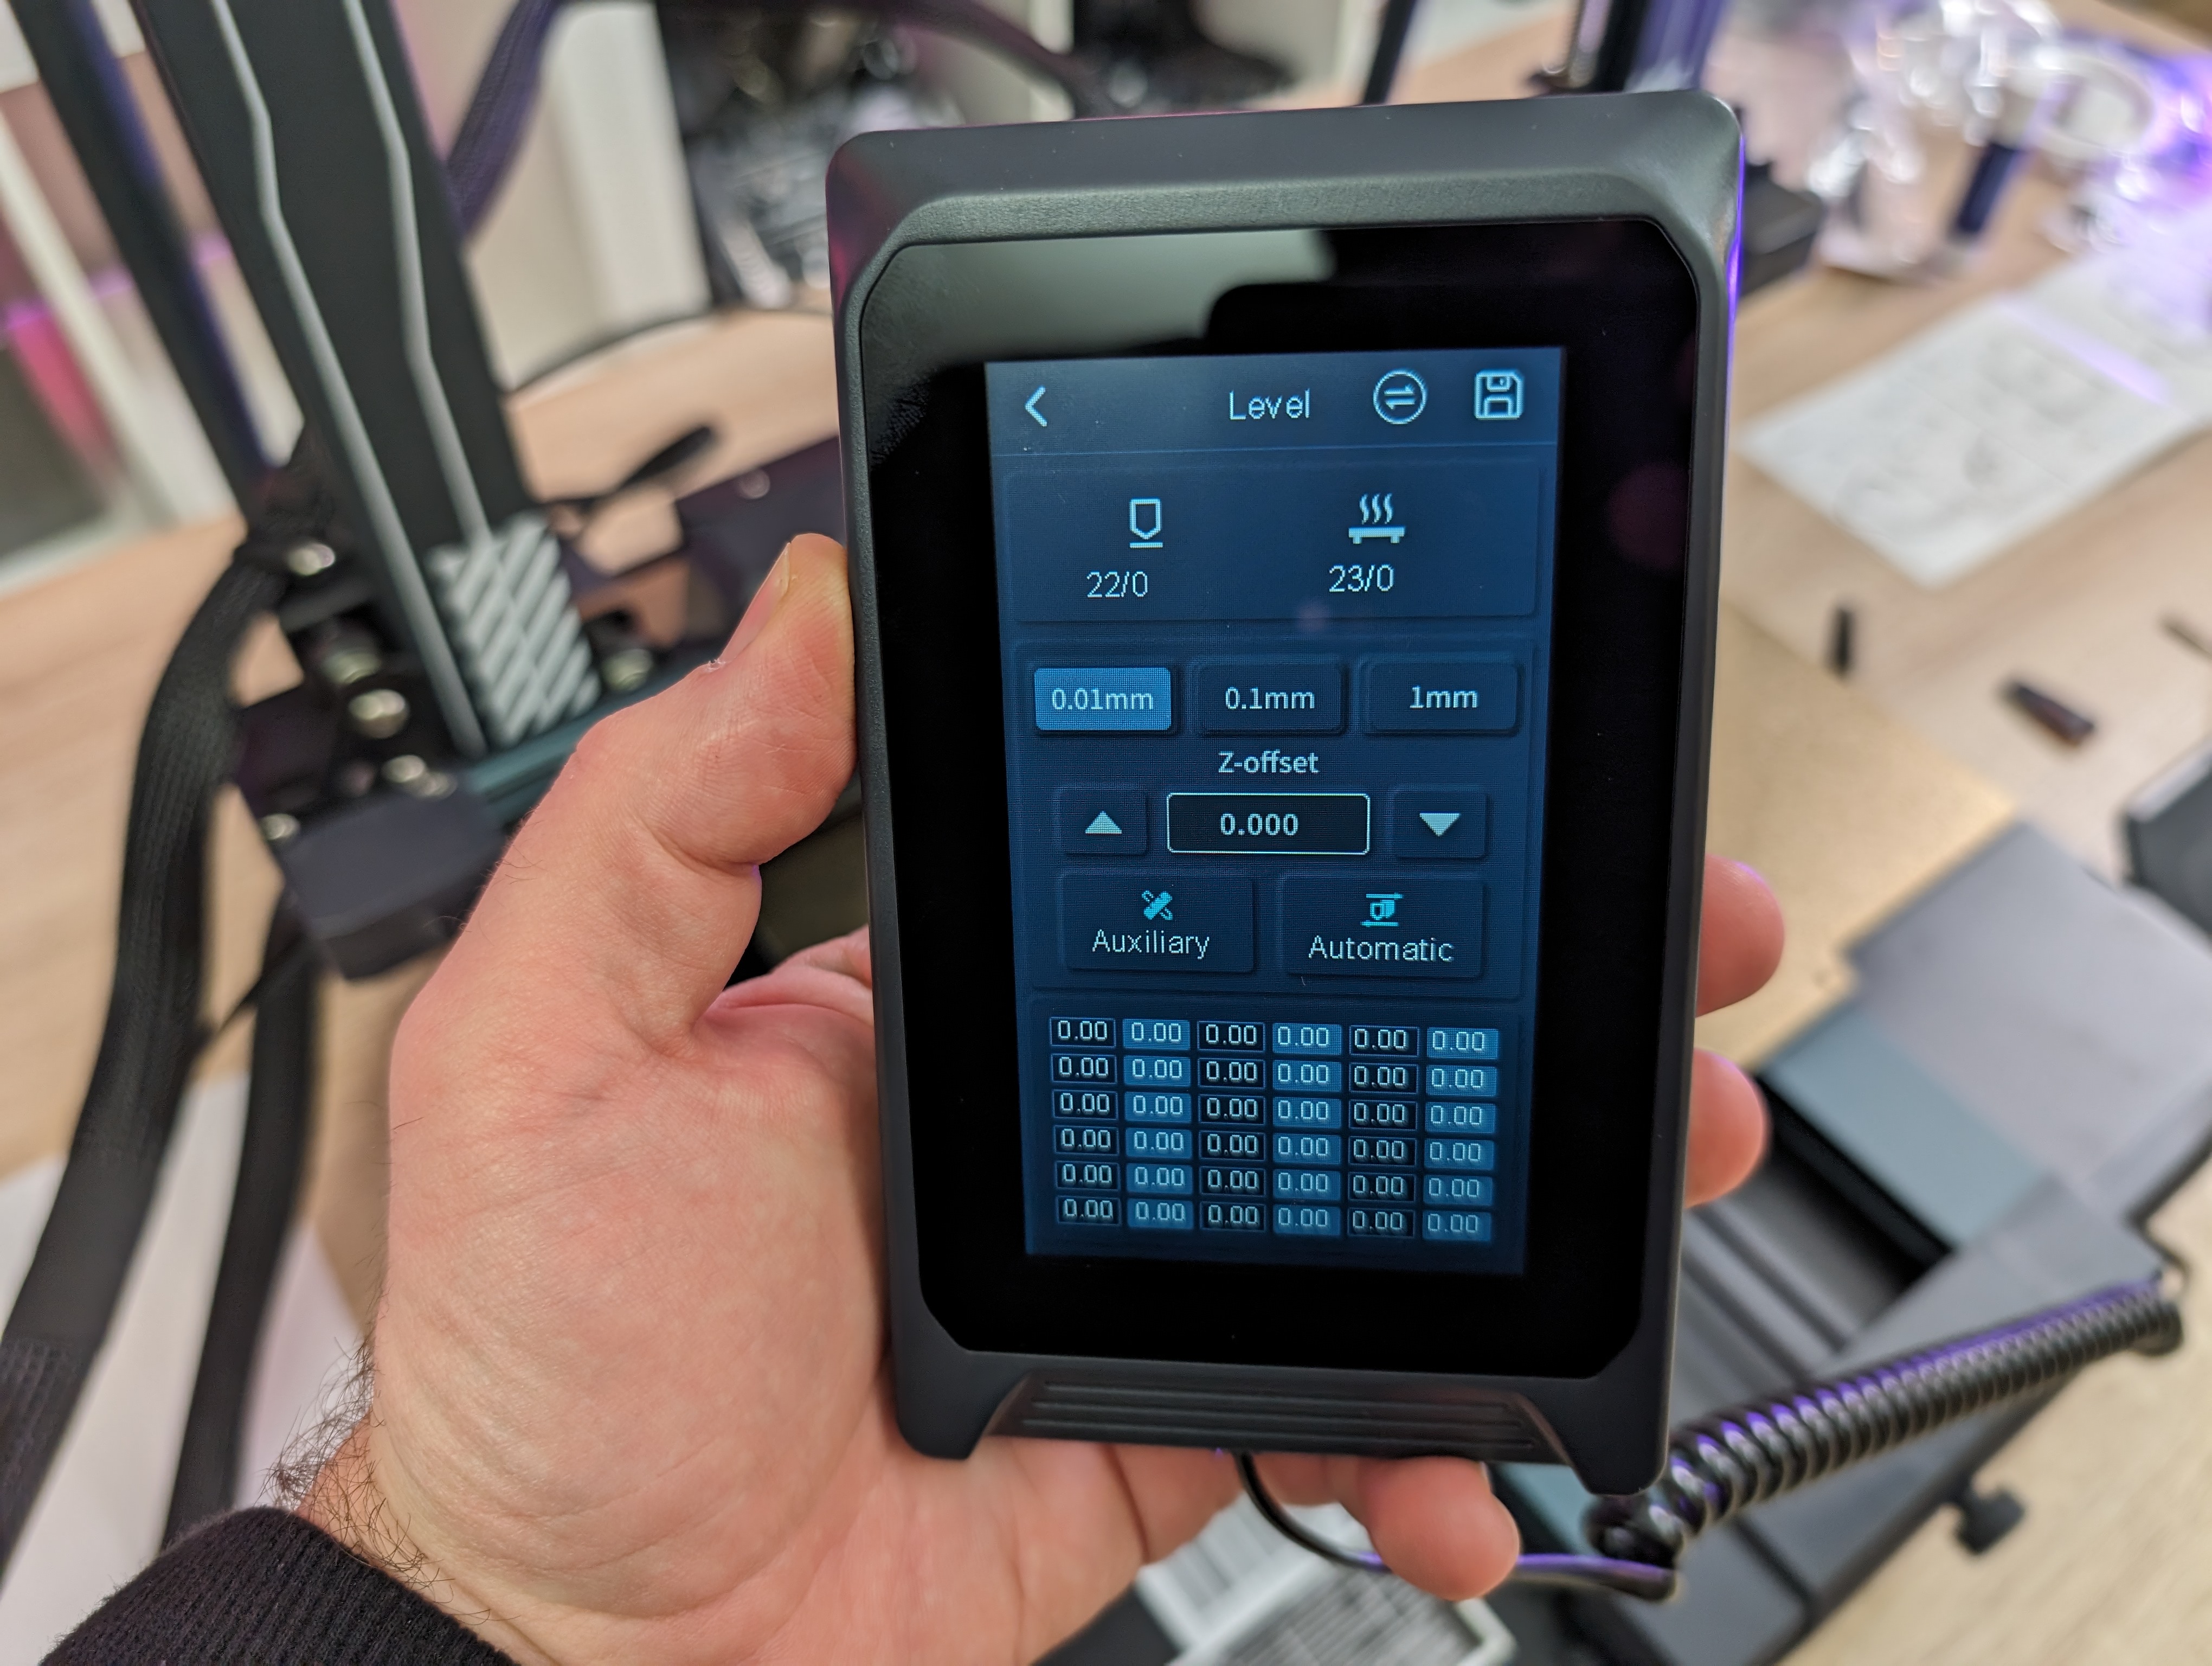
Simply select the Level item in the menu via the touch display. The machine is then warmed up to normal operating temperatures. After this, you can choose between seven points on the plate distributed among the four corners, the middle of the sides and the center of the plate. It is simply a matter of selecting each of the points and then the print head is moved to that point.
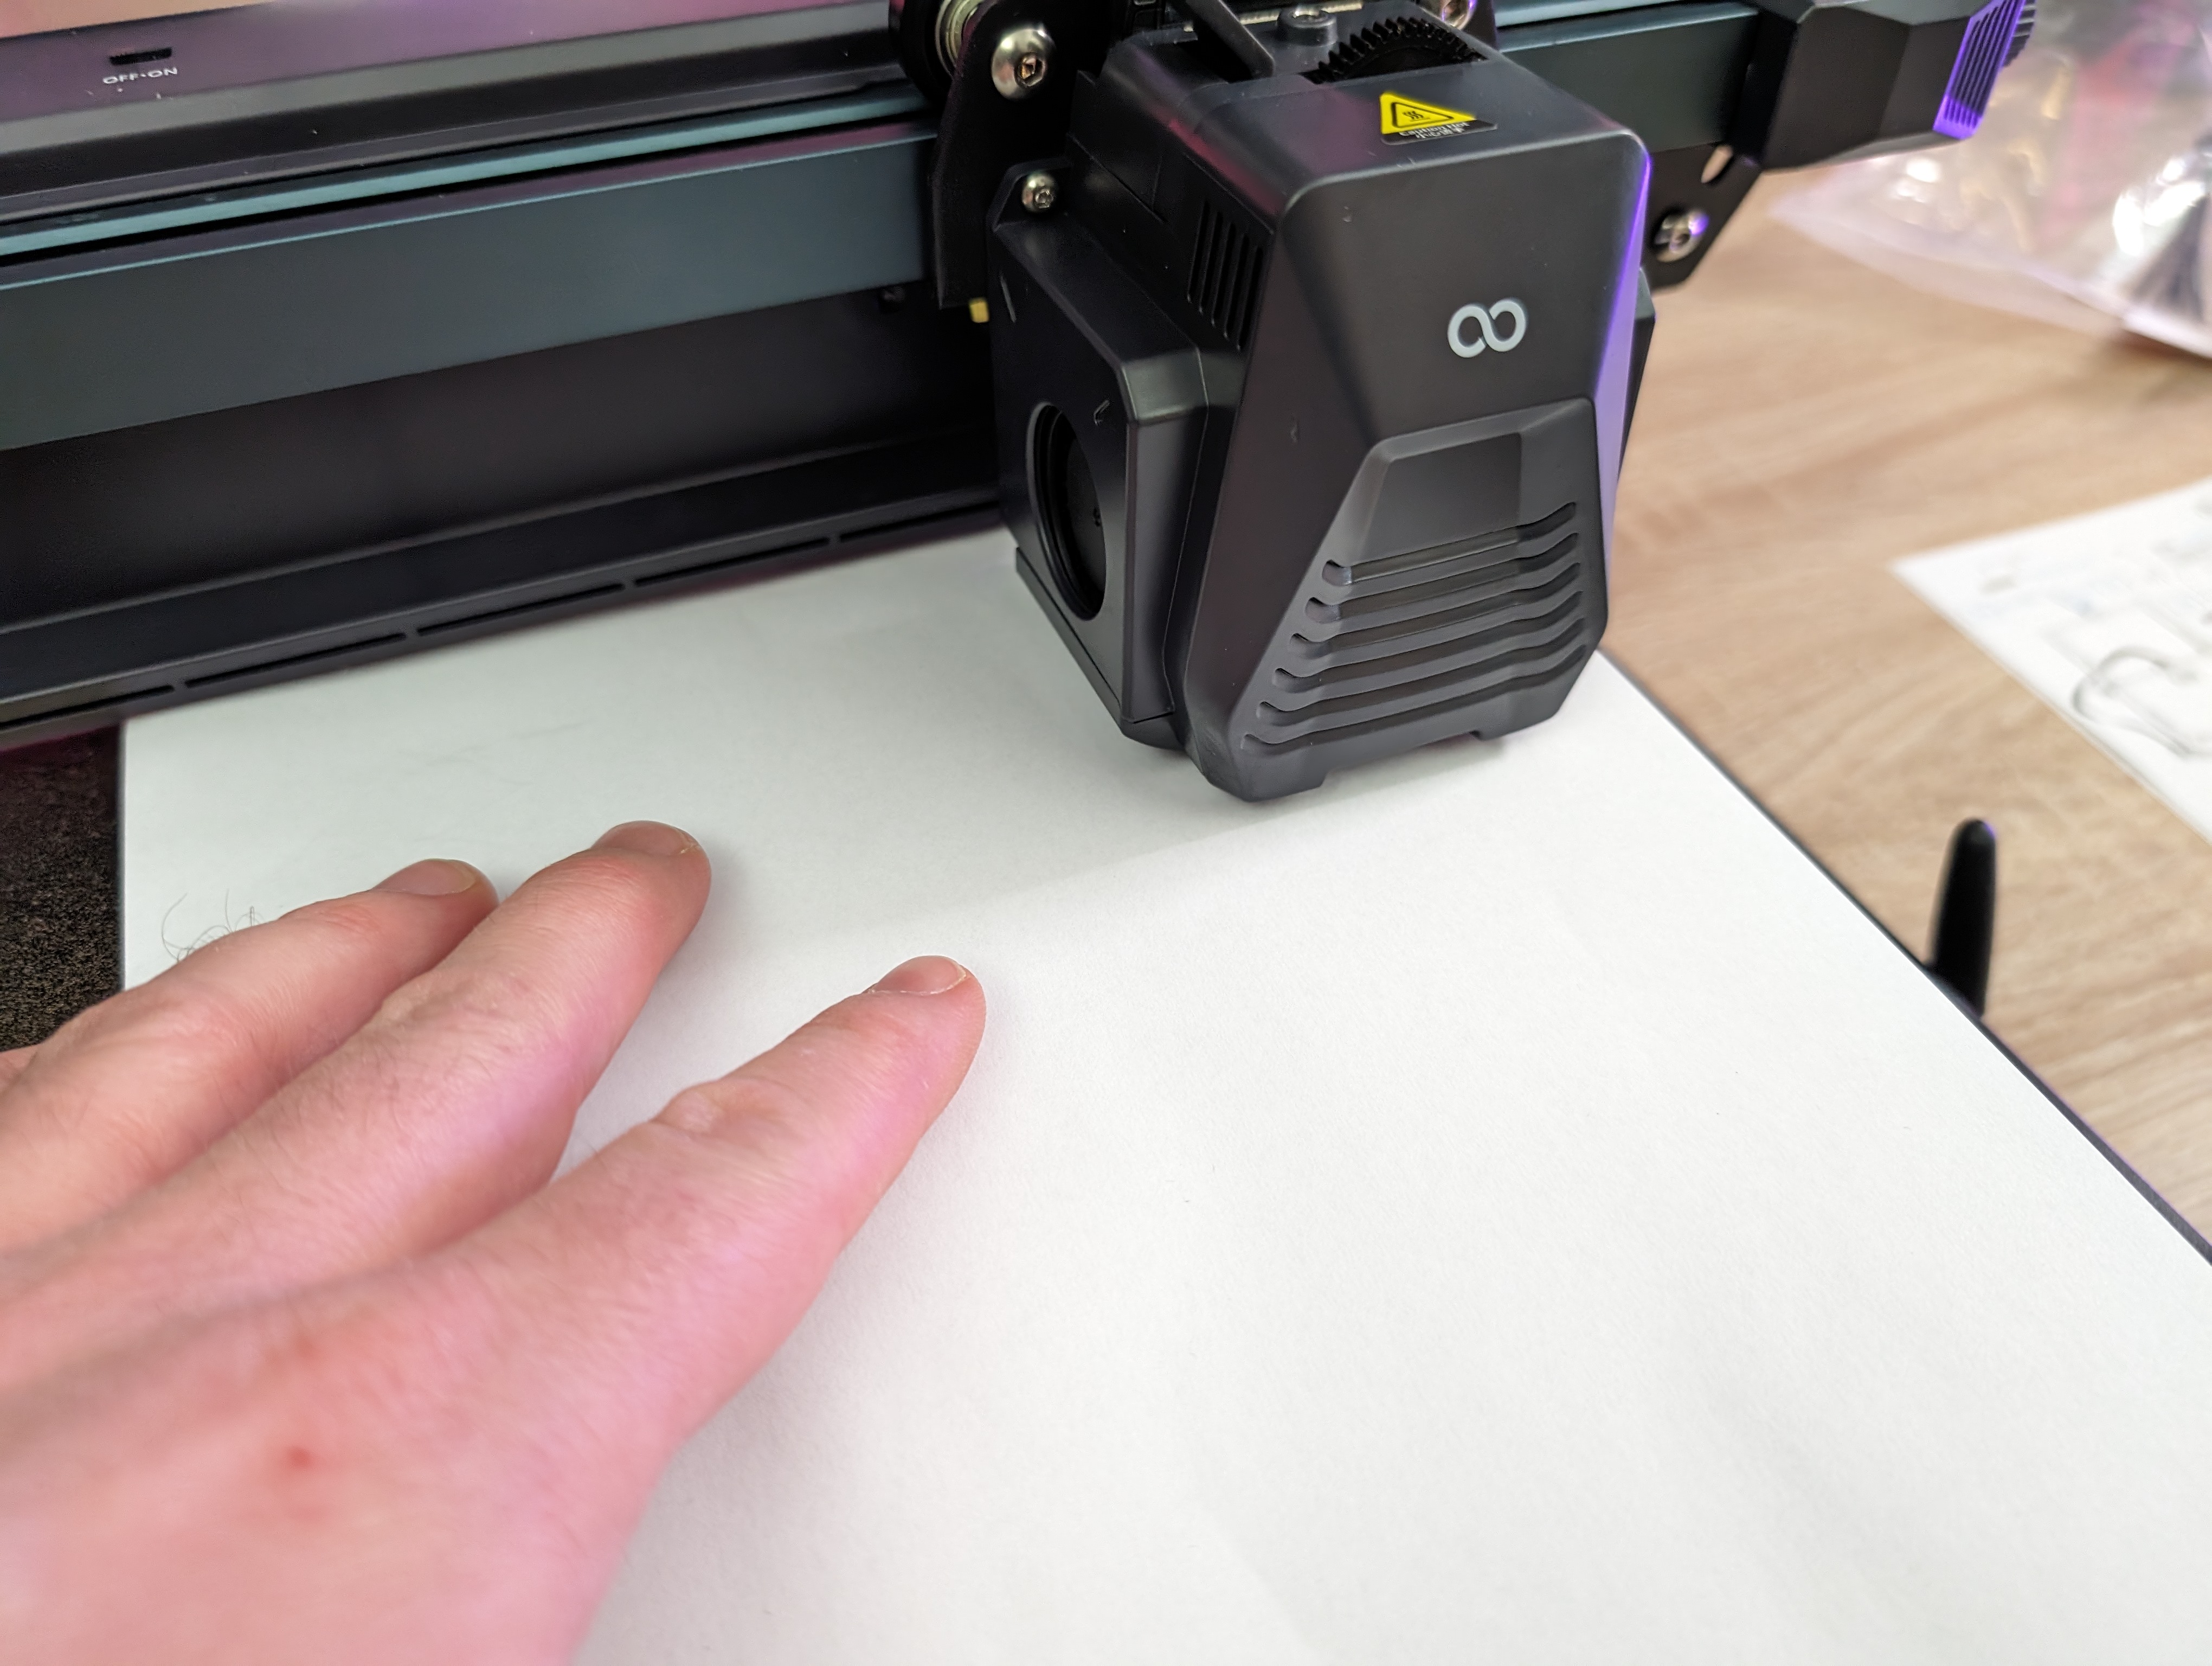
After this, it is just a matter of placing a piece of plain paper between the nozzle and the bed and checking the distance. There should be some resistance when you move the paper around. If this is not the case, you can use the screw to adjust until it fits.
Via the touch display, it is possible to make small 0.01mm, 0.1mm or 1mm adjustments until things fit.
In my case it took about 10 minutes for the machine to run the setup and for me to do a check.
However, Elegoo states on their website that, just as we saw with the Neptune 4 Pro, it is a 121 (11x11) point auto leveling process. However, this is not what our test machine has run through. Here it was limited to 36 points (6x6). However, I have not experienced during my test that it has given rise to problems. Naturally, I cannot comment on how much better the result would have been with 121 points.
However, it is a bit annoying that there is misleading information on Elegoo's website.
Overall, however, the process was wonderfully easy and quickly over and then I was ready to use the machine.
Software
The software part of the machine is also two-part as there is the software on the machine and then the slicer program that you use on your computer to prepare your prints.
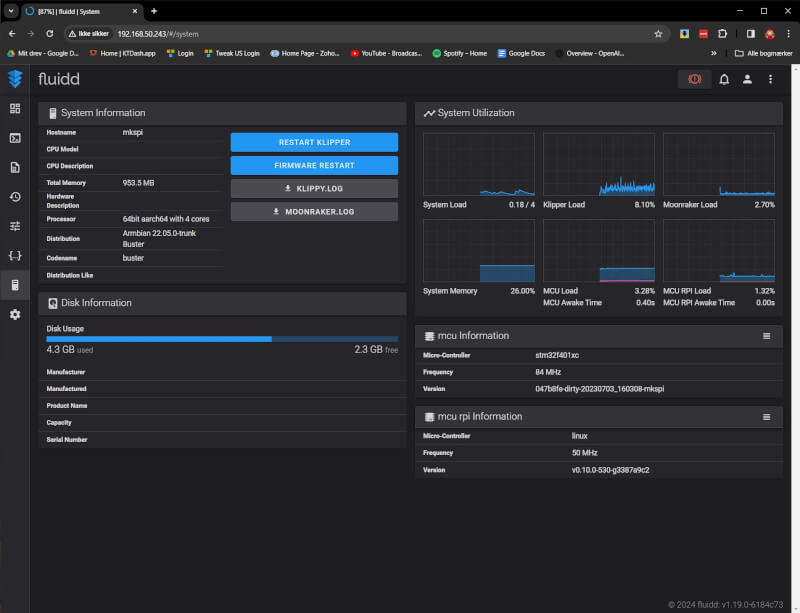
The Neptune 4 Plus comes with Klipper Firmware pre-installed on the machine. It also means that the machine is equipped with more powerful hardware to be able to run everything locally on the machine. On many other printers that were not born with Klipper, it is run separately, via e.g. a Raspberry Pi, together with the machine's regular software.
However, all that is gathered and built into the Neptune 4 Plus, which makes things much easier. Klipper uses the extra power to be able to process the flow of commands in the printing process more efficiently, which means that with Klipper you have the opportunity to print both faster and more accurately.
It is Klipper that makes it possible to print at speeds of up to 500 mm/s.
However, the cutting part is not something you notice in the interface on the touch screen. Here you have access to a good selection of settings and functions. This is where you can start the leveling process, which I have already covered.
However, it is also possible to check information such as IP address and other settings for the printer. Most settings can also be customized while printing directly on the machine.
The interface on the machine itself is arranged sensibly, and it is wonderfully clear to work with.
The second part of the software experience is the slicer program that you use on your computer to prepare your prints.
Elegoo has supplied us with an Elegoo version of the Cura slicer on the supplied USB drive. Cura is one of the most widely used slicer programs and in this version it has been given an Elegoo skin.
The disadvantage, however, is that in the special Elegoo version you do not get updates to the core program quite as quickly. This meant that the version that came with the printer was version 4.8, which is quite an old version without the latest updates and optimizations.
However, there was a profile for the Neptune 4 Plus despite the old version, so you could get started after all. Fortunately, however, since the USB version there has been a new version of Elegoo Cura which is now updated to version 5.6.
Slicer software is a topic big enough to fill its very own dedicated article, so I won't spend a lot of space on it here.
The Elegoo Cura software is not the only one you can use and there is a wide selection of options. In the end, it is very much about what you prefer. Personally, I prefer Orca Slicer, which is built on the open source core program like Cura, but only with more features. Elegoo also has a download link for Orca Slicer on their website.
During my test, I used both Elegoo Cura and Orca Slicer, but clearly mostly Orca Slicer, as I prefer the options it has for, among other things, manual "paint in" support, etc.
However, both programs have reasonable profiles for the Neptune 4 Plus machine, and a lot of options for settings and customization.
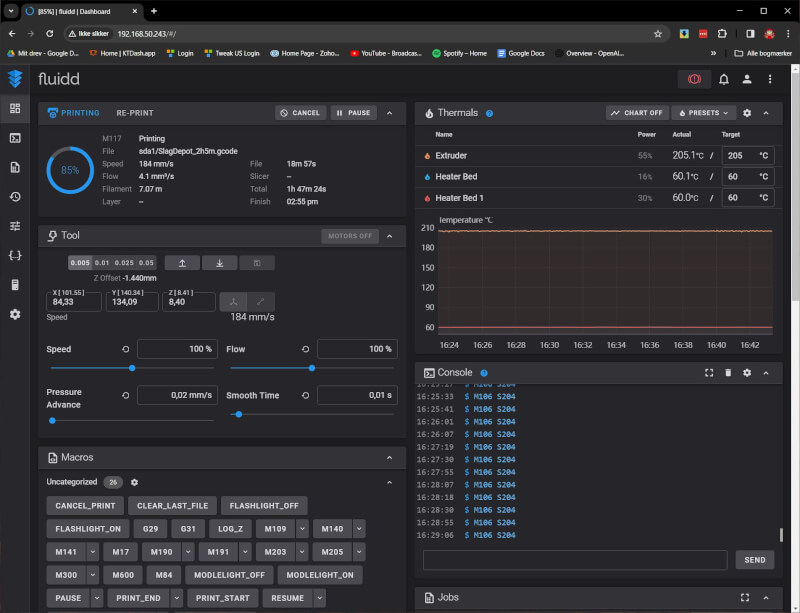
If you want to make use of the network options, it can be done via the Fluidd software via a web browser. Here, you simply enter the IP address of the printer, and then you have access to the software as long as you are on the same network.
Here it is possible to monitor your prints, and even adjust settings during the process or stop a print if something has gone wrong.
Fluidd itself is also a bigger project to cover, but just the wide range of options that I've seen in my short time with the Neptune 4 Plus shows that there are plenty of options for advanced customization and detail management.
However, I would like to say that during my test I did not use the WiFi function, but exclusively cable. This is due to a slightly annoying error in the software on the touch display. If you want to connect WiFi, you just have to do it through the touch interface on the machine.
Here you can find your WiFi network and then log in. Unfortunately, however, it is not a completely complete keyboard that is available when the code has to be entered. In any case, I'm missing the _ sign on mine and since I use it in my WiFi password I can't log in. A little annoying, but in my case, not a big challenge since I already have wired network right next to the machine. Let's hope it's a bug Elegoo fixes with an update soon.
The test
After the setup, and before I even started the computer, I did a test print. On the included USB drive from Elegoo, there is a selection of different pre-sliced files that you can test with.
I tried both the included Budda figure and the classic Benchy file. Both parts came out without problems and the result was really nice.
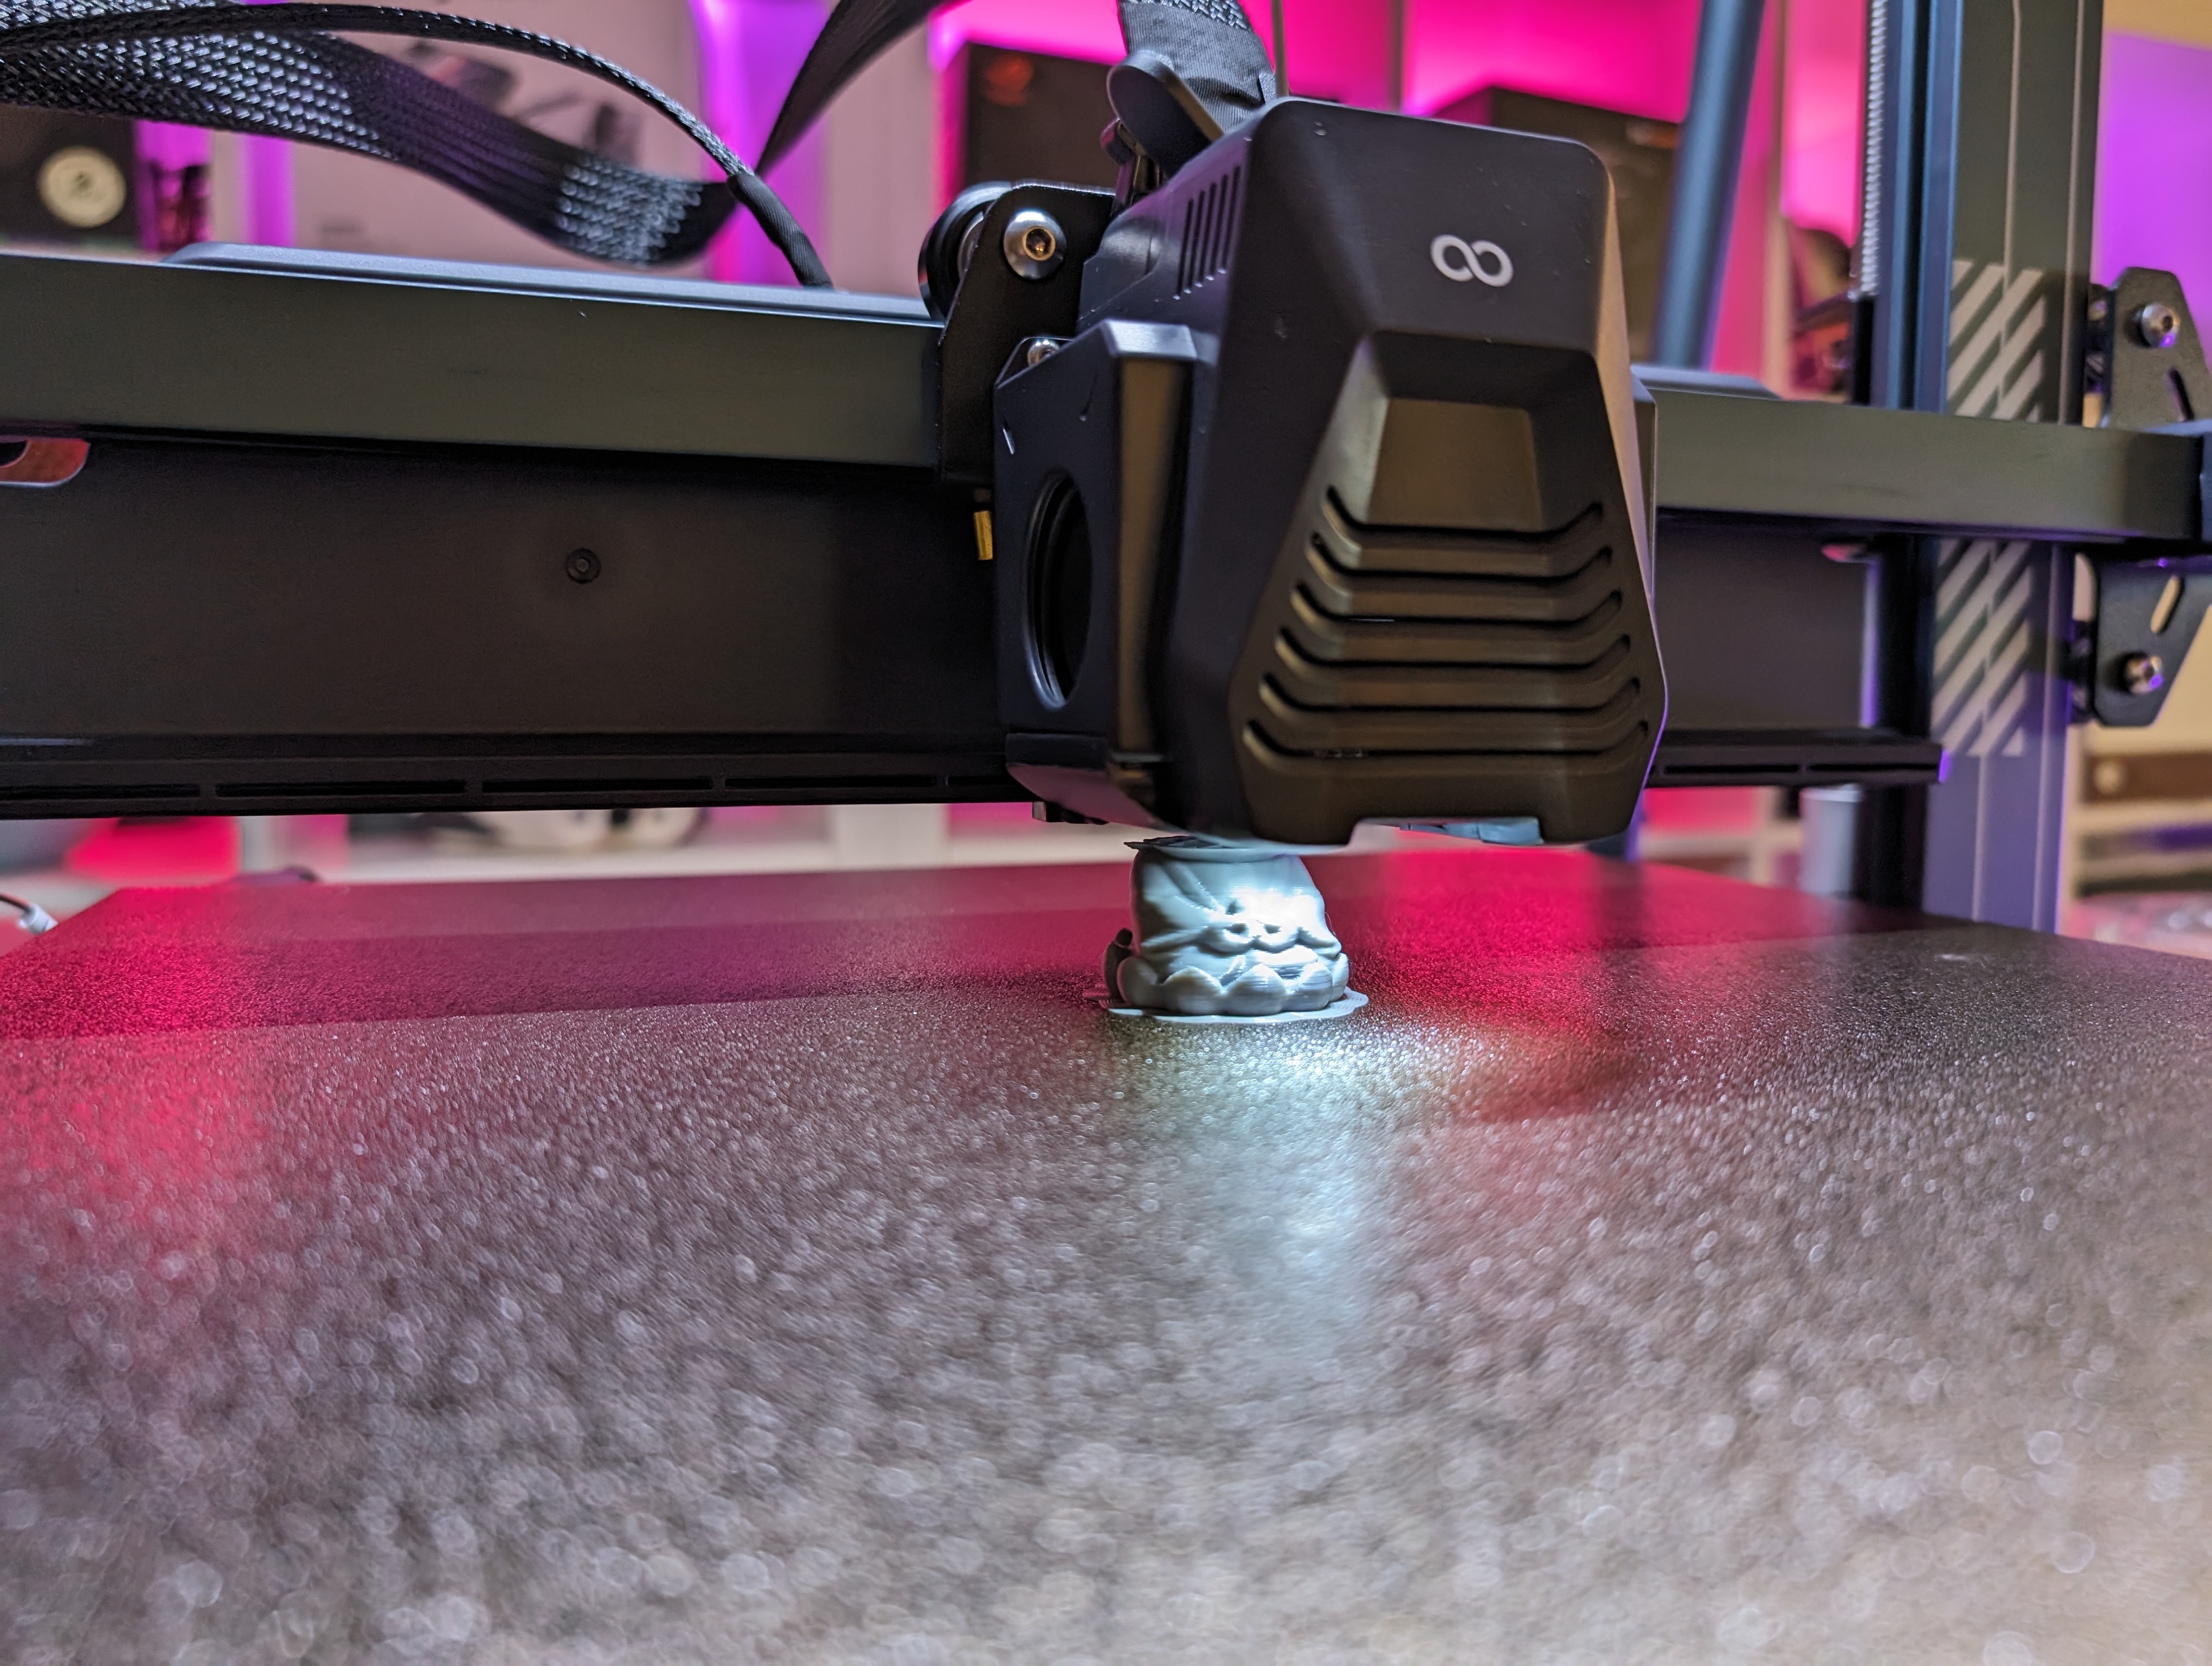
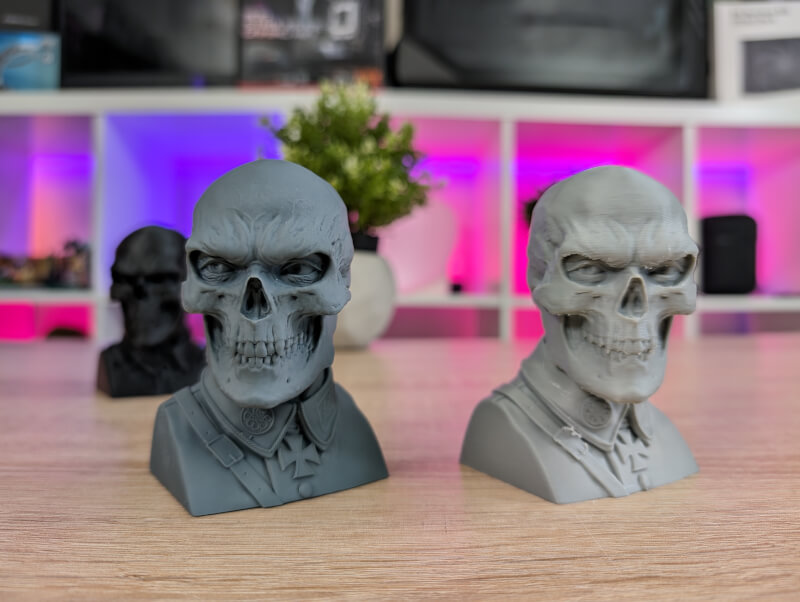
After this it was time for the Red Skull file, which I have printed as a benchmark file on all the 3D Printers I have tested so far.
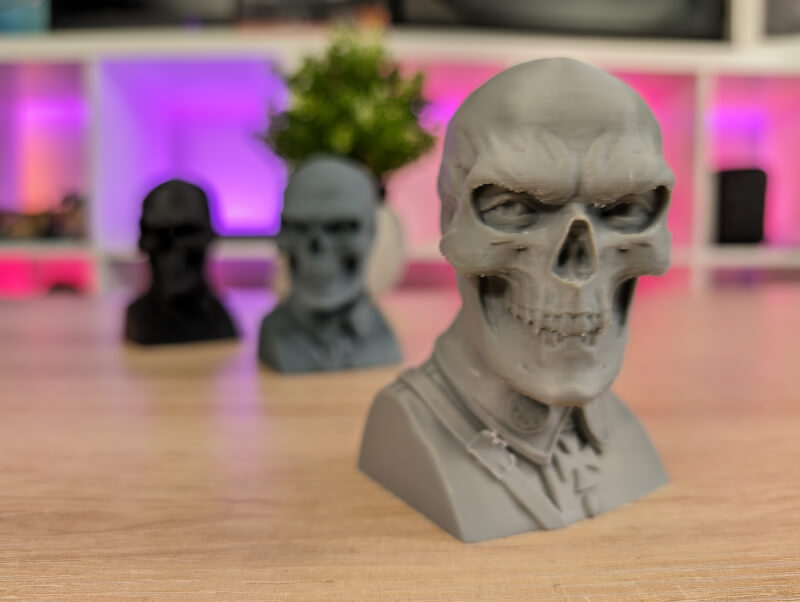
Here, too, the result was really nice, although it almost looked comical with the one small figure in the middle of the large build plate. Of course, it cannot compare with the result from the Resin 3D Printer, but for an FDM printer where I have used nothing but auto settings, I think the result is really good!
From here I naturally had to test how the larger build volume fared, since after all that is what separates it from the smaller and cheaper Neptune 4 Pro.
The Warhammer 40K geek in me had a blast printing an almost full size Chainsword when I tested the Elegoo Neptune 4 Pro printer. Here, the larger build volume would actually have been nice, as I had to cut some of the files to make room for them.
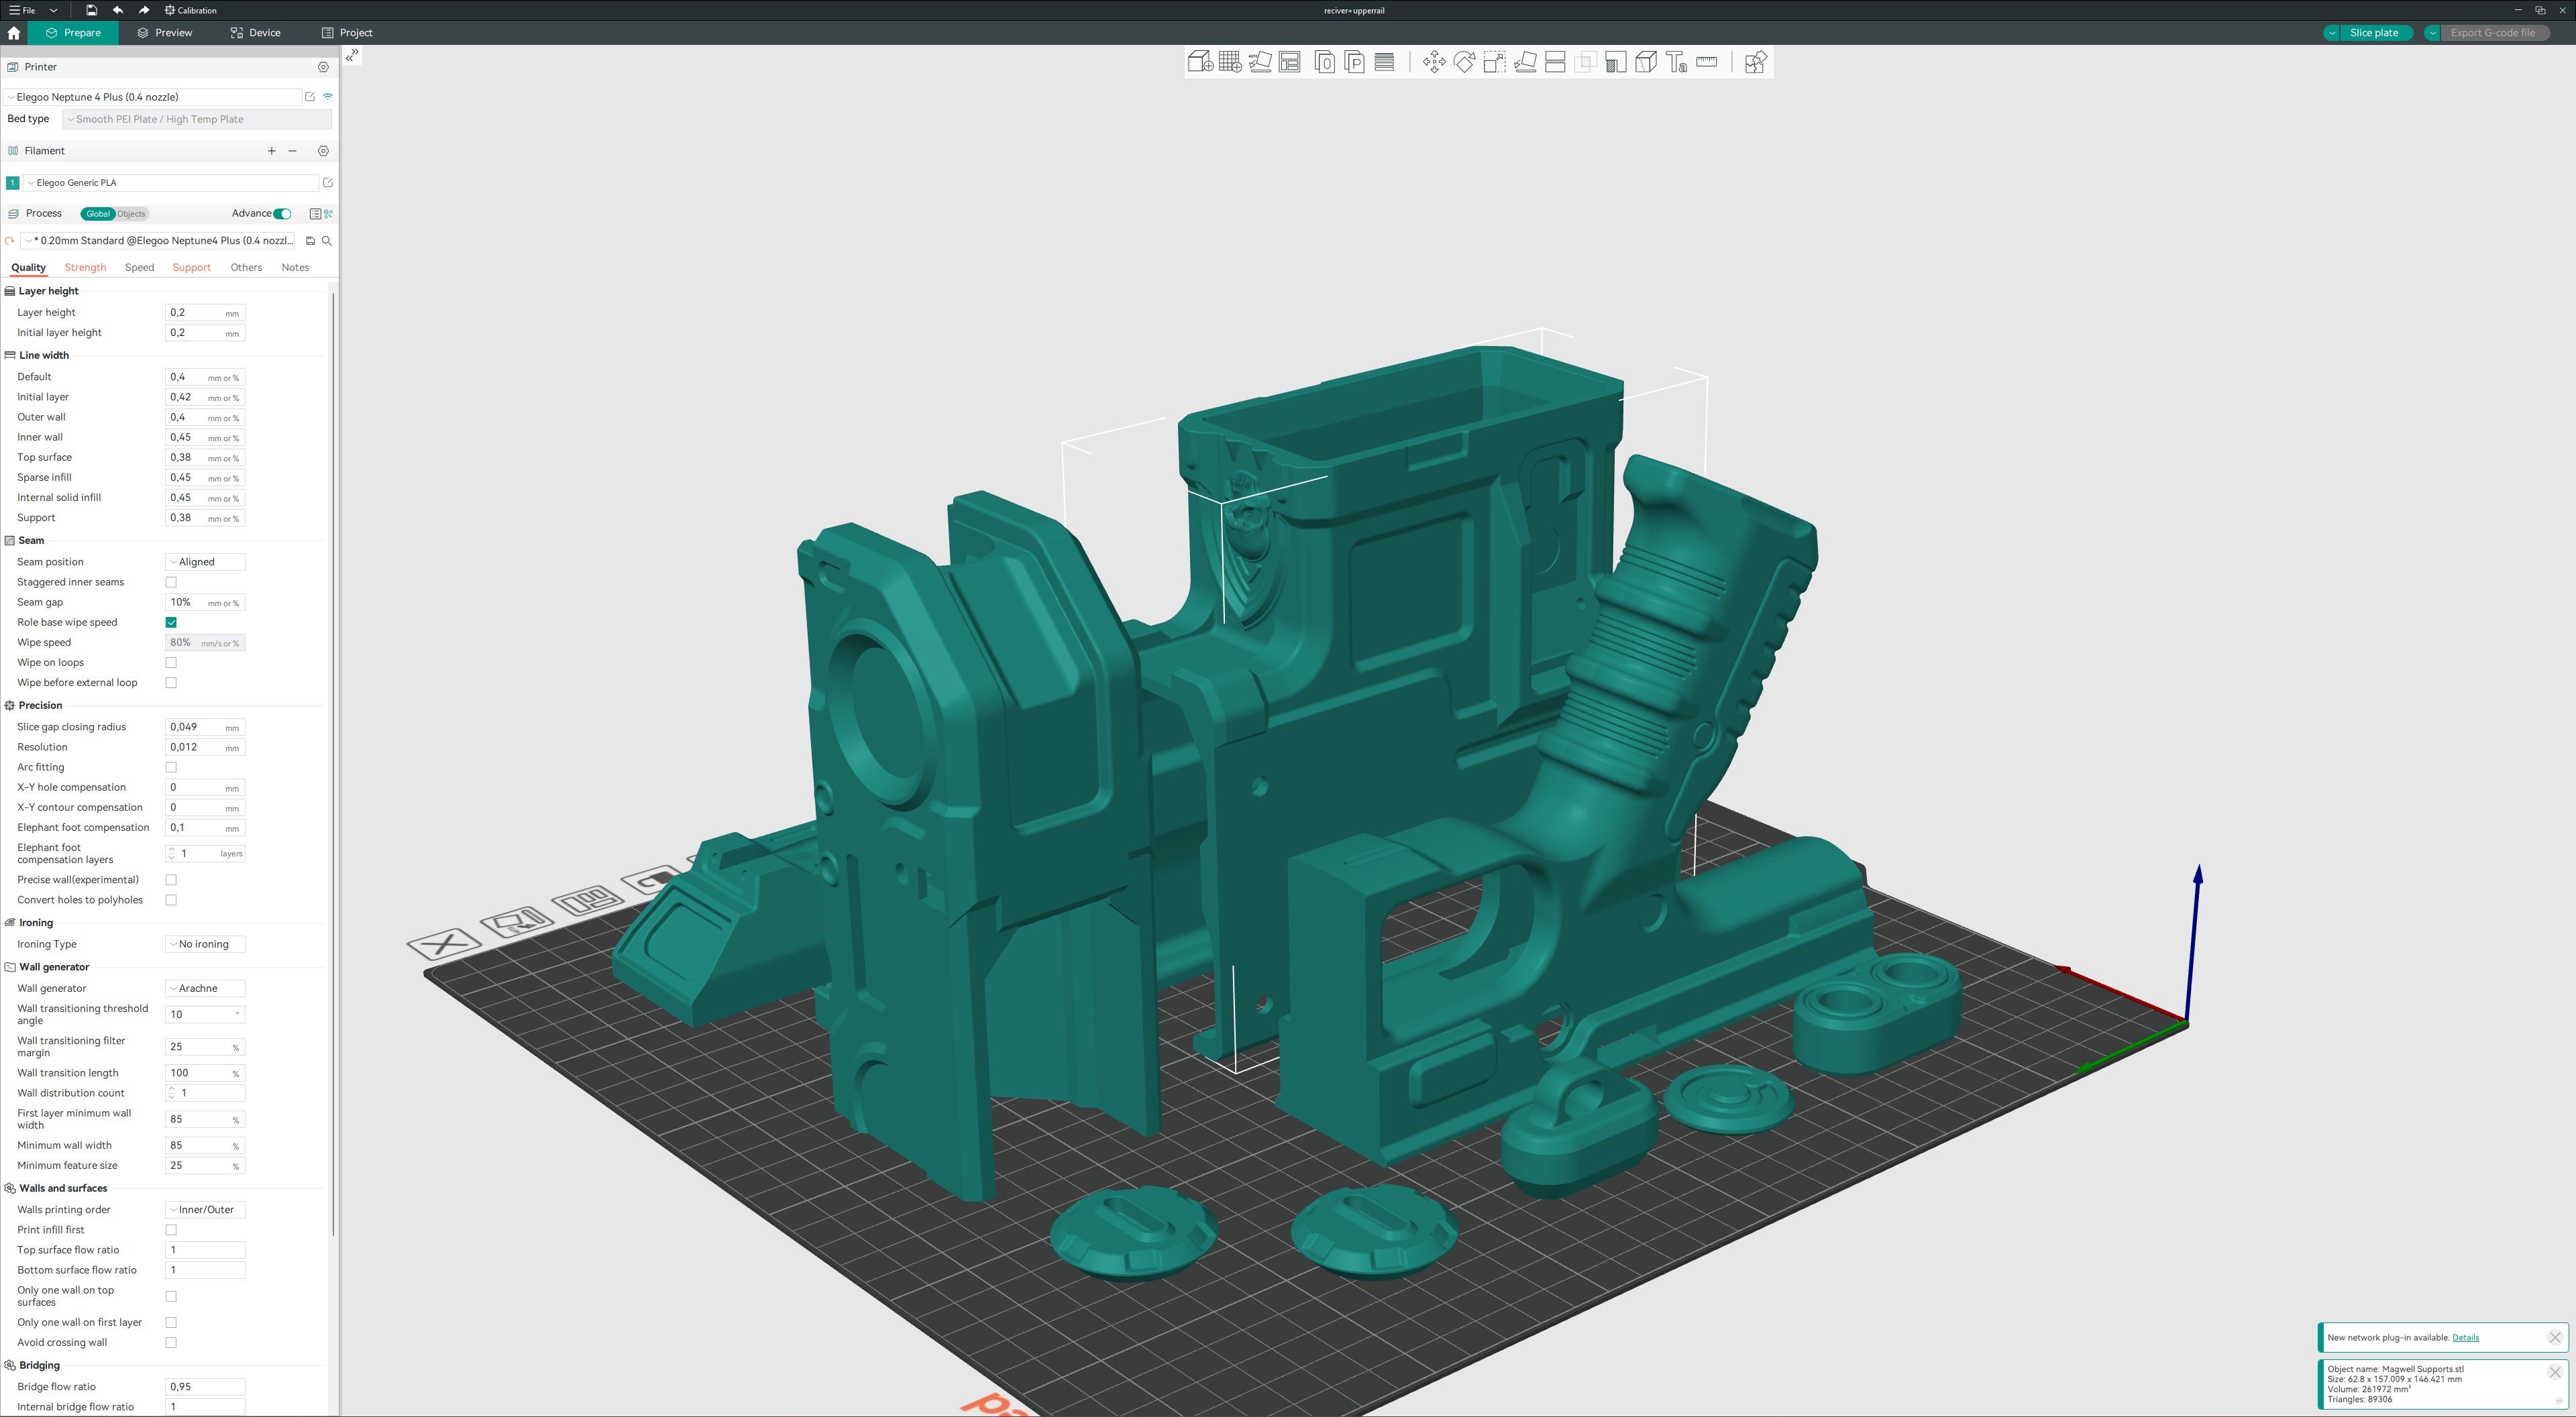
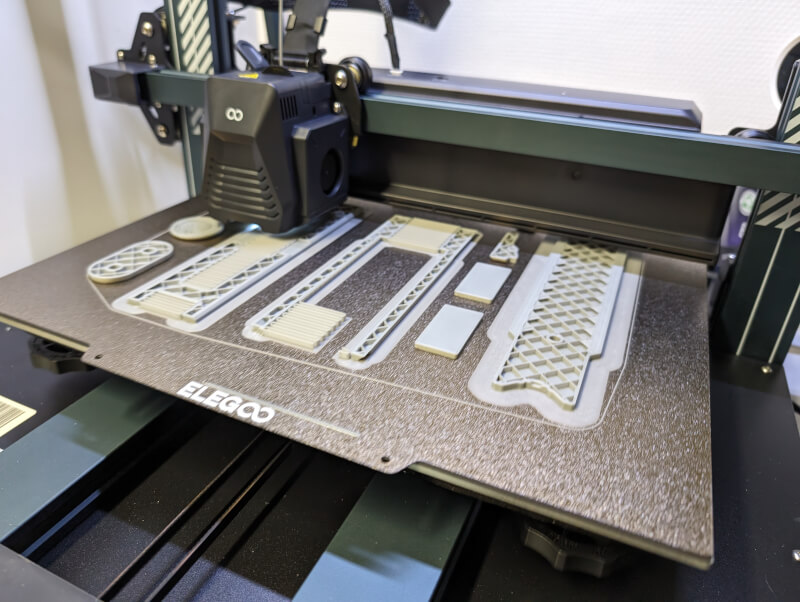
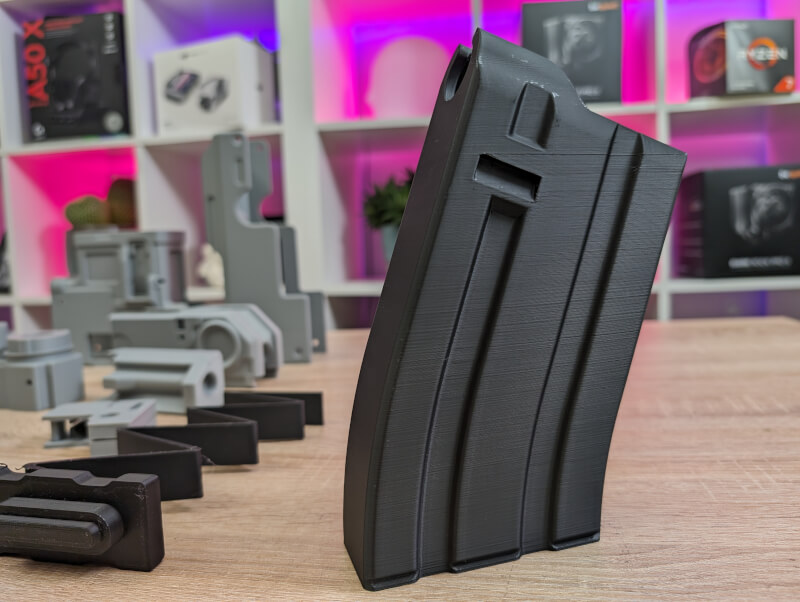
The choice for the test here on the Elegoo Neptune 4 Plus ended up being another Warhammer 40K project with a full size Boltgun.
It is a print with a lot of loose parts and of an ok size, which should be able to test the possibilities with the Neptune 4 Plus.
For the test I used the Orca slicer to prepare the files. It had a profile ready for the printer and was ready to go. At the same time, the possibility to add supports to the necessary areas is also super easy in the Orca Slicer.
From here it was just a matter of setting the prints to run and then otherwise waiting. I had purposely filled each build plate well, to take advantage of the extra space, and test how leveling worked across the large plate.
The prints were spread over four prints and took a total of just about 48 hours to get through. Along the way, I had to fine tune the leveling process a bit, as I could see on the second print in the row that there were problems with the first few layers.
After running through manual and automatic leveling an extra time, it was fine-tuned. From here I was able to run the remaining prints without any problems.
Overall, there were no major flaws on any of my parts across the four prints. There were a few small llayershifts but nothing serious considering the amount of print. In addition to the waiting time, the process could hardly be easier from preparing files to the actual prints.
The results on the prints afterwards were also super good, and some of the best I've seen on an FDM printer, without the need to spend hours fine-tuning settings and print parameters.
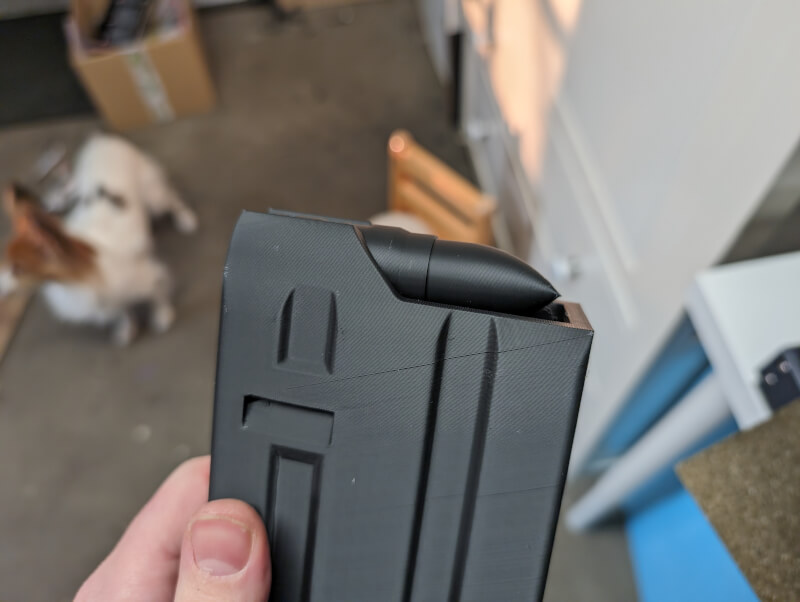
Although of course there will always be visible lines in an FDM print printed at 0.20 mm layer height, it was actually very minimal here and the prints had a super smooth and fine surface.
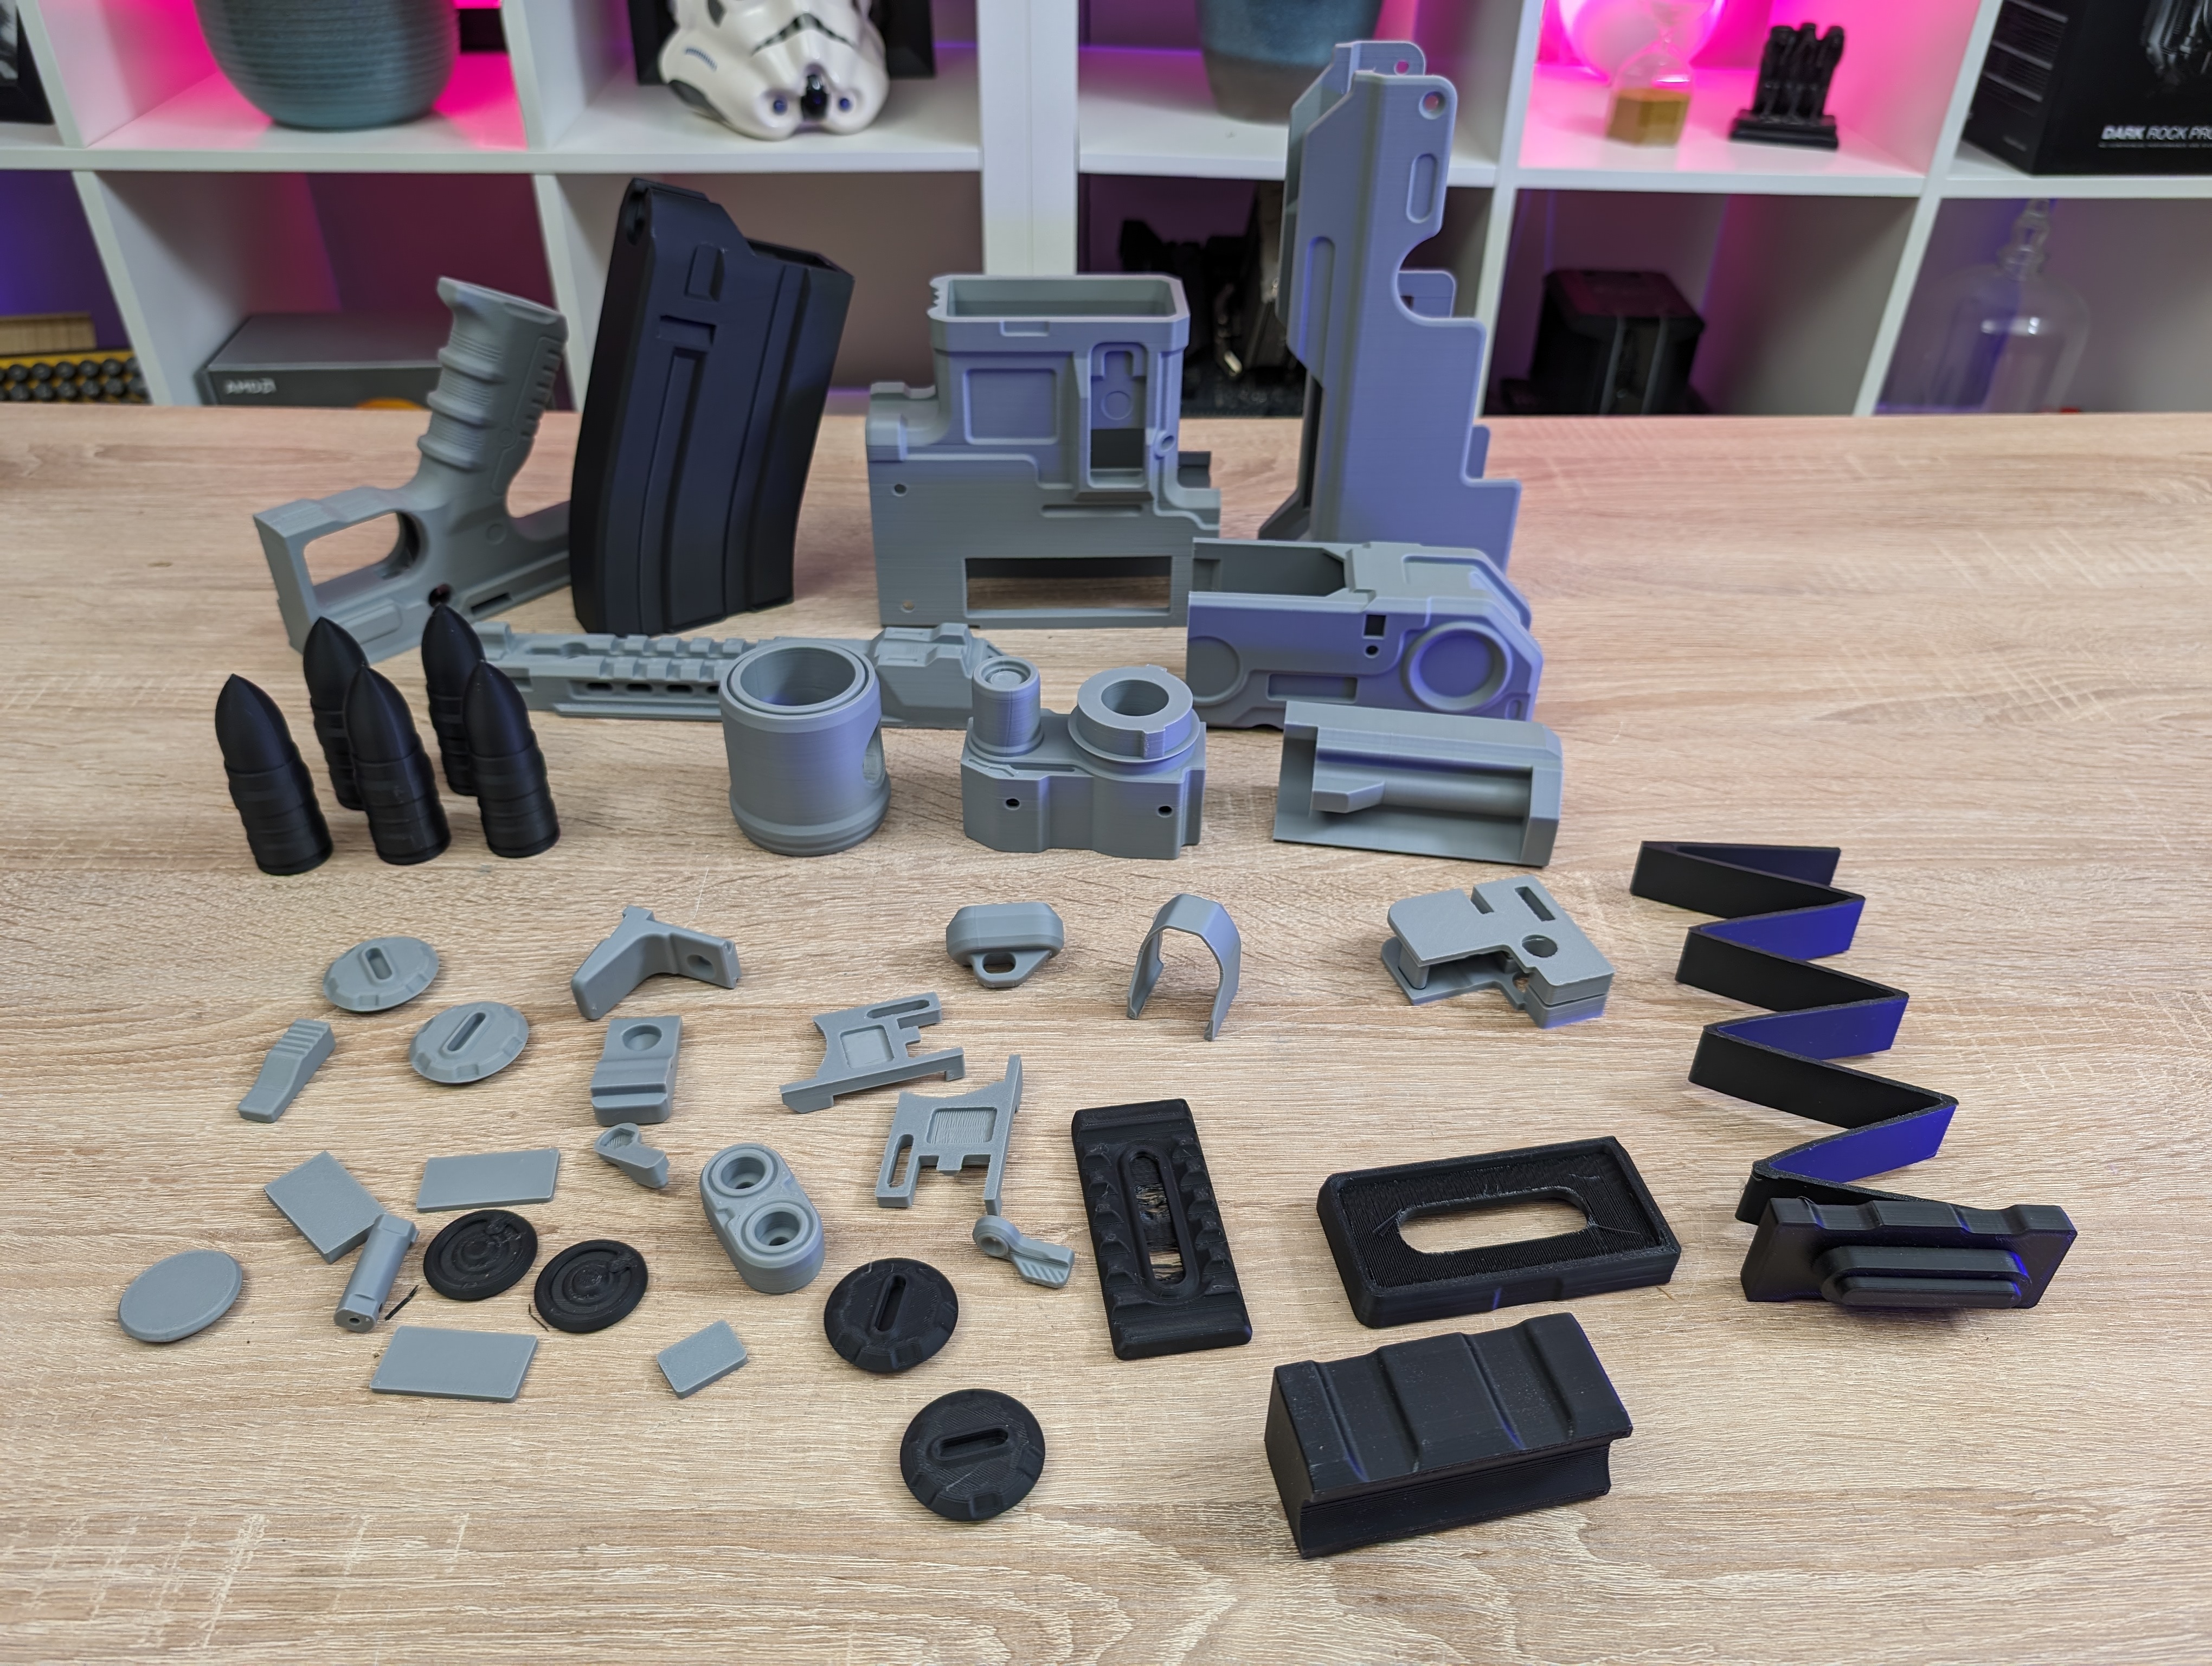
So after about two days I had a sea of felt parts that could be assembled into a Warhammer 40K Boltgun prop.
Because my other big hobby besides gaming and PC Hardware is model building and painting, I also decided to paint and collect my print to make a little extra out of it.
The files are made to have functional parts and the accuracy of the print meant that all the parts fit together without any problems.
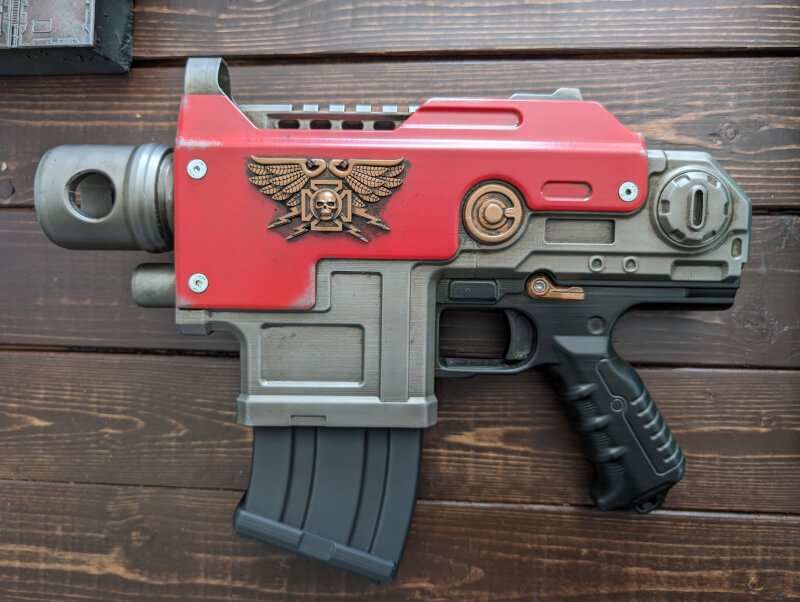
After a good pile of hobby hours with assembly, a bit of sanding and a lot of paint and weathering effects, I ended up with a super good product.
As I said, I spent some time sanding some of the parts to get a smoother finish. However, the result directly from the printer was so fine that most of them just got a good spray primer and then the result was actually delicious to look at.
Price
At the time of writing, I can find Elegoo Neptune 4 Plus with an online price of around 400$ from Danish webshops, which is around 15$ more than it costs to order directly from Elegoo's EU webstore. It is around 110$ more expensive than the regular Neptune 4.
Conclusion
If you are in the market for an FDM 3D Printer with a large build volume and which is easy to access, then the Elegoo Neptune 4 Plus is a really good offer. It requires a little more space on the table in the hobby room, but if you have the space, the extra size is nice to have.
Features such as auto leveling together with Klipper firmware, network options and a good build quality mean that it is difficult to go completely wrong in the city here. The only point is perhaps that you can save almost 150$ if you don't need the extra large building volume.
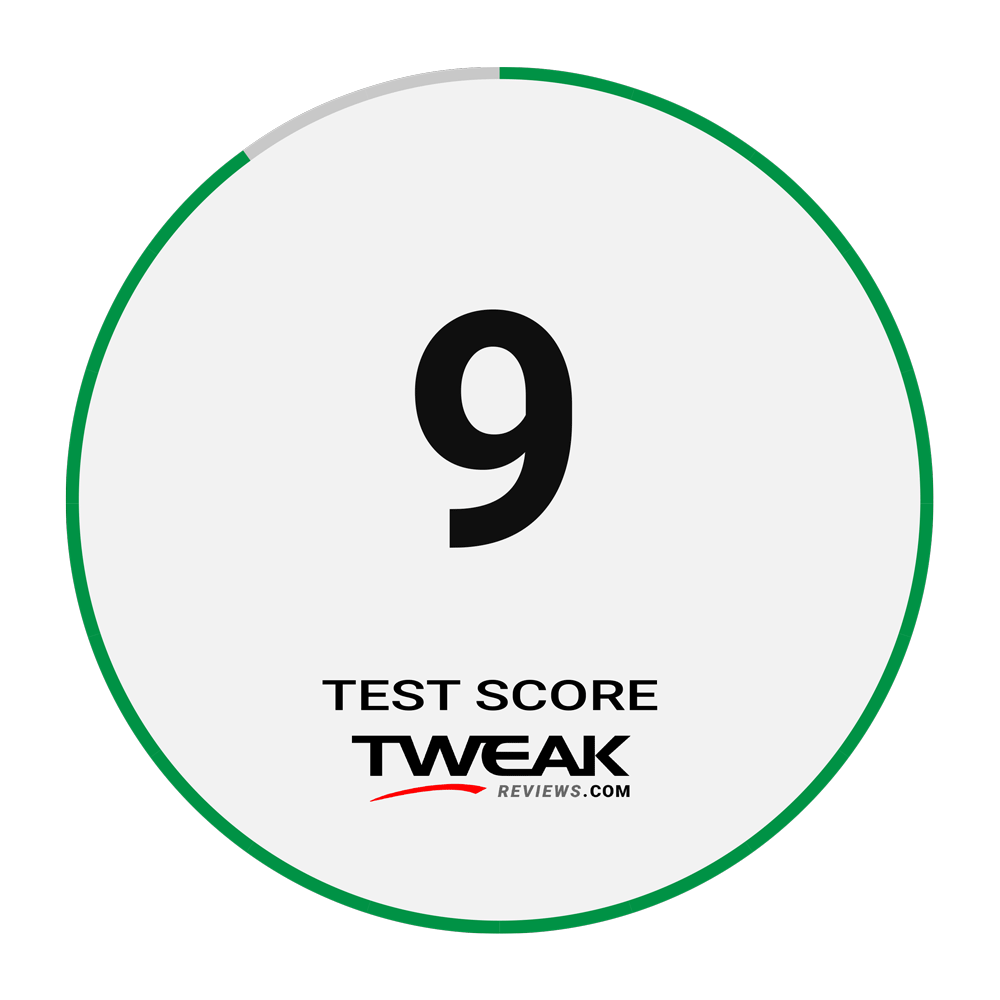
We end up with a final grade of 9, for a solid and accessible printer that delivers super good results without the need for millimeter tuning.
Advantage:
Disadvantages: