27 May
gadgets


Central Specifications
The xTool M1 is available in a few different versions. The core of the whole thing, however, is the same M1 machine, and then with a different selection of accessories. We have been visited by the xTool M1 in an Ultra Deluxe version, which includes accessories in the form of a Riser Base, Air Assist unit and their RA2 Pro 4-in-1 rotary tool. These are all accessories that we will of course take a closer look at during the test.
A tour around the xTool M1
The M1 base unit comes in a single box and is quite easy to unpack and all accessories are safely and securely packed.
The unit itself is a white plastic box with a dark colored lid and the whole thing measures 557x453x230mm, so it takes up a bit of space on the table. It is a closed unit and all moving parts are therefore inside the "box".
This means that you are protected against the harmful light produced by the laser. There is built-in safety, in that the machine can only be started with tasks if the lid is closed. If you open the lid while the machine is running, the whole thing stops automatically.
The materials in the unit are also made of fire-retardant materials and there is a sensor that can detect if a subject catches fire during the process. It is important to emphasize that there is a risk that the materials may catch fire if the correct settings are not used. Therefore, it is also emphasized in the material from xTool and written on the machine itself that it must be supervised while it is being used.
All cables and moving parts are packed securely away in the workspace and generally the build quality and materials feel good and solid. The entire outer shell is made of plastic, while the actual frame and bottom, which make up the working area of the machine, are made over a solid metal frame.
There is a single function button with indicator light on the front of the machine. On the back we find a power button together with the power plug, a USB port and then a plug where accessories such as the RA2 Pro 4-in-1 rotary tool unit are connected.
All other control is done through software and here xTool has their own xTool Creative Space software, which I will get into more later.
On the back, there is also a mounting point for extraction, as laser engraving and cutting naturally generate smoke etc. A bracket and a flex tube are included, so you can direct the whole thing out of a window or connect it to another extraction system.
xTool also makes a dedicated air filtration and purification unit that you can plug in if you don't have the option of venting it all outside. However, we have not had the opportunity to test it.
If we take a look inside the machine, we can see the working area itself. A metal base is mounted in the M1, which is very practically marked with measuring lines. This makes it easier to place materials in the machine so that they lie flat.
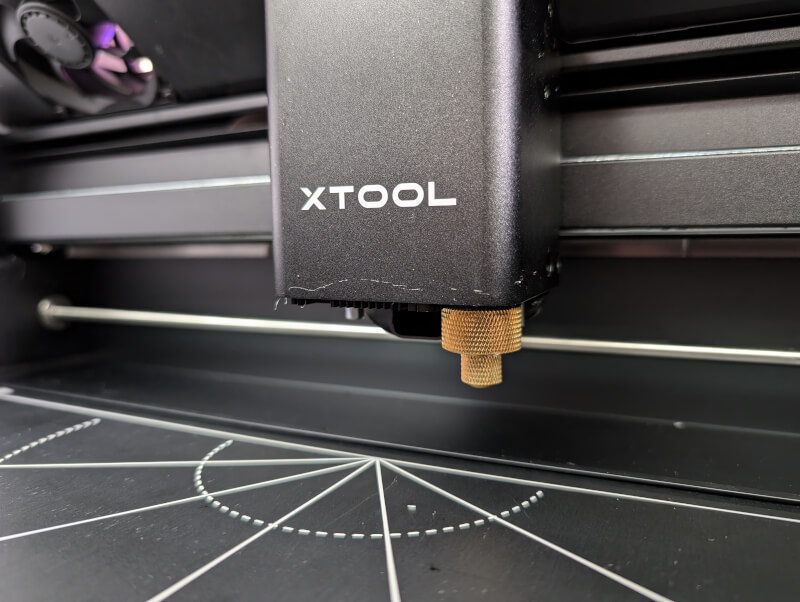
At the rear end of the machine we can see the working head, where both the laser and the cutting unit are mounted. The cutting unit can be easily removed and held magnetically in place. The blades used to cut materials such as cardboard, paper, vinyl and the like do the same.
A total of four blades are included in the box for the M1, so there will be enough for the first time, but you will of course have to replace them continuously.
The 10W Diode laser is also located here.
At the back of the chamber we can see the fan that sucks smoke etc. out of the chamber when the machine is running. At the top, there are a series of LED lights that illuminate the chamber and here we also find the 16 megapixel camera, which you can use together with the xTool Creative Space software to place your materials and designs so that it all fits together. All of which I will get into in more detail in the test itself.
Setup and installation of accessories
In addition to the base unit itself, xTool also has a fairly wide selection of accessories that can both expand the options you have with xTool M1 but also accessories that can help make your workflow easier and more practical. Below we review the M1 and the accessories that came with our test sample. Stop by xTool to see the full range of accessories here.
If you're just going to use the base unit itself without any of the accessories that we'll look at in a bit, then the setup is pretty straight forward. It is just a matter of unpacking it from the box and removing the foam that secures the parts during transport, and then otherwise turn on the power.
You have the option of connecting to the xTool M1 both via USB and WiFi. To connect the M1 to your WiFi, use the xTool Creative Space app for your smartphone. Through it you can connect to your M1 and set up your network so that it can be accessed wirelessly.
Alternatively, you can do the same via your PC and a USB connection in the first place, and then connect via WiFi.
The bottom of the M1 is a metal plate as standard, and if you want to use the cutting functions with e.g. paper, leather, fabric or vinyl, you must use the supplied cutting plates. It is a flexible cutting board which is slightly sticky on both sides. In this way, the material is held firmly and does not slide around while cutting.
If you need to use the laser to cut out items, a package of triangular metal rods is included, which can be placed in the bottom of the M1 chamber. In this way, the material is lifted up so that there is a little air underneath, which creates the best results when cutting with the laser.
If you plan to use the laser cutter a lot, it may be an advantage to have the Riser Base with you, which is also included in our test sample. It also comes with a Honeycomb Mesh, which creates air under the items you want to cut.
The Riser accessory is really just a frame that is assembled and placed under your M1 unit so that there is more air underneath. Then there is room for the included honeycomb mesh at the bottom of your M1 instead of the regular fixed metal plate.
It is easy to switch back and forth between the two when switching from the laser to cutting with the knife.
Another advantage of the Raser Base is that you get the opportunity to work with thicker materials in an easier way. In the base, there are a few grooves, in the same way as for the plates in your oven, and here it is just enough to push the Honeycomb Mesh in if, for example, you have to laser engrave on a higher item than is possible in the normal configuration.
Another good accessory to have with you if you aim to use the laser a lot is the Air Assist unit. In short, it is a small pump that blows air down over your object when you need to laser cut or engrave. In this way, you keep the work area free of smoke and dust that can get in the way of the laser.
The installation of it is slightly more complicated than the Riser frame. However, all the necessary accessories are included in the box. xTool has also provided a good guide in the manual, so that the installation is clear.
The air pump must stand on the table next to M1, and then a hose must be pulled from there into the machine and down to the laser head. It must be connected to a small mounting bracket that magnetically snaps into place so that it sits properly around the laser.
Mounting brackets are also included, which ensure that the hose can be pulled inside the machine and secured so that it does not get in the way when the machine is running. There are even extra brackets, so you have a place to place the small fan head when it is not in use.
However, the Air Assist unit is not integrated into the M1 machine and the workflow and is operated separately manually. This means that you have to remember to turn it on and off when necessary.
The last piece of accessory that was included in our sample is the RA2 Pro Rotary accessory. With it, it is possible to laser engrave round items such as glass, rings, mugs, etc. It can be set up in a few different ways, so it is possible to use it both with small items such as a finger ring or large items such as a thermos.
I will get more into that particular device during my test.
Software
Software is of course unavoidable with a device like the xTool M1. The machine itself cannot be used without external software on your computer or mobile device. In this section, we review the possibilities with xTool's own software.
A large part of the work with the M1 is of course through the included xTool Creative Space software. It can be found on both PC, Mac, Android, iOS and iPad OS. So there are super good options to use it on your favorite device.
It is through xTool Creative Space that you prepare and start your tasks for the M1 machine. It can therefore both be used to create and adapt the graphic elements you want to have engraved or cut, and to adapt all the settings you need to get a good result based on the material you are working with.
I had no experience with xTool Creative Space before starting my test here, so I went into the task as a novice. However, I would say that you are a little ahead if you are already used to working with image processing programs such as Photoshop or similar.
During my test I mainly used Creative Space on PC, and this is basically what I refer to below.
However, the experience of xTool Creative Space was quite straightforward, as it is structured very intuitively and to that extent is purposefully made to work together with the xTool products. This is an advantage compared to other Laser software such as Lightburn, which is designed to work with a large selection of machines.
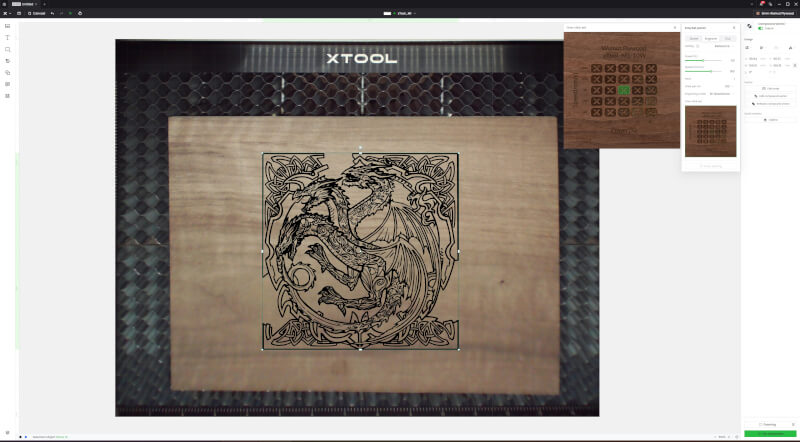
In the software, you have a workspace where you can import or create the graphic elements to be used for your project. It can be anything from pictures and graphics to engraving or lines that need to be cut.
A big advantage is that you can take a snapshot of your material and its position in the machine via the built-in camera in the M1. You can then use that to place and scale your project. It is not a millimeter-precise location, but it provides an incredibly good starting point for getting things positioned as you want.
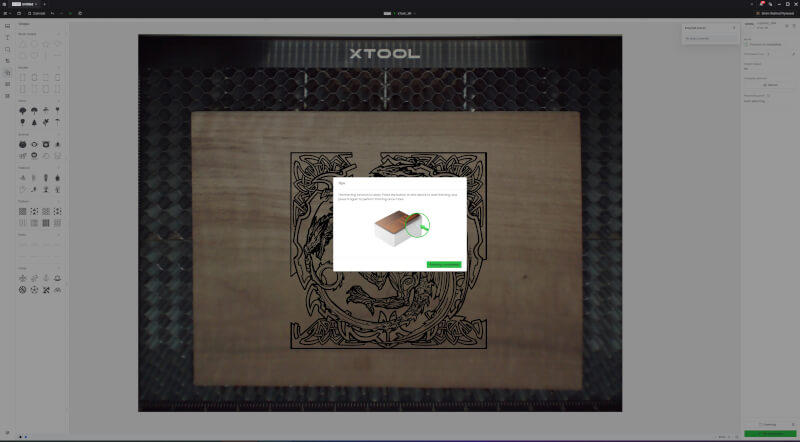
In order to hit exactly the right spot, however, you have to check it with the framing function on the machine. Here the laser travels out and "draws" a frame around the used area with a weak power. That way you can check that things are positioned as they should be.
Another important detail is of course choosing both the right process and the right material. All that is controlled via drop down menus on the right side. Here you can choose whether you work directly on the plate, whether you will use the laser or whether it will be cutting material with the knife.
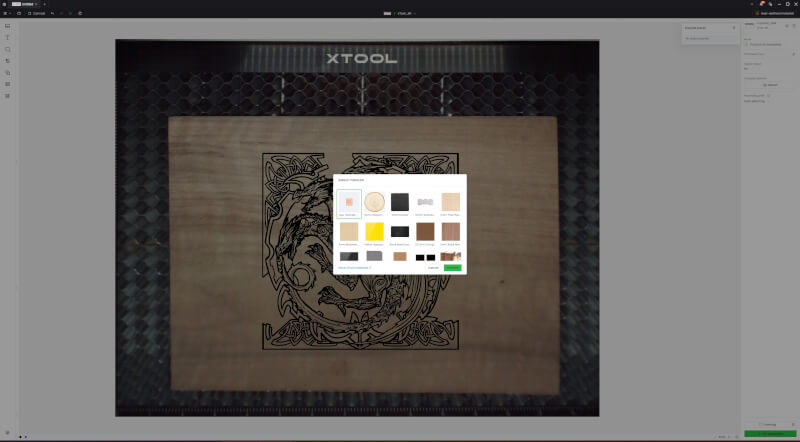
After this, you must of course also indicate which material you are working with. You can choose to specify your own settings completely manually for cutting and engraving. However, I found it much easier to make use of the large database of materials that xTool includes in their Creative Space.
It is of course a database that has been created on the basis of the materials that they themselves sell via their website or dealers. However, this is information that can also easily be used with equations. third party products.
The xTool database is super comprehensive and contains everything from a wide selection of wood veneer sheets to vinyls, metal jewellery, mugs, leather, watch straps and much, much more.

If you select the material from here, the software also indicates the recommended settings for use for cutting or engraving. All automatically, which makes the task incredibly easy.
Of course, there is still the possibility to adjust the settings if you want, so you are not locked in. It is possible to choose between predefined settings for how powerful you want your engraving, for example, or you can control it 100% manually between the power of the laser and the speed at which it runs.
In the same way, there are also settings for how much pressure the knife cuts with when cutting vinyl and foils, e.g. It can be done so accurately that you can only cut partially through a transfer vinyl, for example, so that you still have it sitting on a mounting film when it has finished cutting.
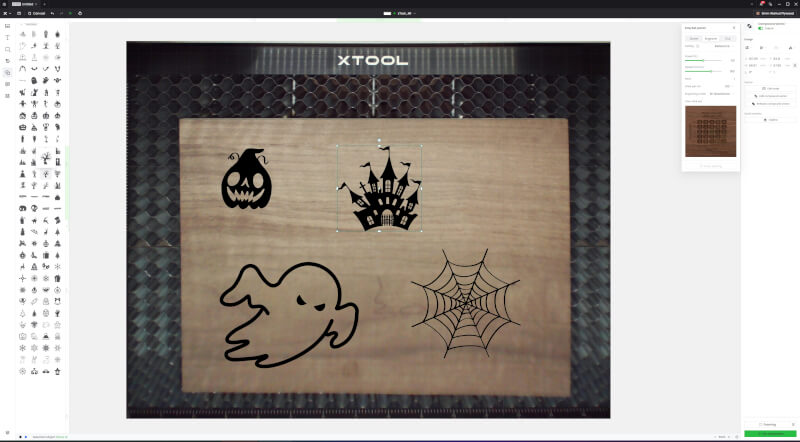
The graphic part of the program is of course not on the side of dedicated programs such as Photoshop, Illustrator and the like, but there is a wide selection of options. On the one hand, you can create text in all shades and then there is a good selection of smaller clip art-like graphic elements and shapes.
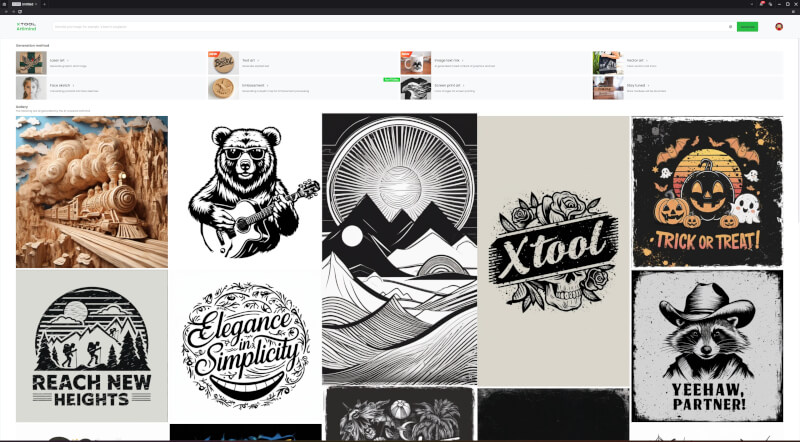
On top of that, AI has of course also found its way in here, and there is a Generative AI function where you can generate graphic elements or images based on text prompts. There are different categories to work with, and you can, for example, also use the AI function to convert a portrait image into one that can be used for your project on M1.
However, the AI functions are not free and xTool has a points system where it costs you five points for each image you generate. As a new user, you get 300 points as a welcome gift, but then you have to add more yourself to continue using the functions.
This can be done by being active in the xTools community in one way or another. This can be, for example, by answering questions in their support forum, sharing projects on social media or as a member of their xTool Creator Club, where they have a point back system, so you earn points when you buy things like materials etc. in their webstore.
All those things are of course fine as a bonus, but I find it a little annoying that it is tied to this kind of "requirement" for activity. I haven't been able to find any place where I can just choose to buy points if I wanted to.
Having said that, I don't have many complaints about the xTool Creative Space software, which is otherwise free to use. As I said, it is available across devices such as smartphones, PCs and tablets, so there is a super high degree of flexibility on that front.
As I said, I have mainly used xTool Creative on PC, but have also briefly visited both smartphone and tablet. On the phone, I think things were a bit cramped, but it was usable for smaller, not so complicated projects.
The experience on the iPad is somewhat more usable and with a little getting used to, it was quite close to the PC experience. In my case, however, the workflow is always easier on a PC and a large screen.
Testing
Specifications on paper or on the website are of course all very fine, but I have of course also spent a lot of time testing the possibilities with the xTool M1 machine. In this section, we review some of the many options available with the M1. Due to time constraints, I have of course not been able to reach around all types of tasks or materials... Because M1 can work with a really wide variety of materials.
I've had the xTool M1 around for two weeks now, and during that time I've tried a selection of different projects and tried to get my head around the different possibilities that the M1 has in terms of materials and processes.
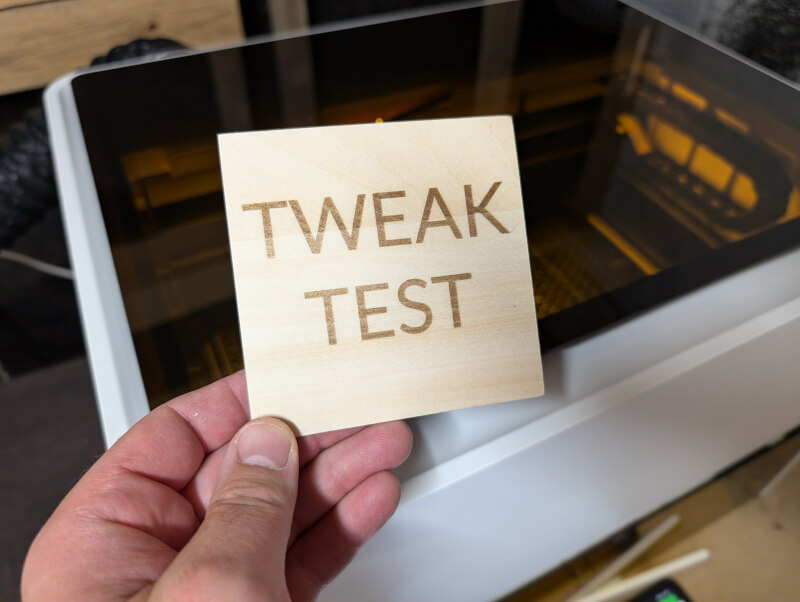
Initially, I used something simpler and had our Tweak logo cut out of some of the cardboard paper that came with the machine.
It was a super easy process, where I simply dragged our logo into Creative Space, selected material and told them that I would like it cut out. After that, the process itself took less than a minute. The result was beautifully carved and considerably faster and more accurate than I would have been able to do by hand.
That process can then be copied for the large selection of other materials you can use with the M1 and the cutting knife.
During my test, I tried both with vinyl stickers and Heat Transfer Vinyl, which can then be ironed onto your clothes, or as in this case a tote bag for a Friends superfan in your life.
In all cases, the cutting task went without any major problems, and the built-in material profiles in Creative Space meant that I didn't have to mess with settings other than simply selecting material.
From here I went on to test the possibilities of the laser. A few small trials, again with logo and various graphic elements from Creative Space, gave me a good impression of how things worked.
Again, I used the included material selections and settings that could be selected in the software and in all cases it produced fine and satisfactory results.
From here I moved on with a slightly larger project. It was an ornate box made from files found on Etsy. Here it was files made specifically for use with laser cutting, so the heavy work on that front was done by others with more talent than me for that sort of thing.
Again, working with the files and xTool M1 was a super easy experience. All I did was import the files into Creative Space, select material and specify which parts should be cut and which should be engraving.
It was a larger task split over several parts, several of which took about a couple of hours to get through, with the combination of engraving and cutting.
However, the result was beautifully carved and engraved parts that could be easily assembled with glue. It was really a project that showed what possibilities a machine like the M1 offers for the hobby enthusiast.
With a diode laser, such as the one we find in the xTool M1, engraving and cutting of a wide variety of materials is possible. Some of them were also included in the material package that came with it, and therefore of course I had to try several of them to see how the M1 coped with those tasks.
I therefore also tried engraving and carving acrylic sheets. Here I made an attempt to make a selection of playing pieces for a figure game that I am currently playing.
Here my experiments also went super well and I was left with nice and useful results. However, you must be aware that due to the way a diode laser works, you cannot cut all types and colors of acrylic.
For example, it is not possible to cut clear acrylic, so if you have many plans with just acrylic, a CO2 laser may be the way forward instead. You can get that with xTools P2 or S1 machines.
Another test I did was engraving on steel. In my tests, it was a steel water bottle and a black painted steel thermos bottle.
With both, I tested engraving using the RA2 Pro accessory. It is of course a bit more extensive than flat items, but again xTool had made a good manual which describes the procedure point by point.
The RA2 Pro accessories can be assembled in a multitude of different ways, depending on the type and size of the round workpiece you want to work with. The device is connected to M1 directly with a cable and is thus controlled centrally.
RA2 Pro continuously rotates the workpiece during the process. so you get an engraving result that follows the curves. It is just a matter of choosing the accessories in Creative Space, so that you tell us which process you would like to use.
Here, however, you get the best results if you have a subject that does not vary too much in thickness, as this naturally affects the focal point of the laser. In my test with the water bottle, you can see a little variation in the result, as the thickness of the bottle varies slightly.
However, on the larger thermos, the result was super fine, as it did not vary in thickness. The thin lines around the writing are not the machine's fault, but mine. I hadn't realized that I had put an outline on before I started the machine.
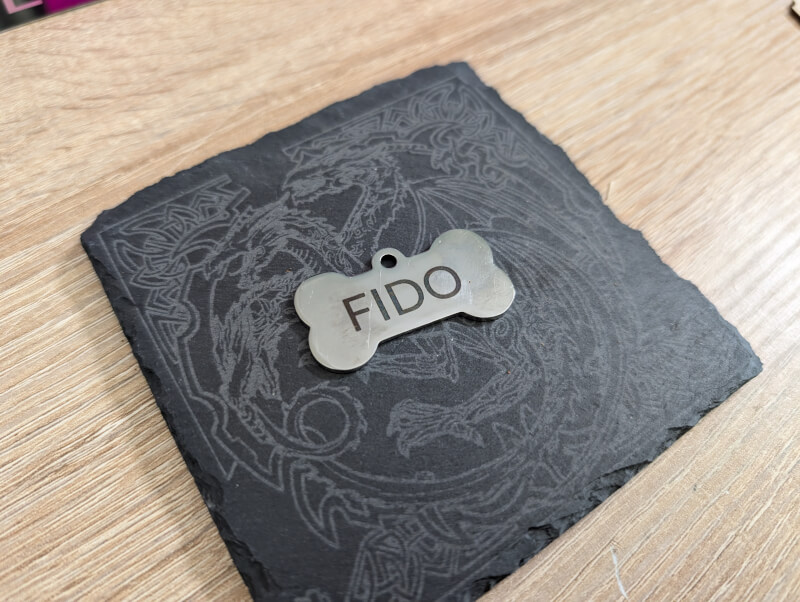
I finished my tests by testing engraving on a steel dog tag, anodized aluminum business card and then on slate stone. Again, I got fine results without the need for more than just selecting the right material in Creative Space.
Overall, my testing period with the M1, the accompanying accessories and the included materials has been characterized by a high degree of accessibility and a very high level of information from xTool. It is through their manuals and support material on their website and YouTube channel.
xTool itself says that they have a fairly extensive team of over 60 people who continuously work on their xTool Creative Space software and it can be felt. The interaction between the M1 machine and the Creative Space software is one of the biggest factors in the problem-free experience I had during my test. To that extent, it has helped make it a process that has been easy to go to, despite the ability to do some pretty advanced stuff.
A little about support
Normally this is not a point by itself in our reviews, but in this case I just want to spend a few lines talking about the very wide support that xTool has for the M1 and their other machines. In this section I discuss the wide support options that xTool has provided for their M1 machine.
During my test period, I had a few questions, and generally tried to learn what I could about the M1 machine. In this connection, I have visited the xTools support website several times and here I have been impressed by the amount of dedicated support that can be found, for virtually any part and function on the M1 machine.
It's everything from how to use the different functions and the selection of materials to instructional videos on how to take apart and maintain the machine or replace parts when needed.
There is video and guide material for replacing virtually all parts in the M1 machine, which also shows that xTool has made a machine that is easy for the user to service himself, which is nice to see both from an environmental point of view and as an end user.
It is rare to find so much support and documentation and it has been fantastic to see. I haven't needed most of it, but it's nice to see that xTool seems to be aiming to support their hardware.
Price
At the time of writing, I can find xTool M1 in the basic version with a price of from xTool's own website with a price of just $899.00 down from $1499.00. The large Ultra Deluxe bundle, which we visited with the large accessory package, naturally lands with a heavier price of $1899 but still down from over $3700.
Conclusion
The xTool M1 is the second laser cutter we look at here on the site, and where the first, in the form of Elegoos Phecda, had cut all the way to the bone to keep the price down, the M1 has gone in the other direction.
Here you get a much more complete package in the form of both hardware and software that is packed with features and user-friendly conveniences that create a more coherent ecosystem.
It ranges from the completed closed design, the combination of knife and laser, the choice of materials, to the super powerful software, which together create a significantly better and more user-friendly experience.
Although I've had a few weeks with the xTool M1 now, there are still plenty of features and options that I don't feel I've gotten around to enough.
The crafting possibilities are enormous and with the wide selection of materials there is plenty to get started with. During my short test here, I have had both decorative boxes, specially adapted playing pieces for my board games, stickers and beautifully engraved coasters made.
If you are a hobby geek and would like to expand your options for creating new and unique things, then the xTool M1 is a really good bet for a light and accessible machine with a lot of options.
The price for the full package is perhaps a bit on the heavier end when we are close to the $1900 mark. However, it is also only necessary if you want all the options that the M1 offers.
For the more average hobby and crafting room, you can also go a long way with the M1 in the basic version, and here I think the combination of hardware, software and features justifies the price.
We end up with a final grade of 9 and a Great Product Award for a completed product with an impressive feature list and top-notch user-friendliness.
Click below to check out the M1 and the entire xTool range of products and accessories.
![]()
Benefits
Disadvantages