27 Feb
keyboard


We’ll be going over all these features in today’s test where the MasterBox NR600 will be examined closely. Has Cooler Master created a reasonable budget case here, or does the MasterBox NR600 fall short of this promise? There’s only one way to find our, so let’s get on with it and have a look at the technical specifications first.
Specifications and Features
All of the relevant information can of course be found on Cooler Master’s own website, so we paid them a visit and found the specifications that we’ve listed down below. We also have added some images that illustrate the various features of this case.
Type: Mid Tower
Available colors: Black/Gray
Materials: Steel, Plastic, Tempered Glass
Dimensions: 478 x 209 x 473 mm (LxWxH)
Motherboard Support: Mini-ITX, Micro-ATX, ATX
Expansions Slots: 7
Drive Bays: 3.5” HHD x 4 + 2.5” SSD x 5
Front I/O Panel: USB 3.0 x 2 + Audio In/Out
Clearance - CPU Cooler: 166 mm
Clearance - Power Supply: 180 mm
Clearance - Graphics Card: 410 mm
Cable Routing - Behind MB Tray: 20-28 mm
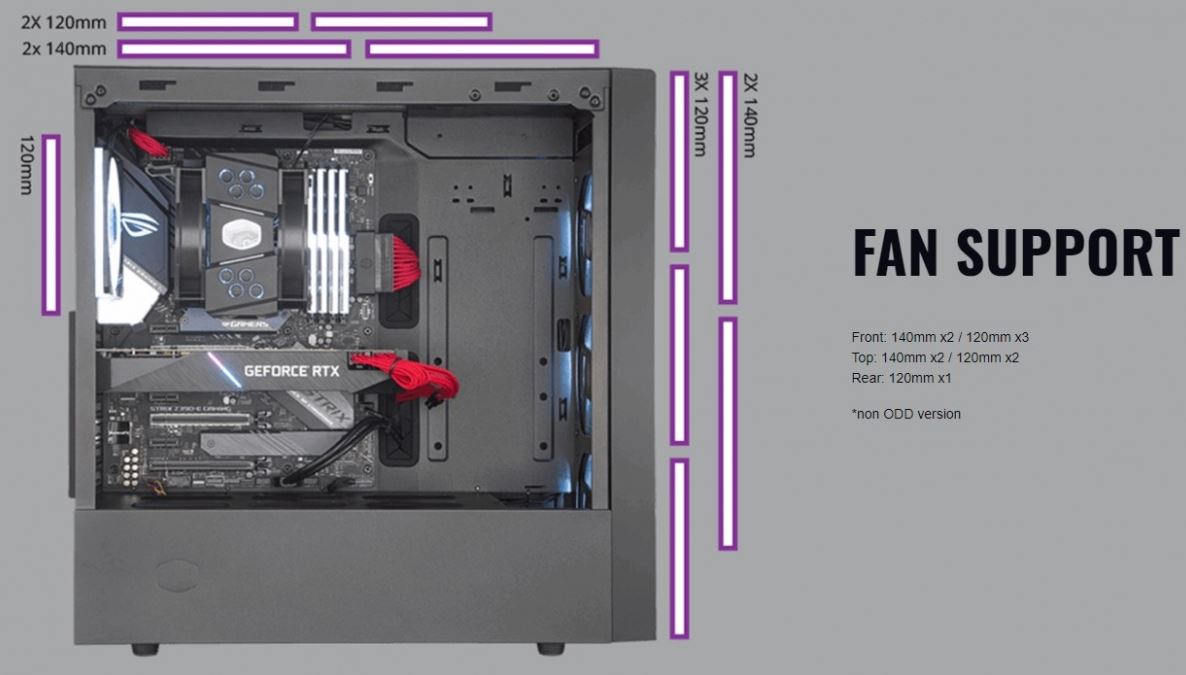
Fan Support - Front: 140 mm x 2, 120 mm x 3 (120 mm x 1 is included)
Fan Support - Top: 140 mm x 2, 120 mm x 2
Fan Support - Rear: 120 mm x 1 (is included)
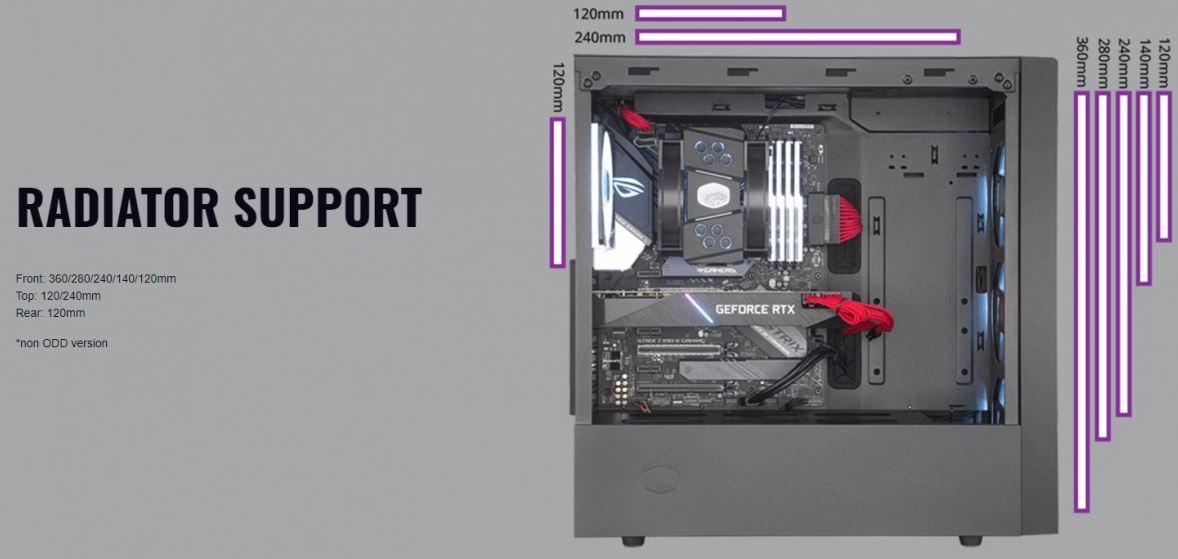
Radiator Support - Front: 360 / 280 / 240 / 140 / 120 mm
Radiator Support - Top: 240 / 120 mm
![]()
A Tour Around the Cooler Master MasterBox NR600 Case
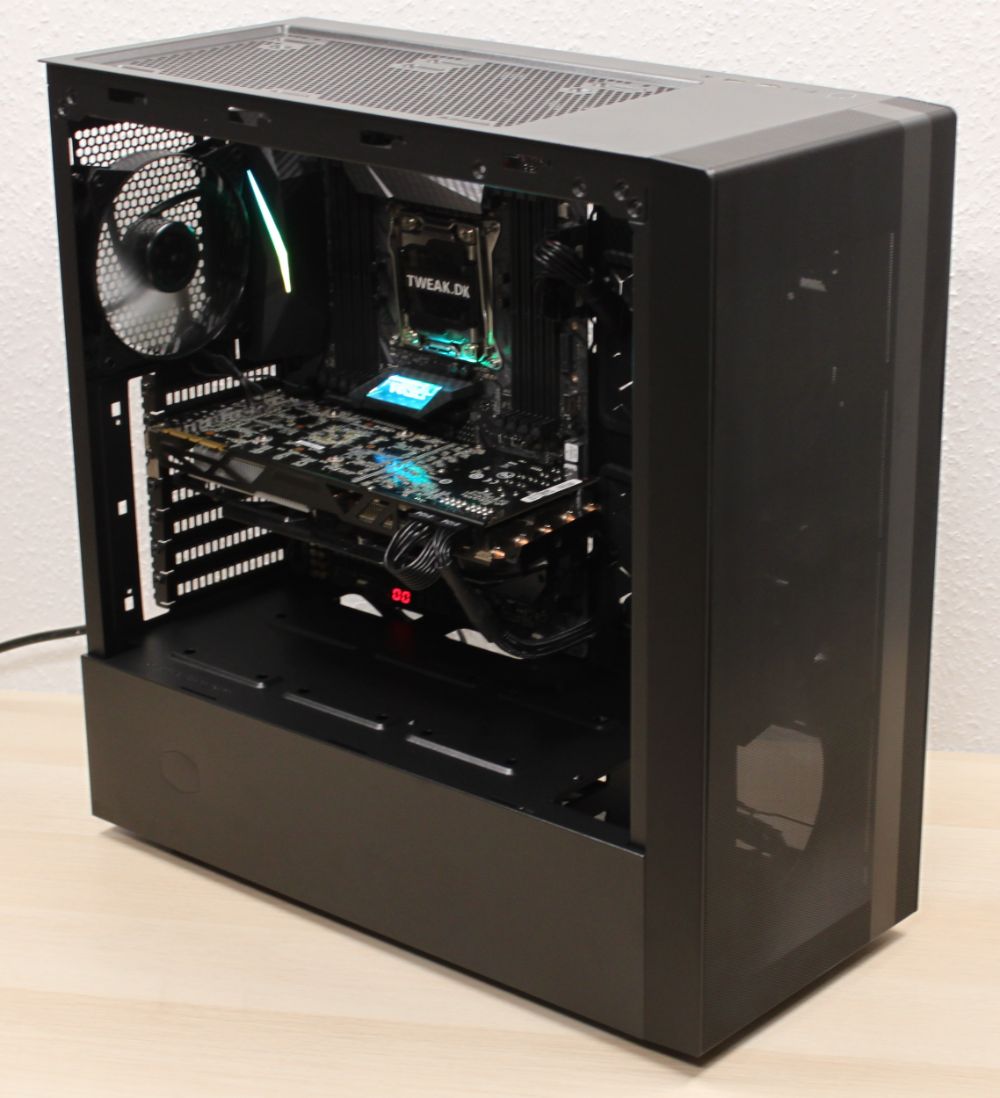
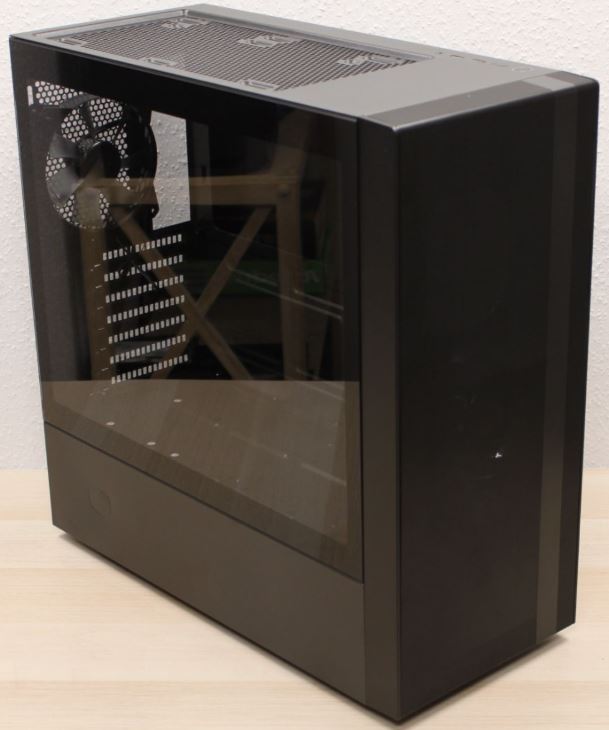
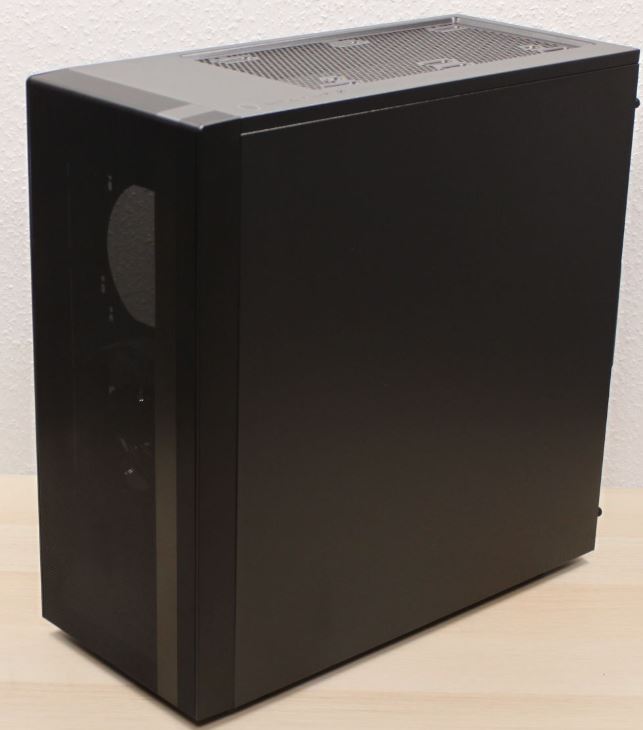
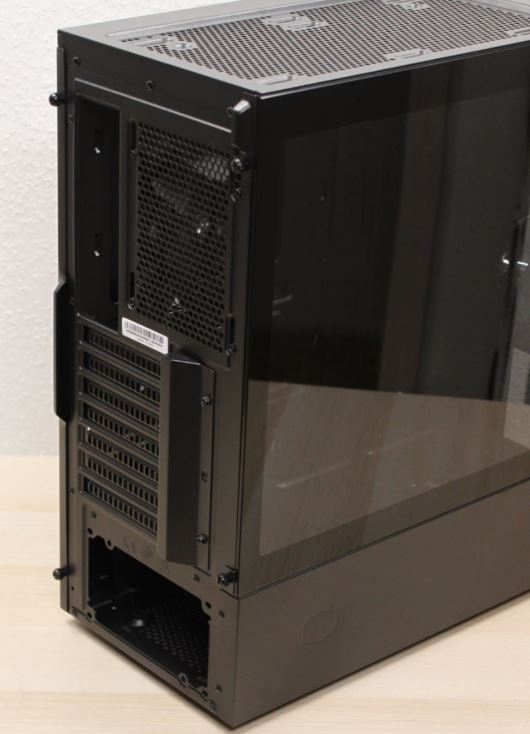
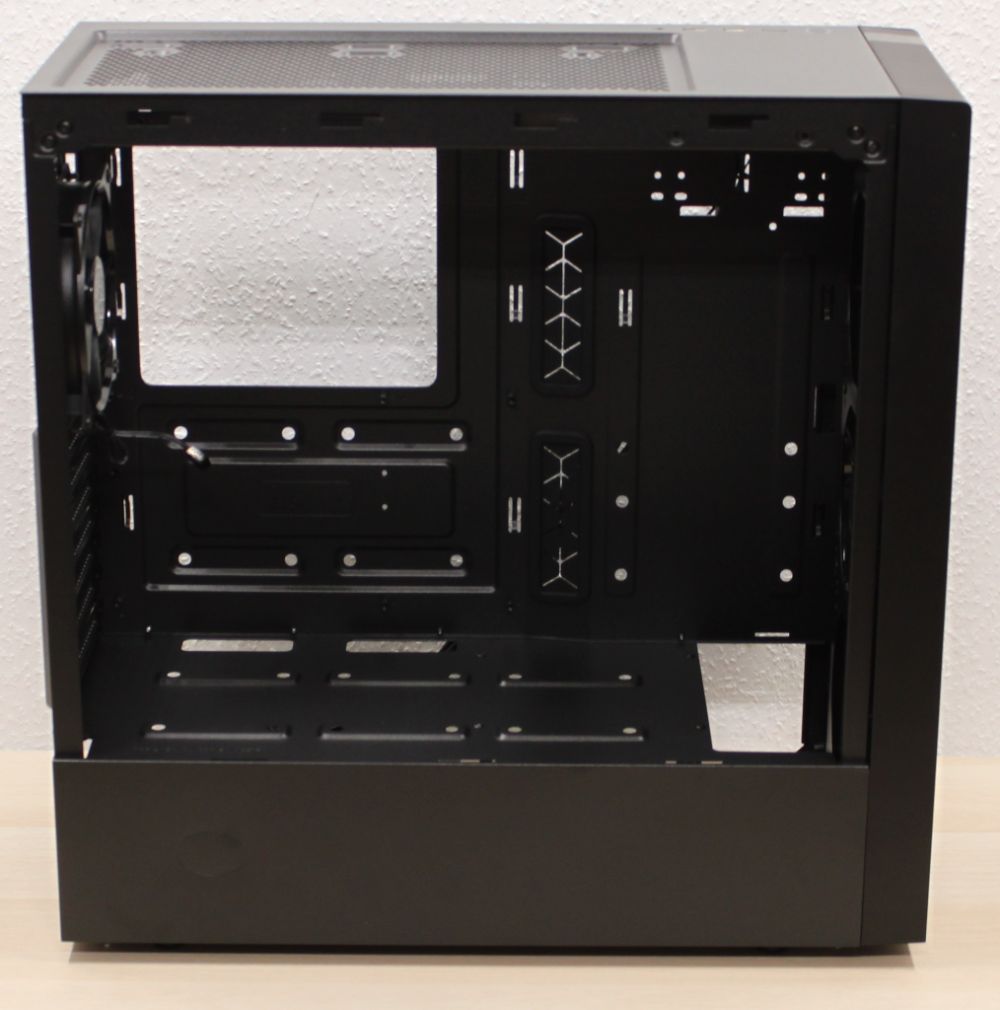
With the technical specifications and introduction out of the way, it’s time to unpack the MasterBox NR600 case and have closer inspection of it. As usual, we’ll start things off with a couple of overview shots, below, so we can get an impression of the overall design. The MasterBox NR600, with its’ black/gray colors, is a very subtle case to behold. It would no doubt fit into any room without grabbing all the attention. The left side features a large panel of tempered glass, and the right side is pure metal and does not have any additional detail.
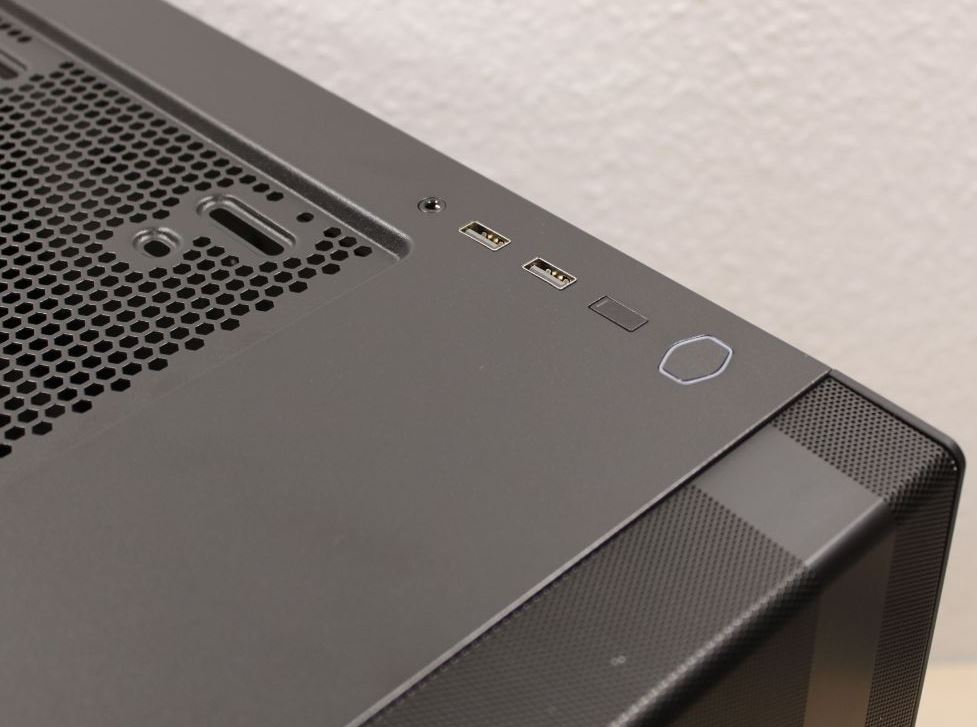
The front I/O panel is located at the top, on the right hand side. It’s quite sparse in terms of features, compared to other cases. We find a couple USB 3.0 ports, the reset and power buttons, as well as a single 3.5 mm jack. Cooler Master has here opted for a combo connector that handles both headset and microphone in a single connector. This is a trend that has finally made its way to newer cases on the market, and it’s nice to see Cooler Master add this to one of their budget cases.
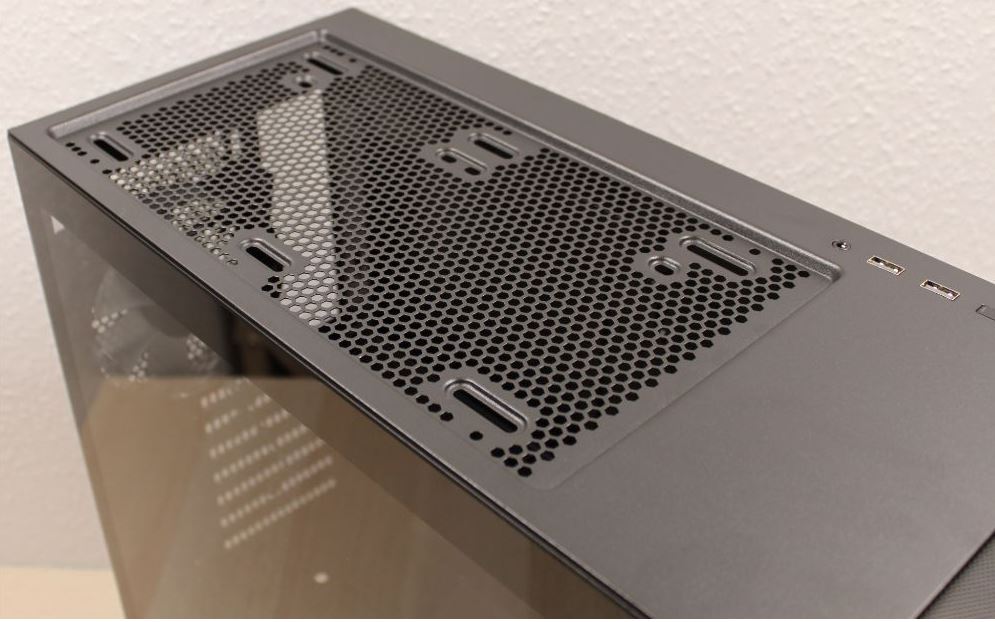
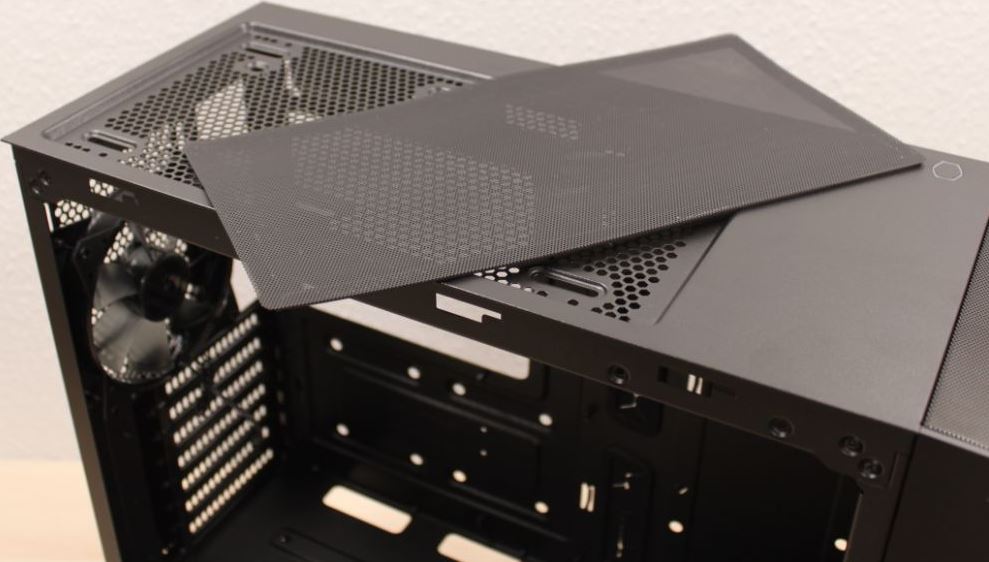
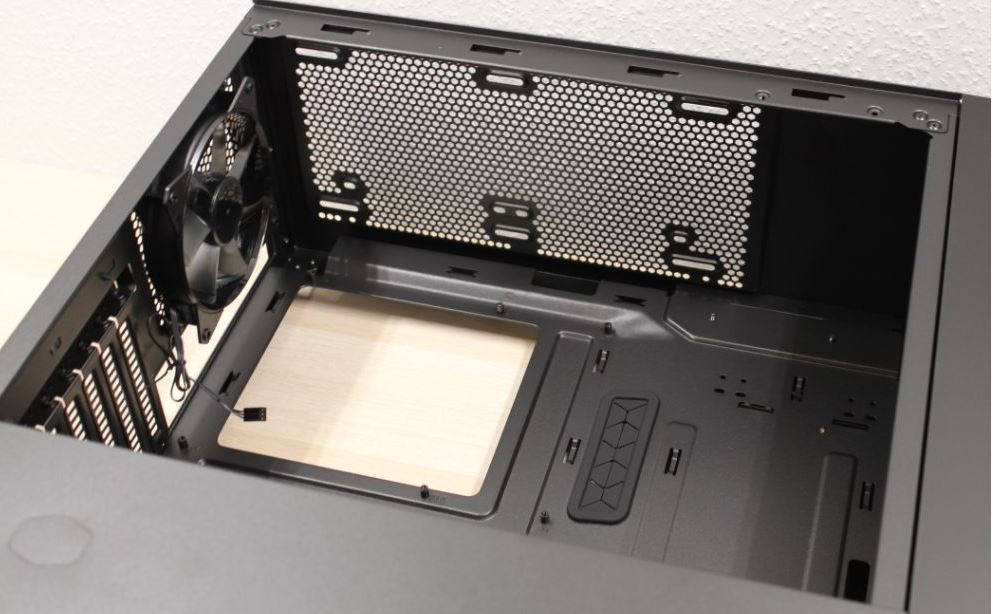
Whilst on the subject of the top section of the case, this is also where we find room for either two 120 mm or two 140 mm fans, or a radiator of up to 240 mm. I do wonder, however, how come there is no magnetic dust filter located here since this surely seems to be the norm these days.
The front panel can be removed by grabbing it by the bottom and applying a jolt. This reveals a 120 mm pre-installed fan. The front will support either three 120 mm or two 140 mm fans, in case one wants to go all in on air cooling. If you wish to install a radiator in the front, the MasterBox NR600 will support up to a 360 mm radiator. This more or less means that any AIO that is available on today’s market will fit right in. The fine grid on the front panel also serves as a sort of dust filter since nothing else is installed behind it, which would’ve been nice, though.
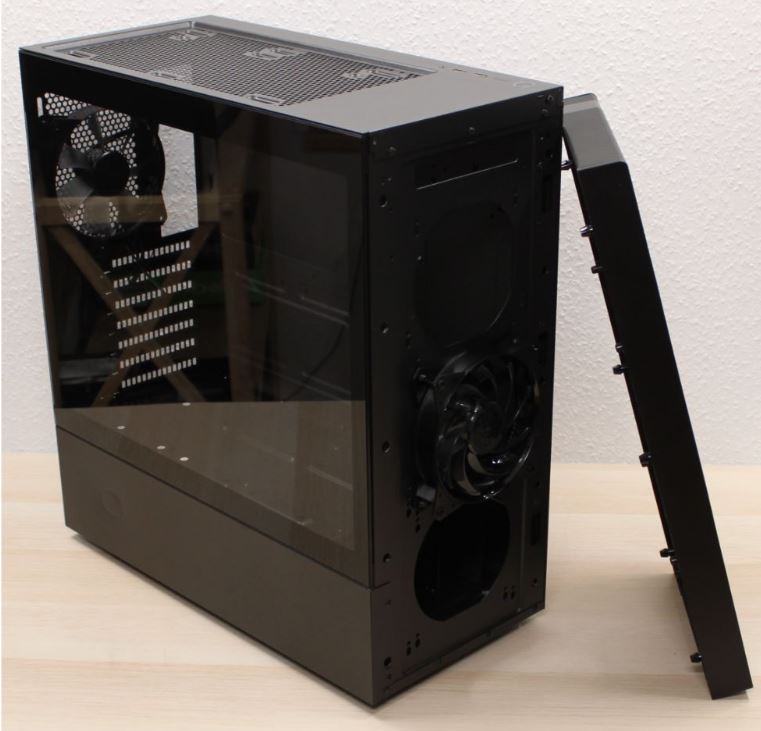
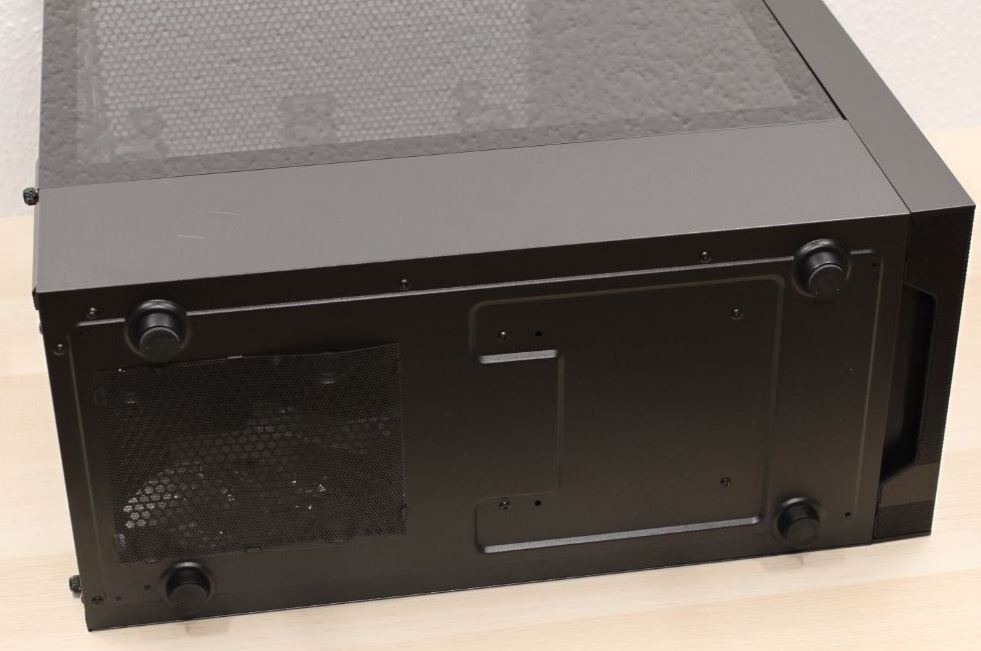
With the rear side facing the camera we can see the layout that Cooler Master has chosen for the MasterBox NR600, and it’s more or less your standard layout. This means that we find the power supply at the very bottom, followed by seven expansion slots above it, and finally the I/O cutout at the top along with yet another pre-installed 120 mm fan. While we are at it, we also see that the tempered glass side panel is fixed with normal thumbscrews, which is a clear bonus on a budget case such as the MasterBox NR600.
The bottom offers little to no highlights, and is probably the most boring part of the case that we’ve come across so far. We find four plastic feet with rubber attached in order to minimize vibrations. Also, we see one of those boring and stiff dust filters that is nearly impossible to re-attach once it has been removed in the first place. Whilst on the subject of dust filters, I did earlier mention my wonderment on this matter when looking at the top of the case. Once I had the side panels of the MasterBox NR600 removed, in order to continue my inspection of the interior, I found the included dust filter for the top. So, everything’s all good again. I can’t tell if Cooler Master intentionally placed the filter here in order to protect it during transit, or if our sample had been previously opened and it just ended up there. Nonetheless, it’s nice to see that it is included after all.
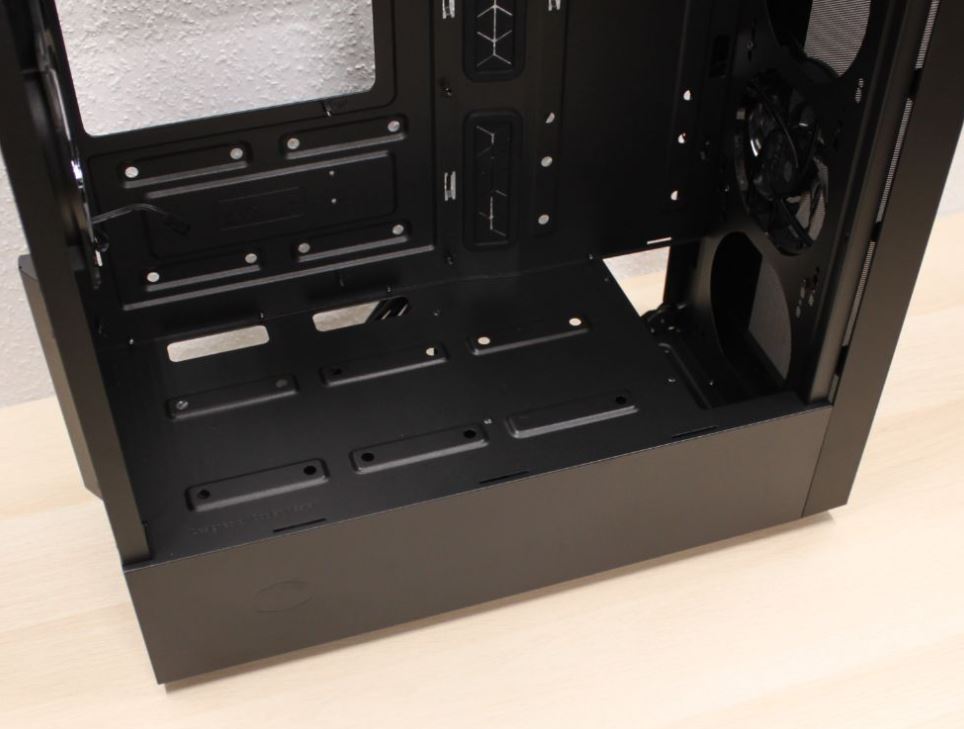
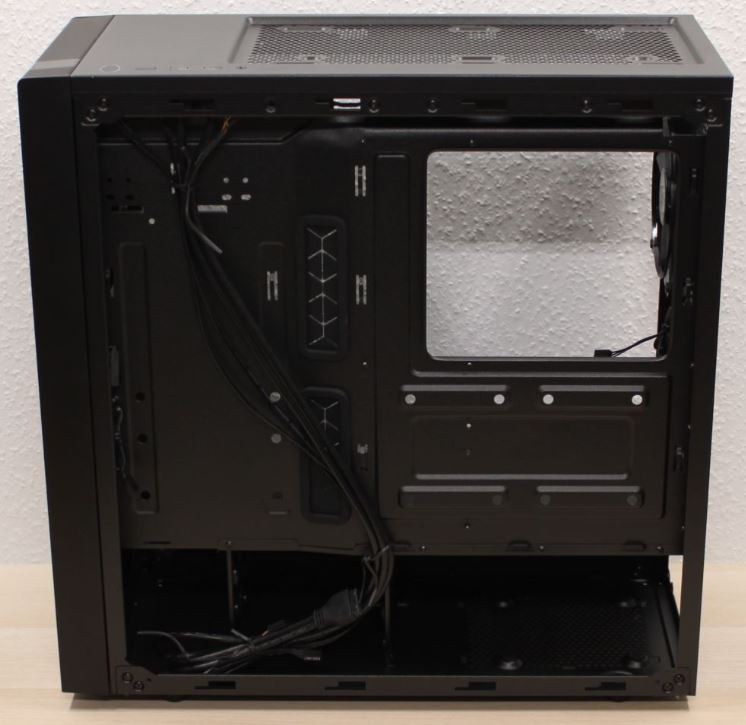
With the exterior covered, we can continue our inspection of the interior of the MasterBox NR600 case. I’ve put the side panels aside for now, in order to give us a better look inside. Below, we see an overview shot of the left side of the case, where the motherboard, graphics card etc. is supposed to be mounted. It’s great to see that we are dealing with an open layout, which means that we have free access, from the front, to all of the installed components.
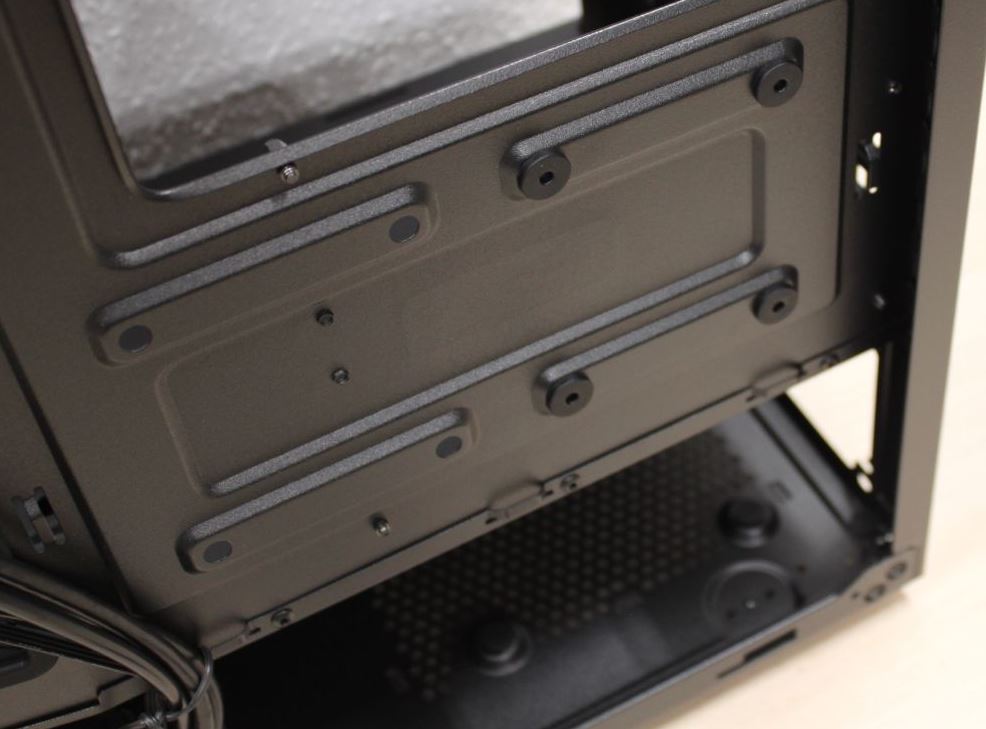
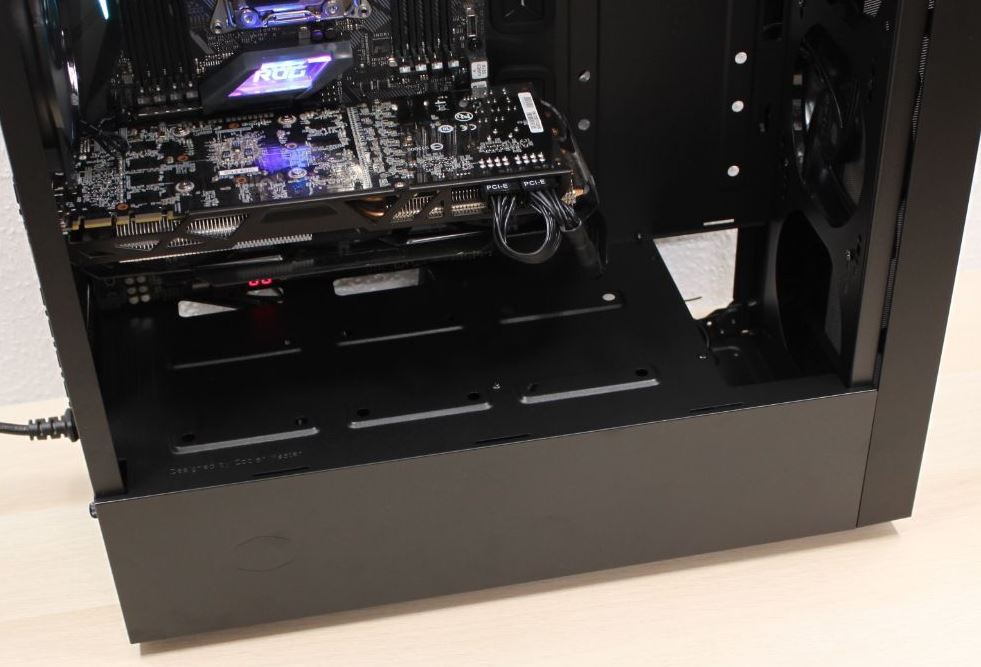
On the integrated PSU shroud, we find two cable routing holes, as well as a large cutout in the front, which will allow for a radiator to be mounted. Aside from these holes there are 12 additional holes, which all are for SSD mounting. Cooler Master has implemented a new and smart way of mounting 2.5” disks, which we’ve only see once or twice before. We’ll talk more about that later. This new approach means that there is room for no less than three 2.5” disks on the PSU shroud alone. Nice detail! Here, we also see the free passage from the front, and the option of installing a large radiator without any problems.
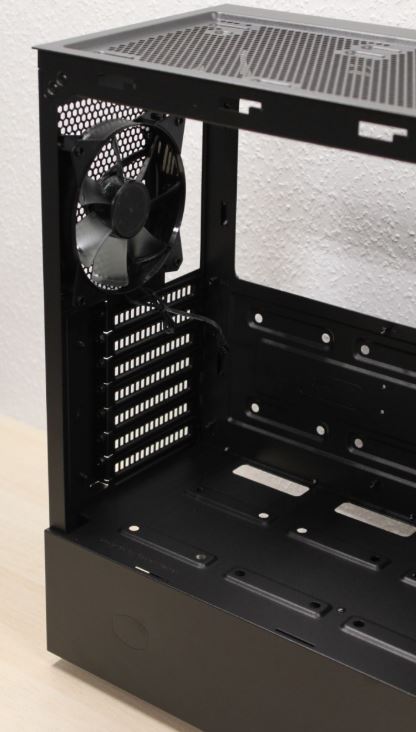
Even though we are dealing with a budget case, it’s nice to see that all seven expansion slot covers are screwed on and thereby can be re-attached, and even better they are also ventilated. Speaking of ventilation, you get a lot of that in the top as well, where a radiator of up to 240 mm can be installed. Cooler Master has moved the mounting holes towards the left in order to make more room and add compatibility to the long list of motherboards on the market.
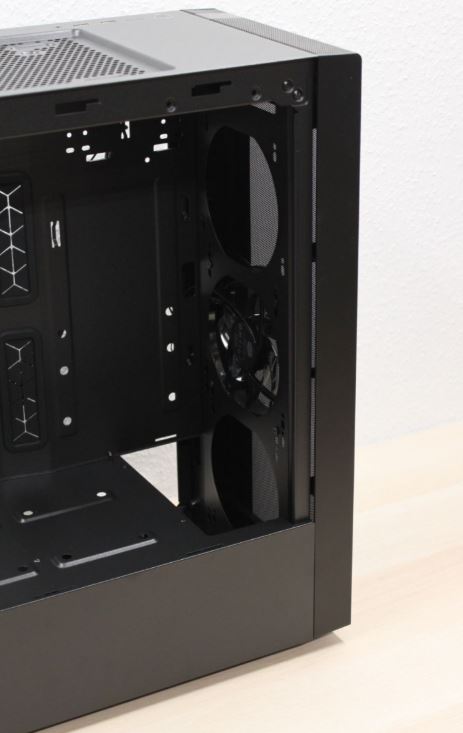
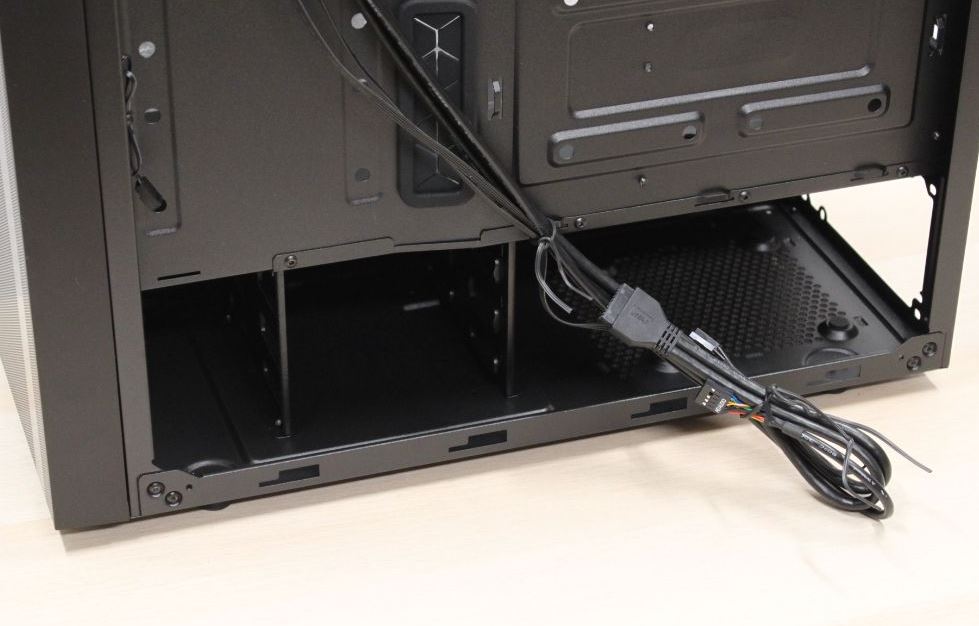
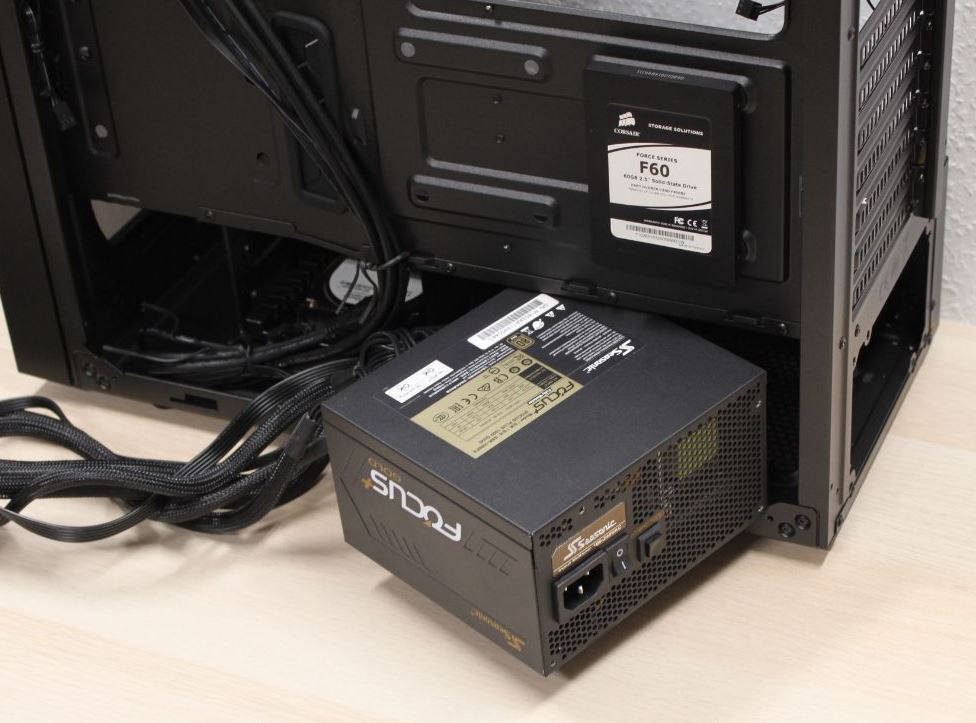
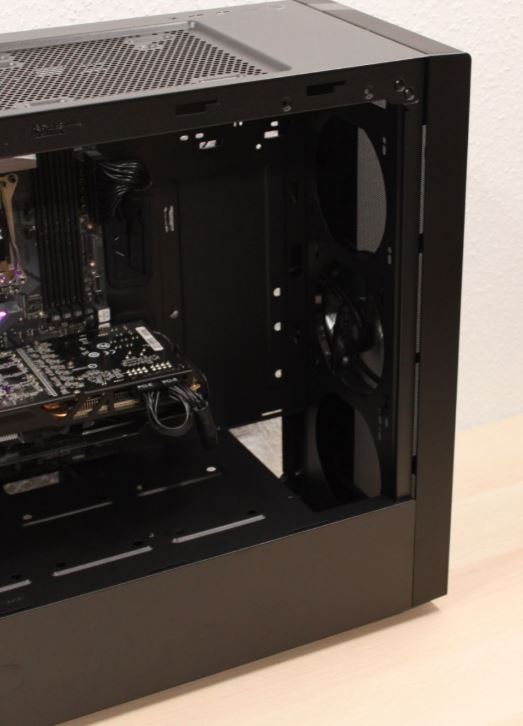
Let’s quickly have a look at the right side before we throw some hardware into the MasterBox NR600 and start building in it. On the first image below we see the huge CPU cooler cutout, which is something that we often forego mentioning since it’s become quite the standard of modern cases. There’s a bunch of holes for cable routing, and places where zip ties can be fixed, however, it would’ve been nice with a few more of these. Beneath the PSU shroud we find room for three 3.5” disks, whilst a fourth can be mounted on the motherboard tray, facing the front. Aside from the three 2.5” mounting points on the front of the shroud, yet another two can be installed on the back. Cooler Master has really made an effort to support as many disks as possible with the MasterBox NR600 case. They deserve a thumbs up for that.
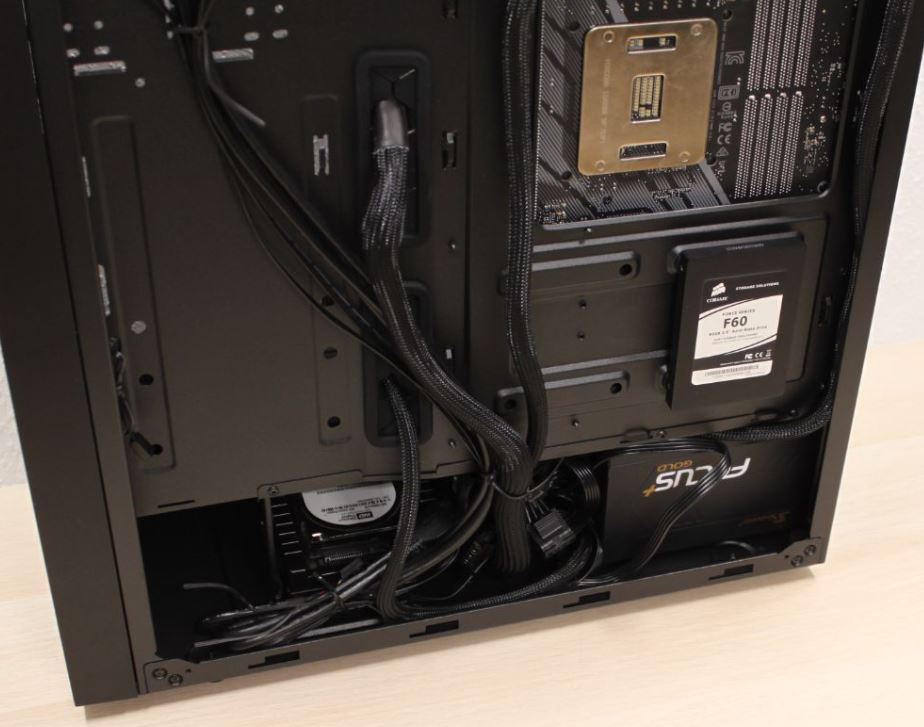
A view of right side for cable-management
Installation of Hardware
Where most cases feature a type of drawer that will hold the 3.5” disks, the MasterBox NR600 is a bit different. Here, you have to attach a set of rails onto the sides of the 3.5” disk, which will let it slide into place inside the case. This, in turn, also means that the three 3.5” spots in the basement are not compatible with 2.5” disks. However, with 5 dedicated spots this shouldn’t become a problem right away. The 2.5” disks are installed by screwing in four small pins, as shown below.
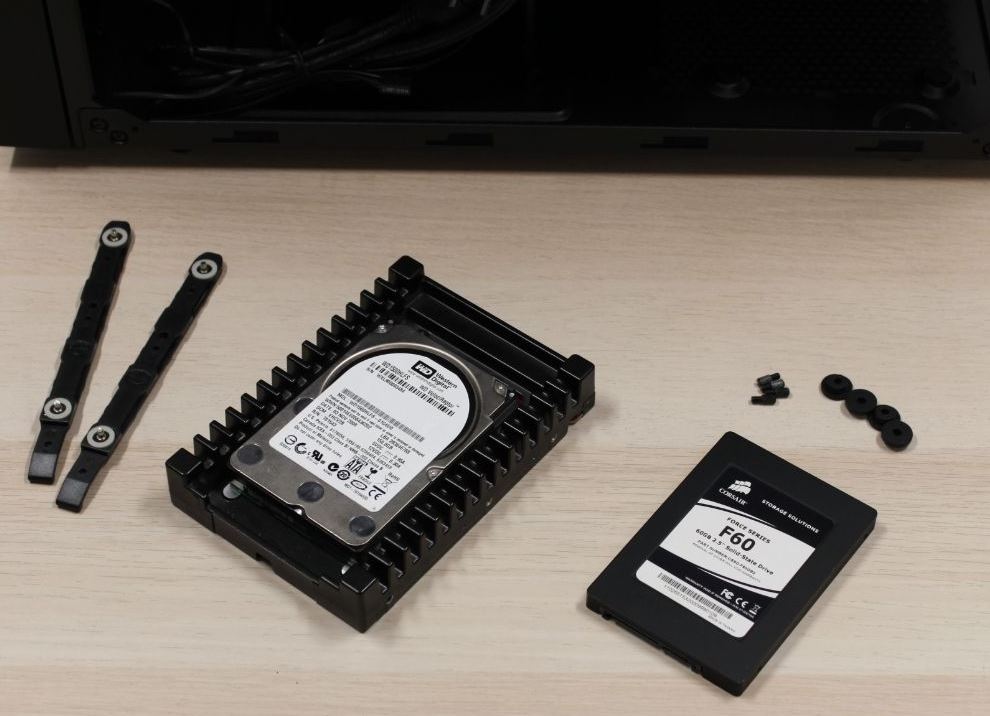
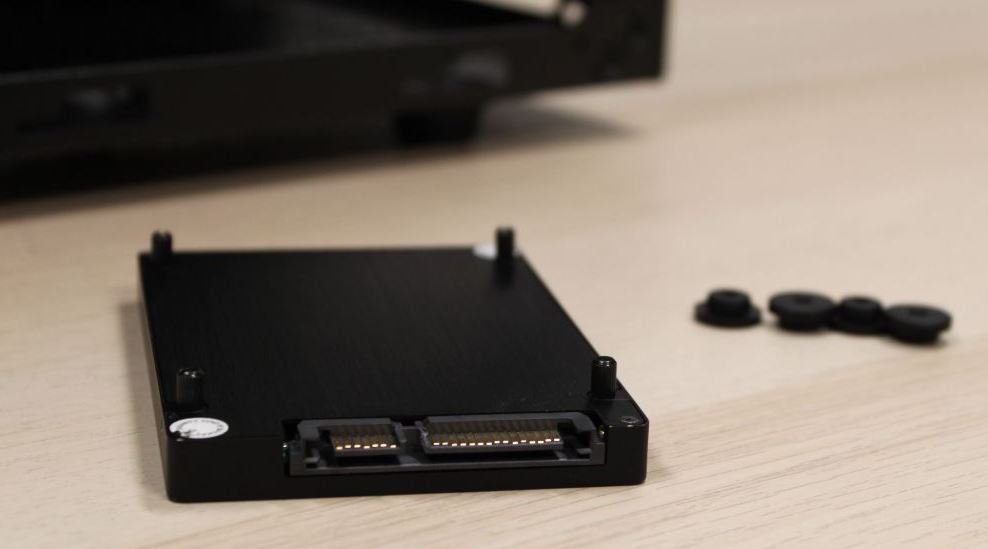
Once those have been screwed on, some small rubber stoppers are squeezed into some correlating holes in the case. The disk can then be installed by pressing the pins into the stoppers, and that’s it. It’s a super simple and solid solution (alliteration not intended) that Cooler Master has chosen for this and a long range of there other new cases. The power supply is also installed from the rear, and it’s certainly an advantage if you install all of the cables that you are going to use before fixing it to the case. Well, at least if you are, like us, using a modular power supply.
It was a breeze working inside the MasterBox Nr600 case. There was lots of room, both on the front and on the rear for cables and hardware. As can be seen below, our cable management was quite successful, and that’s even without the use of any zip ties. Cooler Master also mentions, on their website, that there’s about 20 to 28 mm room for cable routing on the back, which is enough to effortlessly achieve a quite fine result.

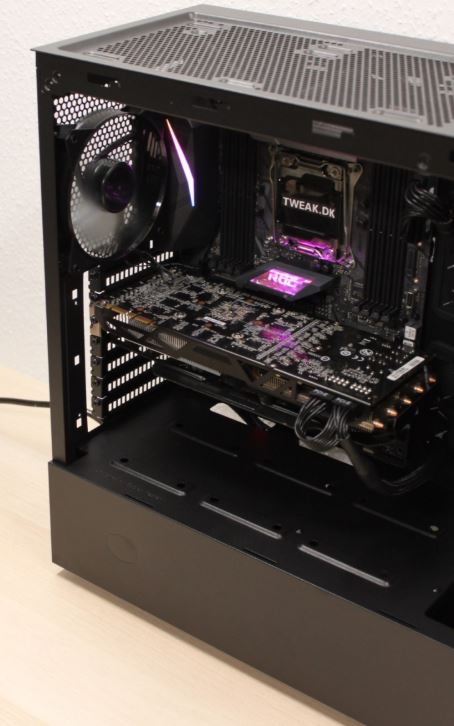
Let’s have a look at the other side again, and cast our gaze upon the finished build. As you might notice, there’s surprisingly much space left in the MasterBox NR600, even with a standard ATX motherboard and full-grown graphics card installed.
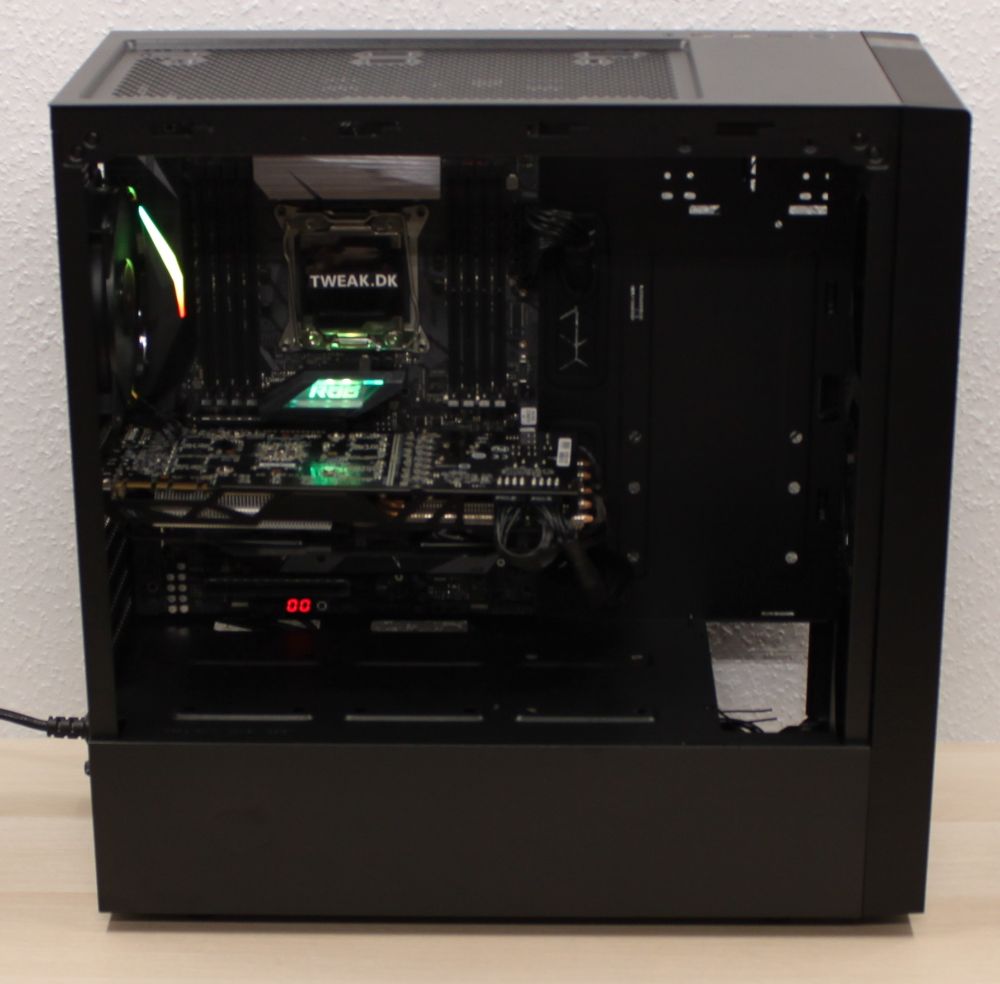
As long as you only plan on using a single graphics card (is there really any need for more these days?) you’ll end up with a reasonable amount of available space under it so that the SSDs that are mounted on top of the PSU shroud will be visible. The MasterBox NR600 supports every graphics card on the market since they can be up to 410 mm in length before colliding with the front, and 166 mm in height, which applies to the CPU cooler as well. However, if you install a radiator on the front, some of this potential space will be consumed by it and the fans, which will leave you with a little less room.
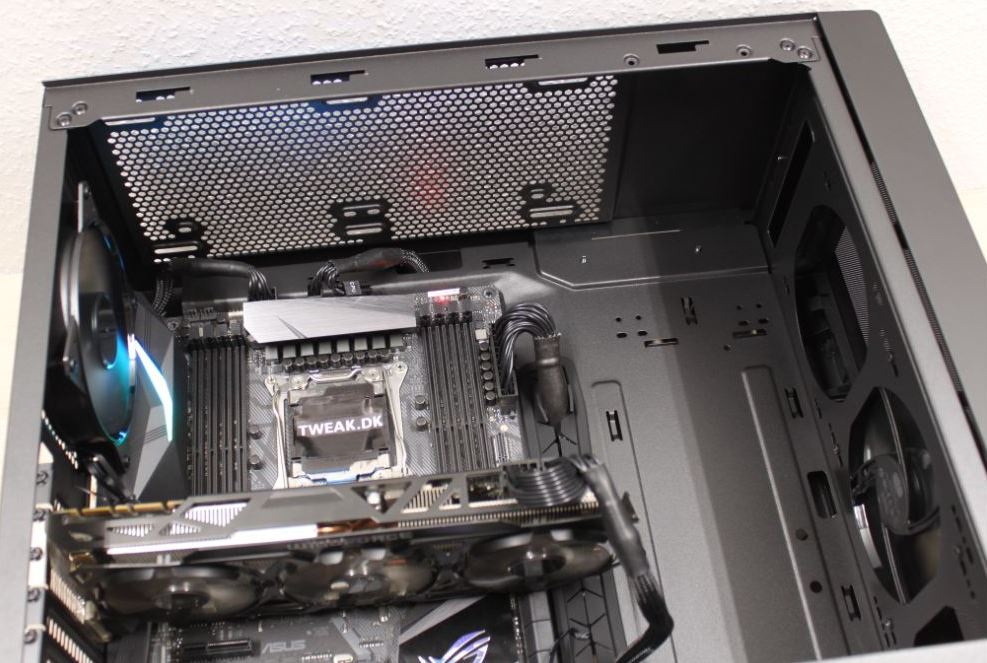
Even though Cooler Master doesn’t officially mention anything about radiator support on the rear of the MasterBox NR600, I’m pretty convinced that there is room for one. If you take a look at the image below, you’ll see that there is plenty of room above the pre-installed fan, which potentially, I guess, can sustain one end of the radiator. It’s not something Cooler Master has mentioned on their website, though. However, they do mention that there is room for either a 120 or 140 mm radiator on the top, which makes sense. The mounting holes are, as mentioned, moved towards the left, which allows for a radiator and fans to be installed without colliding with any cooling elements on the motherboard. However, you still need to pay attention, and especially so if you have RAM with a high profile. With that said, it’s time for me to gather up all of my thoughts and wrap up this review of the MasterBox NR600 case in my conclusion below.
Price
At the time of this writing, the Cooler Master MasterBox NR600 is priced at around $70. This is a quite reasonable price for a mid tower of this calibre. Not only do you get a tempered glass side panel and an open layout, but it’s also refreshing to see a front part of a case that isn’t completely closed off, but instead focuses on the best possible air flow.
If you want all of the details on the MasterBox NR600 case, you can visit their website by clicking the banner with their logo below.
Conclusion
It’s now time to wrap up our review of the MasterBox NR600 case from Cooler Master. It’s been a delight looking at this very budget friendly case, which actually managed to surprise us positively most of the time, even though, at times, it was clear to us that we were dealing with a budget class case. The cheap dust filter in the bottom and the lack of one on the front are some of the compromises you make when dealing with a case in this price segment. The same goes for the overall build quality that could’ve been slightly better. Thin metals and cheap plastics made an appearance on this case, but it has been seen way worse in other cases, and it’s still fair when considering the price.
With that said, there’s not really any other negative thing to say about the MasterBox NR600, which by all means is a well thought out case. The subtle design fits into any room, and the open front gives the fans plenty of breathing room to keep the components cool. The tempered glass side panel, with rear fixing, and the PSU shroud are also clear winners, and definitely add to the verdict. I was also thoroughly surprised by the number of hard drives that the MasterBox NR600 can house. With many new cases, the available disk space is often quite limited, since the M.2 standard is gaining popularity now that they’re available in reasonable storage sizes. With room for five 2.5” and four 3.5” disks, the MasterBox NR600 should fulfill any need in this regard.
The open layout also means that there is plenty of room for both cables, radiators and not least fans. All things considered, I have decided to give the Cooler Master MasterBox NR600 a final score 8.5 out of 10, as well as our Safe Buy Award. You get a solid case that has no glaring flaws or needs, but only a few small things that could’ve been improved. At this price, you can’t go wrong with the MasterBox NR600. You get a lot of value for your money.
Pros:
Subtle design with an open front
Tempered glass side panel
Good pricing
Lots of room for hard drives
Radiator and fan support is fine
Open layout that supports long graphics cards and more
Decent cable routing options
Comes with and without 5.25” slot in the front
Cons:
Cheap dust filter in the bottom
The price is reflected in the build quality
Score: 8.5 + Safe Buy Award