25 Sep
gadgets

Key Features
On paper, these are some impressive specs that Bambu Lab brings to the table with their first laser cutter. With a 55W CO2 laser, there are quite a wide range of material options, and Bambu Lab themselves highlight the possibility of clear materials such as clear acrylic and glass.
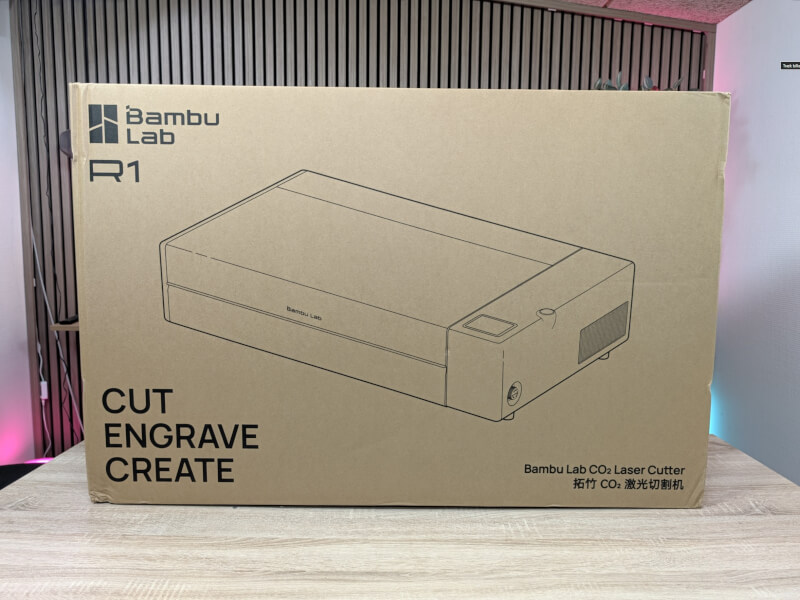
Although Bambu Lab tells us in their PR material that the R1 takes up a lot less space than other machines with the same working area, you still have to be prepared that the R1 is a big unit to get onto the table.
The R1 machine itself, without cardboard and packaging, weighs just over 33 kg and is so large that it is practically impossible to carry by yourself. So you need to have a helper ready when you need to put things in place.
The test package that Bambu Lab has sent us comes with a few different accessories in the form of their Riser Base, Conveyor Attachment and Bambu Labs Smoke Purifier. The last accessory is actually made for their H2D series of printers, which also have the option of laser cutting. In connection with the launch of the Bambu Lab R1, Bambu Lab also has their new E1 Pro air purifier on the way, which is made specifically to fit together with the R1.
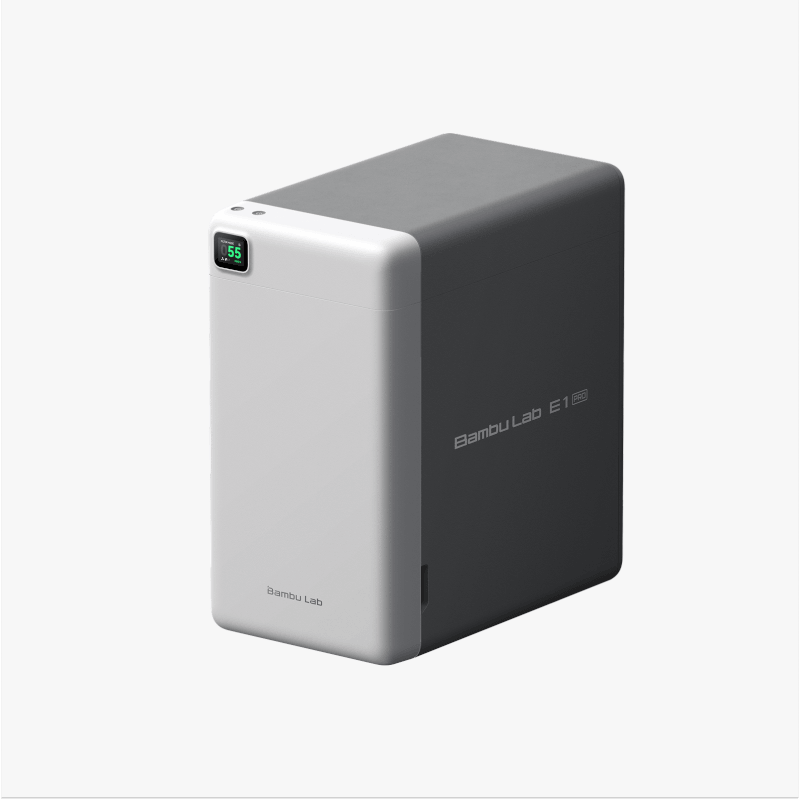
However, those devices were not ready yet prior to the test, so they are not included in the test here in the same way as the Rotary Tool accessory.
If we start with the R1 unit itself, it comes in typical Bambu Lab style, super well packaged. It's secured well with foam and sturdy cardboard. As soon as you open the box, there's a QR code that you can scan for instructions on unpacking and assembling. However, there's also a detailed manual in the box if you prefer the analog approach to things.
Simply follow the instructions to get the R1 unpacked and ready for use. There are a few physical steps you need to go through before you are ready to start the machine. First, all the packaging material must be removed, along with a bracket that holds the laser head itself in place during transport.
A stable table with plenty of space is required to stand the Bambu Lab R1. The machine takes up a total of 94x56x20 cm on the table and requires an additional 20 cm of free space at the back and 10 cm on each side, so that the machine has enough space to get rid of the heat generated during use, as well as space for the extraction hose.
The outer shell of the Bambu Lab R1 is made of strong white plastic with the large UV-protective lid on top. It opens via a handle on the front and is super stable with two gas springs that keep it firmly in place when opened, without the slightest risk of it closing by mistake.
Hidden inside the lid, Bambu Lab has placed a camera that, when the lid is open, acts as an overhead camera to map the work area, so the system knows where materials etc. are located. It is a smart detail to have it placed there and allow it to move into position by opening the lid. It gives a super nice overview of the work area.
In a window behind the lid, Bambu Lab has created a pretty cool detail where you can see the large laser tube in a lit chamber. It's probably completely unnecessary, but it looks super cool.
On the right side at the top you get a small touch display that you can use to control some of the machine's functions. This is where you can check the status of the machine, perform calibrations, etc. However, most of the work is done through the Bambu Suite software on your PC, which I will get to later.
Above the small touch display is a large illuminated function button, which is used to start the tasks you prepare and send from your PC. You can only start tasks while you are physically standing at the machine.
On the right side of the machine there is a large emergency stop button which can be used to quickly shut down the machine if problems arise. With laser cutting and engraving there is always a risk that the materials you are working with may catch fire.
Bambu Lab R1 has an automatic system built in that can detect if the materials catch fire and automatically shut down the machine.
Looking at the left side of the machine, there is the option of connecting various accessories as well as a direct USB connection if you prefer. Bambu Lab also offers an automatic fire extinguishing system that can be connected here, and this is also where you connect other accessories such as their Rotary Tool. Finally, there is also a small USB security key here, which must be in place before you can operate the machine. It can be used as extra security if, for example, you have the machine standing in a place where children or other curious fingers could poke around a little too much. Then simply remove the security key when you are not using the machine.
There is not much on the back of the machine other than the mounting for the extraction, the power connection, the power button and a filling opening for water. The extraction unit is mounted on the back and is a separate unit that can be removed.
This is probably intended so that the unit can be easily replaced, but also to facilitate possible connection to central extraction in a workshop.
Inside the machine is a box of accessories for the R1, which includes various parts for calibrating the machine, extraction accessories for mounting on the back of the machine, and a bottle of antifreeze.
To keep the laser in R1 cool during use, the machine is water-cooled. Before you can start the machine, you must fill it with demineralized water via a filling opening on the back of the machine. If the machine is going to be in a place where there is a risk of frost, such as a garage or unheated workshop, you need to add antifreeze to avoid damage to the machine. There is a guide for the dosage depending on how cold it can get where the machine will be.
You must fill with water before starting the machine for the first time, and after about 30 seconds you must top up to ensure that the system is full.
Then, on the small touch display on top of the machine, there is a guide you can follow, which takes you through the final steps before starting.
This includes calibrating the machine, where you go through things like vibration compensation, tracking calibration, etc. These are all things that the machine does completely automatically, but which take about 30-40 minutes the first time.
If we look at the internal hardware, the central thing is of course the large laser head. It comes with a built-in air assist unit, so it's all in one unit, and it's not something you have to assemble yourself.
The large Tool Head is also equipped with a camera and a distance meter, which work together with the other sensors and the overhead camera in the lid when preparing your projects, and the system must register where the materials are placed in the machine.
The camera here can also be used to precisely scan an object and create a cutting line around, for example, a sticker or something else on the surface.
On the side there is also a magnetic connection for the small unit for automatic laser calibration. Here Bambu Lab has made another small stroke of genius by making this process completely automatic. The biggest technical challenge with traditional CO₂ laser cutters has historically been the manual adjustment of the mirrors that guide the laser beam from the tube to the cutting head.
If the mirrors move even fractions of a millimeter, the laser loses precision and cutting power. The process has previously required the user to manually set up heat-sensitive paper, fire test shots, read the burn mark, and adjust the mirror screws by hand – a task that could take over an hour for beginners.
Bambu Lab solves this with the Auto Laser Alignment feature. By mounting a Laser Alignment Sensor (a plate with crosshairs) on the cutting head, the machine automatically detects where the beam hits using motorized actuators on the mirrors and automatically corrects the light path. The entire calibration is completed without paper or manual adjustment screws in about one minute.
Internally in the machine there are also a host of other sensors used to detect things like fire, whether the lid is open, and whether the tray at the bottom is in place.
Extraction is via the unit on the back of the machine, which is equipped with a powerful vortex fan and not a more traditional PC-like fan, as is often seen on other machines. At the same time, air is also actively drawn into the R1, so there is a cross flow over the item you are working on. This, combined with the built-in Air Assist unit, aims to help provide optimal conditions during work.
The Riser Base accessory is not included as standard, but must be purchased separately. It allows you to work with taller workpieces in the machine. Where the standard limit is 58mm, the Riser Base accessory allows you to work up to 248mm.
At the same time, the Riser Base accessory is also necessary to be able to use accessories such as the Conveyor and Rotary Attachment accessories, as the extra height is needed here.
The Riser Base accessory is a completely separate unit that requires a bit of assembly before it's ready. There are four parts that need to be screwed together before you're ready. However, the process is very well described in the included manual, and all the parts are clearly marked so there's no doubt about what needs to be placed where.
There are a few internal cables that need to be installed into the unit, and once it's ready, there's also a cable that needs to be connected to R1. The Riser Base unit comes with separate sensors, and they obviously need to be connected to the rest of the machine to function.
The R1 simply sits on top of the Riser Base. The large, sturdy feet on the R1 fit right into the Riser Base accessory, and when the two units are assembled, the whole thing feels solid.
The software in the R1 automatically detects when you have connected a Riser Base, and all images etc. in the software are updated to include the Riser Base accessory. A nice little detail.
The Conveyor accessory is quite simple on the surface, as it, together with the Riser Base, allows us to run longer workpieces through the R1. With the Conveyor accessory, the total working area increases from 600x300mm all the way up to 600x3000mm, so three meter long workpieces. It gives quite a few extra possibilities and it is quite nice to see that Bambu Lab has already thought about that part in connection with the launch.
Adding the Conveyor accessory, like the Riser Base accessory, requires a fair amount of assembly before it's ready to use. Both parts are included with our test unit, but due to time constraints, I didn't have time to include them in the test in the first place.
There will be a more thorough look at the accessories and perhaps also a slightly deeper review of all the many functions and options that the Bambu Lab R1 provides.
However, one very important detail regarding the safety of the R1 and not least the accessories is worth mentioning. If you use the R1 as a Stand Alone unit, i.e. without the Riser Base and Conveyor, the R1 machine is a Class 1 laser device.
Class 1 means that the laser is completely enclosed in the machine and the risk of eye damage is minimal. The device is considered safe to use under normal circumstances and as instructed. Other Class 1 laser products include a CD player or a laser printer.
However, when using the Riser Base accessory, the R1 changes to a Class 4 product.
Class 4 is a more serious category, where Bambu Lab itself writes that it is intended for professional use by trained personnel. This is because the machine is now not enclosed in the same way as before, and that there is a greater risk that the laser light can find its way out. A 55W CO2 laser can cause serious damage to the eyes in particular, but also skin, etc.
I would always recommend that you take safety seriously with machines of this type. Bambu Lab does not ship safety glasses with the unit and does not sell any themselves. However, if you plan on doing a lot of work with a laser cutter like the R1, I would recommend getting a set of safety glasses that are specifically designed for the wavelength of the CO2 laser.
Although the R1 is Bambu Lab's first dedicated laser cutter, it's not their first foray into laser cutting. With the H-series of printers, there's the option to add a laser module, so Bambu Lab has warmed up a bit.
This also means that they have already been working on the software part of it through their Bambu Suite software, which is used to prepare tasks for R1. It is completely separate software from Bambu Studio, which is used for the 3D printers.
It is also the only software supported by R1, so if you have previously used, for example, LightBurn, you cannot do this.
Bambu Suite is quite straightforward, and the same level of initial ease of use that we are used to from Bambu Lab is also included in Bambu Suite.
Once you have connected R1 to your Bambu profile, it will automatically appear in the software when you log in.
From here you are presented with a workspace where you can prepare your tasks. This gives you a very practical clear record of the available workspace in the printer.
You can create your own graphic elements directly in the program, where you can add shapes, text and a selection of different clipart-like graphic elements.
However, it only really starts to make a difference when you bring in files from outside, where they are compiled in more powerful graphic programs with more options than those available in Bambu Suite.
If you are not graphically inclined with the skills to create everything from scratch yourself, fortunately there is a wide selection of options online.
Part of it is via Bambu Lab's own MakerWorld website, where in addition to 3D printing projects, they now also have projects for laser cutting and engraving.
Websites like Etsy also have a very large selection of files and projects that are ready to import into Bambu Suite. Unfortunately, both Bambus MakerWorld and Etsy are also flooded with AI content, which can be good enough for certain things, but is also often quickly produced stuff that is not always optimal for what it is intended for. The advantage of MakerWorld, however, is that it is all free.
If you've never tried laser cutting before or used software like Bambu Suite, you can't help but notice that there's a bit of a learning curve. There are a number of possible variables in terms of materials, laser output power, and speeds.
However, Bambu Lab has made it quite easy to get started with a wide library of profiles for different tasks and materials. From here, it is possible to add profiles yourself from scratch or based on existing ones. It is also possible to freely modify the profiles in Bambu Suite so that the results match what you prefer.
You also get good help with the layout part of the setup in Bambu Suite, where you can constantly see the size of the individual elements, and you get help with adjusting things so that they are in line, etc.
Of course, there's no way I'm going to go into all the details of the software in a review like this. That would be too extensive, but I will say that overall Bambu Suite is a really nice piece of software with a low threshold to start with, but with more advanced options as you dig deeper.
At the same time, Bambu Lab also has a very extensive Wiki section on their website, where you can find a wealth of useful information that can help you further.
It is also possible to use the Bambu Handy app on your phone, but it is limited to monitoring the machine. Unlike on Bambu Labs 3D printers, you cannot find and start tasks from your phone without being at the machine.
Since the delivery of the Bambu Lab R1 machine and the selection of accessories took longer than expected, I have not had more than a little over a week with the machine prior to this review. This means that I have not been completely in-depth with all the functions. As I mentioned earlier, for example, I have not had time to look particularly closely at the Riser Base and Conveyor accessories. I have assembled and connected the Riser Base part, but have not exploited its possibilities. These things will be covered in a later article/test on this site.
However, I have used the R1 together with the Bambu Labs Smoke Purifier, which then sends the air out a window. At no point in my test did I experience that the room smelled of smoke or anything else. If you look down into the machine while it is working, it is also very clear that the extraction is super efficient. Smoke is sucked away super quickly, and when a task is finished, there is a 40 second timer to get all the smoke out of the machine before it signals that it is completely finished.
I have been a bit limited in the selection and amount of materials I have had to test with, and have primarily tested with acrylic and wood. However, since these are also the most common materials to work with on a CO2 laser, I think it is a really good starting point, and in any case the process for preparing and working with other materials is the same. It is just the settings and profiles that are different depending on the material.
The first time you boot up the R1 and the Bambu Suite software, you will be required to watch a safety video that goes over the general safety recommendations for using the machine. It is a useful little video that can also be found on the Bambu Labs website along with a lot of other learning and support material.
You are then offered the opportunity to do a small test project where you can make a ruler. If you accept the offer, you will be given a step-by-step walkthrough of the basic functions of the Bambu Suite software. It is a nice little introduction, and afterwards you have a good idea of where the basic but important things can be found in the software, and you are left with a small ruler as a diploma.
I have previously tested laser cutting in our test of the xTool M1 machine, so I was not starting from scratch in terms of concepts and procedures. In many ways, the Bambu Suite software is quite similar to the software for the xTool machines, in the same way that slicer programs for 3D printing are also built on the same template.
It's really easy to import files into Bambu Suite and set up tasks. Throughout my testing, I basically worked with the standard profiles that were already available in Bambu Suite.
A few times I have either changed an existing profile slightly, for example because I wanted slightly darker results in an engraving, or made a new one based on an existing profile because I needed to cut thicker material.
When you have your files ready and are ready to move on to the material, Bambu Suite asks you to open the lid, place the material, and then it takes a picture with the overhead camera located in the lid. It adjusts the exact position via calibration marks on the sides of the machine, and then you get a picture of the entire work area and the material you have placed.
If you use Bambu Lab's own materials, most are equipped with a QR code that the machine reads. This way, the system knows which material you are using and you can use the recommended settings for that particular material.
During this process, the R1 also measures the distance to the material, automatically adjusting the focus distance for optimal results. You can even set the machine to scan curved objects, allowing the machine to engrave on objects with variable focus throughout the job.
The whole process is quickly over, and then you can adjust the position of the elements, and then you are ready to start the task. Of course, this requires that you close the lid and then press the start button. You must be physically at the machine and start the task, and Bambu Lab also recommends that you monitor the tasks at all times, as there is always a risk that things could catch fire.
For even more accuracy, you can use the camera in the R1 machine's tool head to scan an area, achieving even more accuracy if needed.
I have had no problems cutting standard 3mm thick birch veneer or acrylic with the standard profiles. I have tried up to 5mm birch veneer, which also cut fine.
In addition to wood and acrylic, I have also tested engraving on slate, which also ran without problems with the standard profile in Bambu Studio.
It took less than four minutes to make this DnD coaster. However, the graphic file had a bit too thick lines to be optimal at this size.
Engraving and cutting clear acrylic is one of the advantages of a CO2 laser, and as seen here, it went without any problems, even though it creates a lot of dust.
I have also done a few projects with colored acrylic, and here it was also easy and with good results, as seen with this D&D logo, which required two cuts of a black base and the colored logo.
I did experience a bit of a challenge with some of the projects, however, which could potentially cause problems, but did not during my testing. The challenge comes from the pegs used to hold the material in place. There are a total of 11 pegs included, which can be moved based on the material you are using. However, 11 pegs are not enough to cover the entire work area, and even if they were, there are relatively large gaps between them. This means that smaller pieces just fall through and away when they are cut out, which is very nice. However, occasionally they do not fall completely down, but only tilt partially down, as can be seen in the picture here.
This means that there is a small part sticking up like this. This could potentially lead to a collision with the laser as it moves back and forth during work, which could lead to the workpiece shifting and the project failing, or in the worst case scenario, damage to the laser or machine.
Here I would have really liked to have seen Bambu Lab give us a Honeycomb bed instead. It supports the material better and means that you can avoid these kinds of challenges altogether, and it also typically makes it easier to attach the material to the bottom so that it doesn't move.
For example, I also had to abandon a task where I was testing several small wooden pieces that I wanted to engrave a logo on. I simply couldn't attach them in a way that wouldn't push them out of position when I started the task.
Fortunately, this is a challenge that Bambu Lab probably expected, and they have stated that a Honeycomb grid should be on the way.
One detail that I was really happy about during the test is the precision that the R1 delivers. It is of course very important that the machine itself is precise in its tasks. Bambu Lab itself states a variation of less than 0.02mm, which I think, based on my tests, is very accurate.
Another very practical part of the precision is the options you get when the R1 takes a picture of the material, and you then have to place graphics or cutting lines. I have previously experienced on other machines that you had to adjust a lot to compensate for an inaccurate camera. However, with the R1 I experienced that things were actually made with less than 1 mm deviation when I just placed things via the preview image. It makes working with the R1 and tasks on it SO much easier.
As mentioned, the accuracy can be improved even further by using the tool head camera to scan an area. I also tried this to test the system's ability to automatically create a cutting line around elements. In my case, it was a sticker on a piece of wood. Here, the software scanned the area well and then created a cutting line around the sticker. I just had to adjust a few small details that had been included by mistake, but it only took a few seconds.
Then R1 cut around the sticker with millimetre precision, with a super good result.
Overall, it has been a nice and user-friendly experience working with Bambu Lab R1, and apart from the minor details that caused a little frustration, I haven't run into any major challenges.
It would have been nice if Bambu Lab had their Honeycomb bed ready for launch, but it's nice to know it's on its way. It's the only thing I really missed during my testing.
Bambu Lab has the R1 listed on their own website with at a price of
$2,499.00 USD. You can also buy a bundle, where accessories in the form of a Riser Base and Conveyor Feeder are included, as in the package I have tested. Here the total price ends at $3,289.00 USD.
That's definitely a lot of money, but if you look at comparable products like the P2S from xTool, which has a directly comparable spec sheet, Bambu Lab beats them solidly on price.
Bambu Lab has made a very solid entry into the market for dedicated laser cutters with their R1. It is a complete and well-built machine that comes with a good selection of accessories right from the start.
There is no doubt that Bambu Lab has looked in the direction of xTool and used their P2S machine as a reference. Specifications and accessories are completely in line with what xTool offers, so on that front they have nothing that Bambu Lab can't match from the start.
On top of that, there are the benefits of being part of the Bambu Lab ecosystem in terms of support, software, and spare parts. On that front, Bambu Lab has already published a long list of spare parts, which suggests that they believe in the project and are aiming for future support.
On top of that, there are some really cool features like automatic laser calibration, which Bambu Lab is currently the only one to offer. At the same time, they also have a solid background in motor control and tracking from their 3D printers, which they have brought over to the R1. This results in a machine that feels complete, solid and super fast.
It's not quite plug and play, but it comes pretty close. There ARE several variables to be aware of, and there will be a learning curve if you're coming into it as a complete beginner. However, Bambu Lab has brought the ease of use that they've become so known for in their 3D printers to the R1, meaning it's easier than ever to get into powerful and versatile laser cutting as a hobbyist.
The price is still on the high end, but if you are in the market for a CO2 laser with a large working area and a versatile selection of accessories, it is currently hard to beat the Bambu Lab R1, which enters the market with solid specifications, good accessories and a price that beats the competition.
We land with a final grade of 9 and a Great Products Award for a new player in the market who comes in with lots to offer and at a super competitive price.
Advantages:
Disadvantages: